Maytag MEW9530AB Installation Guide - Page 13
Prepare Built-In Oven
 |
View all Maytag MEW9530AB manuals
Add to My Manuals
Save this manual to your list of manuals |
Page 13 highlights
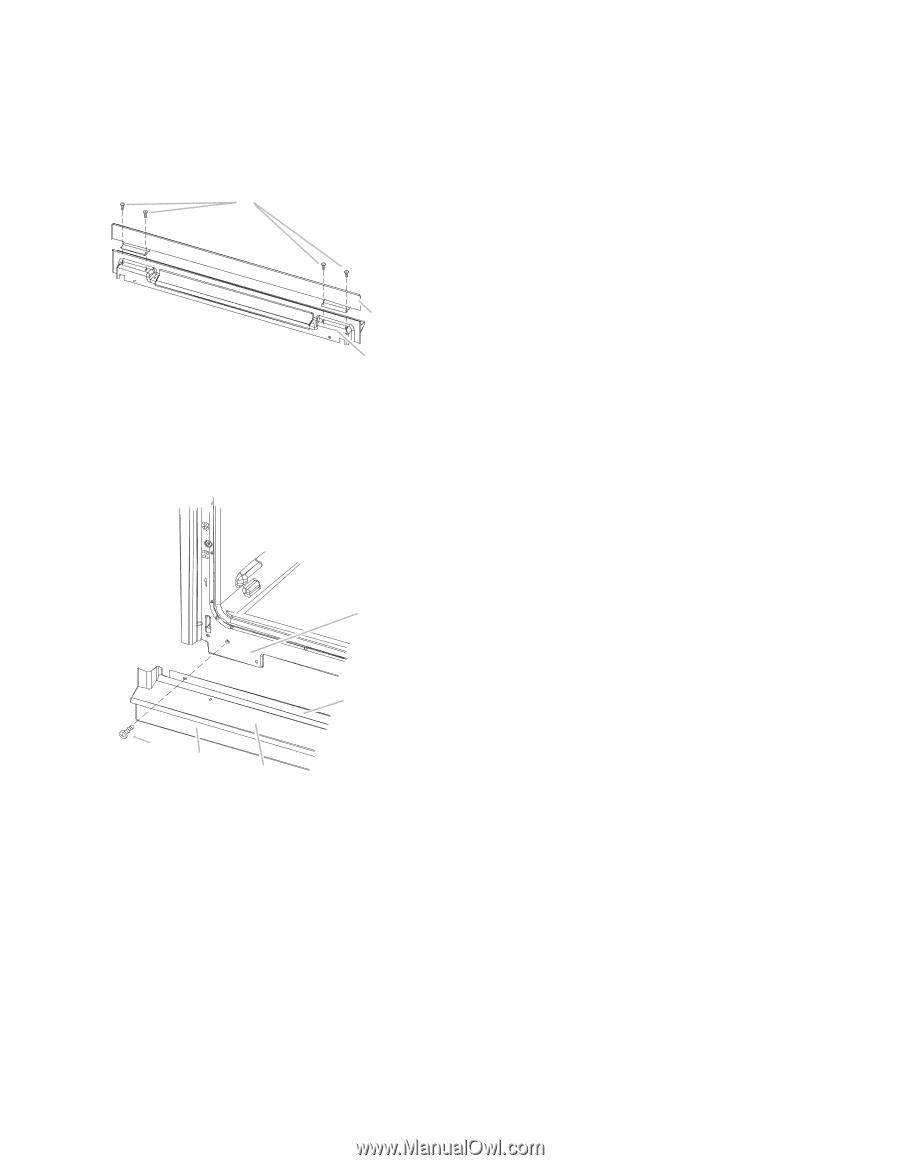
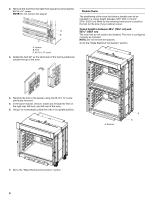
7. On models with the foot positioned with the short side of the foot toward the top of the oven, the bottom vent trim must also be installed. See the following instructions to install. ■ Position the bottom vent trim (B) on the vent (C). ■ Install the bottom vent trim (B) to the vent (C) using two #8-18 x ¹⁄₄" screws on each side. NOTE: On 27" (68.6 cm) models, only one #8-18 x ¹⁄₄" screw is used on each side. A B 8. Replace the oven racks. 9. Replace the oven door by inserting the ends of hinges into the hinge slots in the oven frame. 10. Push the hinges in as far as they will go and open the oven door. You should feel the oven door drop into place. 11. Rotate both hinge latches back to the locked position. 12. Check that the door is free to open and close. If it is not, repeat the removal and installation procedures. See the "Prepare Built-In Oven" section. 13. Repeat for lower oven door. 14. Reconnect power. 15. The display panel will light briefly, and "PF" should appear in the display. 16. If the display panel does not light, reference the "Assistance or Service" section of the Use and Care Guide or contact the dealer from whom you purchased your oven. C A. #8-18 x ¹⁄₄" screw B. Bottom vent trim C. Vent ■ Align vent tab (B) with oven frame (A) as shown. ■ Using one #8-18 x ³⁄₈" screw (E) on each side of the vent tab (B), fasten the vent securely to the oven. A B E D C A. Oven frame B. Vent tab C. Oven vent D. Bottom vent trim E. #8-18 x ³⁄₈" screw 13
-
 1
1 -
2
-
3
-
4
-
5
-
6
-
7
-
 8
8 -
 9
9 -
 10
10 -
 11
11 -
 12
12 -
 13
13 -
 14
14 -
 15
15 -
 16
16 -
 17
17 -
 18
18 -
19
-
20
-
21
-
22
-
23
-
24
-
25
-
26
-
27
-
28
-
29
-
30
-
31
-
32
 |
 |