Maytag MFX2676FRZ Use & Care Guide - Page 21
Refrigerator Care - warranty
 |
View all Maytag MFX2676FRZ manuals
Add to My Manuals
Save this manual to your list of manuals |
Page 21 highlights
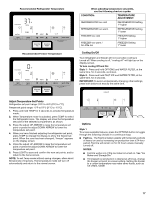
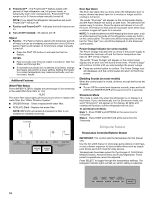
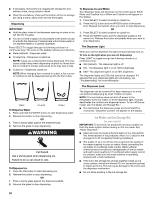
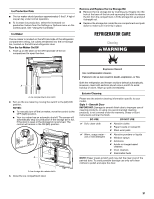
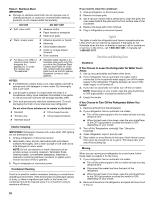
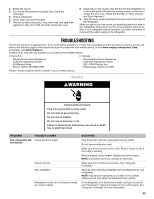
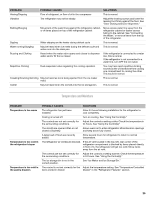
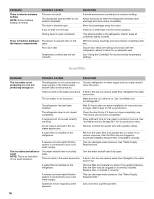
Ice Production Rate ■ The ice maker should produce approximately 3 lbs (1.4 kg) of ice per day under normal operation. ■ To increase ice production, select the increased ice production feature from the Settings or Options menu on the control panel. See "Using the Control(s)." Ice Maker The ice maker is located on the left-hand side of the refrigerator compartment ceiling. Ice cubes are ejected into the ice storage bin, located on the left-hand refrigerator door. Turn the Ice Maker On/Off 1. Push up on the latch on the left-hand side of the ice compartment to open the door. Remove and Replace the Ice Storage Bin ■ Remove the ice storage bin by inserting your fingers into the hole at the base of the bin and squeezing the latch to release the bin from the compartment. Lift the storage bin up and pull it straight out. ■ Replace the storage bin inside the ice compartment and push down to make sure it is firmly in place. REFRIGERATOR CARE Cleaning WARNING A A. Ice compartment door latch 2. Turn on the ice maker by moving the switch to the (left) ON position. NOTES: ■ To manually turn off the ice maker, move the control to the OFF (right) position. ■ Your ice maker has an automatic shutoff. The sensor will automatically stop ice production if the storage bin is full, if the door is open or the storage bin is removed. The control will remain in the ON (left) position. A Explosion Hazard Use nonflammable cleaner. Failure to do so can result in death, explosion, or fire. Both the refrigerator and freezer sections defrost automatically. However, clean both sections about once a month to avoid buildup of odors. Wipe up spills immediately. Exterior Cleaning Please see the exterior cleaning information specific to your model. Style 1 - Smooth Door IMPORTANT: Damage to smooth finish due to improper use of cleaning products, or using non-recommended cleaning products, is not covered under the warranty. Sharp or blunt instruments will mar the finish. DO USE ✔ Soft, clean cloth ✔ Warm, soapy water use a mild detergent DO NOT USE ✘ Abrasive cloths ✘ Paper towels or newsprint ✘ Steel-wool pads ✘ Abrasive powders or liquids ✘ Window sprays ✘ Ammonia ✘ Acidic or vinegar based cleaners ✘ Oven cleaners ✘ Flammable fluids NOTE: Paper towels scratch and may dull the clear coat of the painted door. To avoid possible damage use only soft clean clothes to polish and wipe the door. A. Ice storage bin release latch 3. Close the ice compartment door. 21
-
 1
1 -
2
-
3
-
4
-
5
-
6
-
7
-
8
-
9
-
10
-
11
-
12
-
13
-
14
-
15
-
 16
16 -
 17
17 -
 18
18 -
 19
19 -
 20
20 -
 21
21 -
 22
22 -
 23
23 -
 24
24 -
 25
25 -
 26
26 -
27
-
28
-
29
-
30
-
31
-
32
-
33
-
34
-
35
-
36
-
37
-
38
-
39
-
40
-
41
-
42
-
43
-
44
-
45
-
46
-
47
-
48
-
49
-
50
-
51
-
52
-
53
-
54
-
55
-
56
-
57
-
58
-
59
-
60
-
61
-
62
-
63
-
64
-
65
-
66
-
67
-
68
-
69
-
70
-
71
-
72
-
73
-
74
-
75
-
76
-
77
-
78
-
79
-
80
-
81
-
82
-
83
-
84
-
85
-
86
-
87
-
88
-
89
-
90
-
91
-
92
-
93
-
94
-
95
-
96
-
97
-
98
-
99
-
100
 |
 |
