Maytag MGDC700VW Installation Instructions - Page 2
Installation, Instructions - gas dryer
 |
UPC - 883049145754
View all Maytag MGDC700VW manuals
Add to My Manuals
Save this manual to your list of manuals |
Page 2 highlights
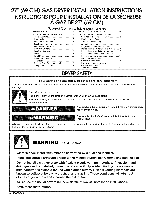
IMPORTANT SAFETY INSTRUCTIONS When discarding or storing your old clothes dryer, remove the door. SAVE THESE INSTRUCTIONS WARNING: For your safety, the information in this manual must be followed to minimize the risk of fire or explosion, or to prevent property damage, personal injury, or death. - Do not store or use gasoline or other flammable vapors and liquids in the vicinity of this or any other appliance. - WHAT TO DO IF YOU SMELL GAS: = Do not try to light any appliance. = Do not touch any electrical switch; do not use any phone in your building. = Clear the room, building, or area of all occupants. = Immediately call your gas supplier from a neighbor's phone. Follow the gas supplier's instructions. = if you cannot reach your gas supplier, call the fire department. - Installation and service must be performed by a qualified installer, service agency, or the gas supplier. WARNING: Gas leaks cannot always be detected by smell. Gas suppliers recommend that you use a gas detector approved by UL or CSA. For more information, contact your gas supplier. If a gas leak is detected, follow the "What to do if you smell gas" instructions. In the State of Massachusetts, the following installation instructions apply: [] Installations and repairs must be performed by a qualified or licensed contractor, plumber, or gasfitter qualified or licensed by the State of Massachusetts. [] If using a ball valve, it shall be a T-handle type. [] A flexible gas connector, when used, must not exceed 3 feet. INSTALLATIONINSTRUCTIONS Gather the required tools and parts before starting installation. Read and follow the instructions provided with any tools listed here. Parts supplied: Remove parts package from dryer drum. Check that all parts were included. [] 8" or 10" pipe wrench [] 8" or 10" adjustable wrench (for gas connections) [] Flat-blade screwdriver [] Adjustable wrench that opens to 1" (2.5 cm) or hex-head socket wrench (for adjusting dryer feet) Level [] 1¼.nut driver or socket wrench [] Knife [] Vent clamps [] Pipe-joint compound resistant to LP gas [] Caulking gun and compound (for installing new exhaust vent) [] Pliers 2 4 leveling legs Parts needed: Check local codes and consult gas supplier. Check existing gas supply, electrical supply and venting, and read "Electrical Requirements," "Gas Supply Requirements," and "Venting Requirements" before purchasing parts. Mobile home installations require special parts (listed following) that may be ordered by calling the dealer from whom you purchased your dryer. For further information, please reference the front page of the "Dryer User Instructions." [] Mobile home installation kit. Ask for Part Number 346764. [] Metal exhaust system hardware.
-
 1
1 -
 2
2 -
 3
3 -
 4
4 -
 5
5 -
 6
6 -
 7
7 -
 8
8 -
9
-
10
-
11
-
12
-
13
-
14
-
15
-
16
-
17
-
18
-
19
-
20
 |
 |
