Maytag MGDX655DW Use & Care Guide - Page 7
Using Your Dryer
 |
View all Maytag MGDX655DW manuals
Add to My Manuals
Save this manual to your list of manuals |
Page 7 highlights
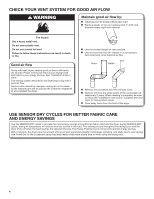
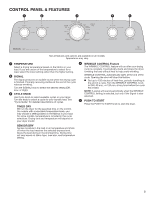
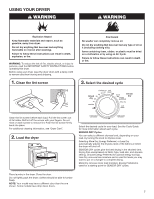
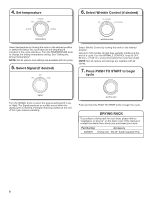
USING YOUR DRYER WARNING: To reduce the risk of fire, electric shock, or injury to persons, read the IMPORTANT SAFETY INSTRUCTIONS before operating this dryer. Before using your dryer, wipe the dryer drum with a damp cloth to remove dust from storing and shipping. 1. Clean the lint screen 3. Select the desired cycle Clean the lint screen before each load. Pull the lint screen out of its holder. Roll lint off the screen with your fingers. Do not rinse or wash screen to remove lint. Push the lint screen firmly back into place. For additional cleaning information, see "Dryer Care". 2. Load the dryer Select the desired cycle for your load. See the Cycle Guide for more information about each cycle. SENSOR DRY Cycles You can select a different dryness level, depending on your load, by turning the knob to dryness level. Selecting More Dry, Energy Preferred, or Less Dry automatically adjusts the dryness level of the fabrics at which the dryer will shut off. SENSOR DRY cycles give the best drying in the shortest time. Drying time varies based on fabric type, load size, and dryness setting. Choose Energy Preferred for optimal energy savings. Less Dry removes less moisture and is used for loads you may want to put on a hanger to complete drying. More Dry removes more load moisture. Energy Preferred is used for a starting point for SENSOR DRY cycles. Place laundry in the dryer. Close the door. Do not tightly pack the dryer; clothes should be able to tumble freely. NOTE: Your model may have a different door than the one shown. Some models have drop down doors. 7
-
 1
1 -
 2
2 -
 3
3 -
 4
4 -
 5
5 -
 6
6 -
 7
7 -
 8
8 -
 9
9 -
 10
10 -
 11
11 -
 12
12 -
13
-
14
-
15
-
16
-
17
-
18
-
19
-
20
-
21
-
22
-
23
-
24
-
25
-
26
-
27
-
28
 |
 |
