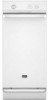
Maytag MTUC7000AWW Use & Care Guide - Page 9
Compactor Use
 |
UPC - 883049150666
View all Maytag MTUC7000AWW manuals
Add to My Manuals
Save this manual to your list of manuals |
Page 9 highlights
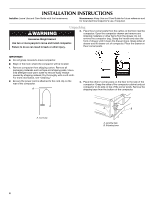
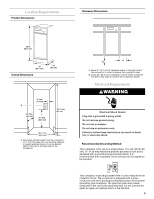
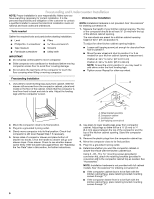
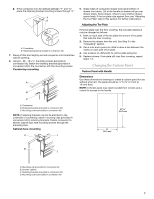
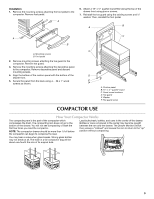
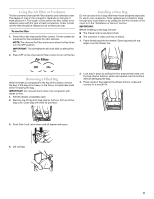
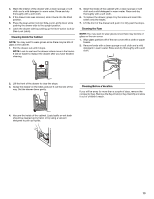
Installation 1. Remove the mounting screws attaching the foot pedal to the compactor. Remove foot pedal. A 6. Attach a 15" x ¹⁄₂" quarter-round filler along the top of the drawer front using glue or screws. 7. Reinstall the toe guard using the existing screws and ¹⁄₂" washer. Then, reinstall the foot pedal. B A A B A. Mounting screws B. Foot pedal 2. Remove mounting screws attaching the toe guard to the compactor. Remove toe guard. 3. Remove the mounting screws attaching the decorative panel to the compactor. Remove decorative panel and discard mounting screws. 4. Align the bottom of the custom panel with the bottom of the drawer front. 5. Secure the panel from the back using 4 - #8 x 1" wood screws as shown. C C D E F A. Custom panel B. 15" x ¹⁄₂ " quarter-round C. Panel screw locations D. Toe guard E. Washer F. Toe guard screw COMPACTOR USE How Your Compactor Works The compacting ram is the part of the compactor which compresses the trash. The compacting ram does not go to the bottom of the drawer. You will not see compacting of trash the first few times you load the compactor. NOTE: The compactor drawer should be more than ¹⁄₂ full before the compactor can begin to compress the load. Load bulky trash, bottles, and cans in the center of the drawer. Bottles or cans not placed in the center may become caught between the ram and the drawer. The Drawer Monitor Switch then senses a "misload" and causes the ram to return to the "up" position without compacting. You may hear a noise when glass breaks. Strong glass bottles may not break at all. The trash in a full compactor bag will be about one-fourth the size of its original bulk. 9
-
 1
1 -
2
-
3
-
 4
4 -
 5
5 -
 6
6 -
 7
7 -
 8
8 -
 9
9 -
 10
10 -
 11
11 -
 12
12 -
 13
13 -
 14
14 -
15
-
16
 |
 |
