Maytag MVW6200KW Owners Manual - Page 5
Installation Instructions, Requirements, Tools and Parts, Location Requirements - washer
 |
View all Maytag MVW6200KW manuals
Add to My Manuals
Save this manual to your list of manuals |
Page 5 highlights
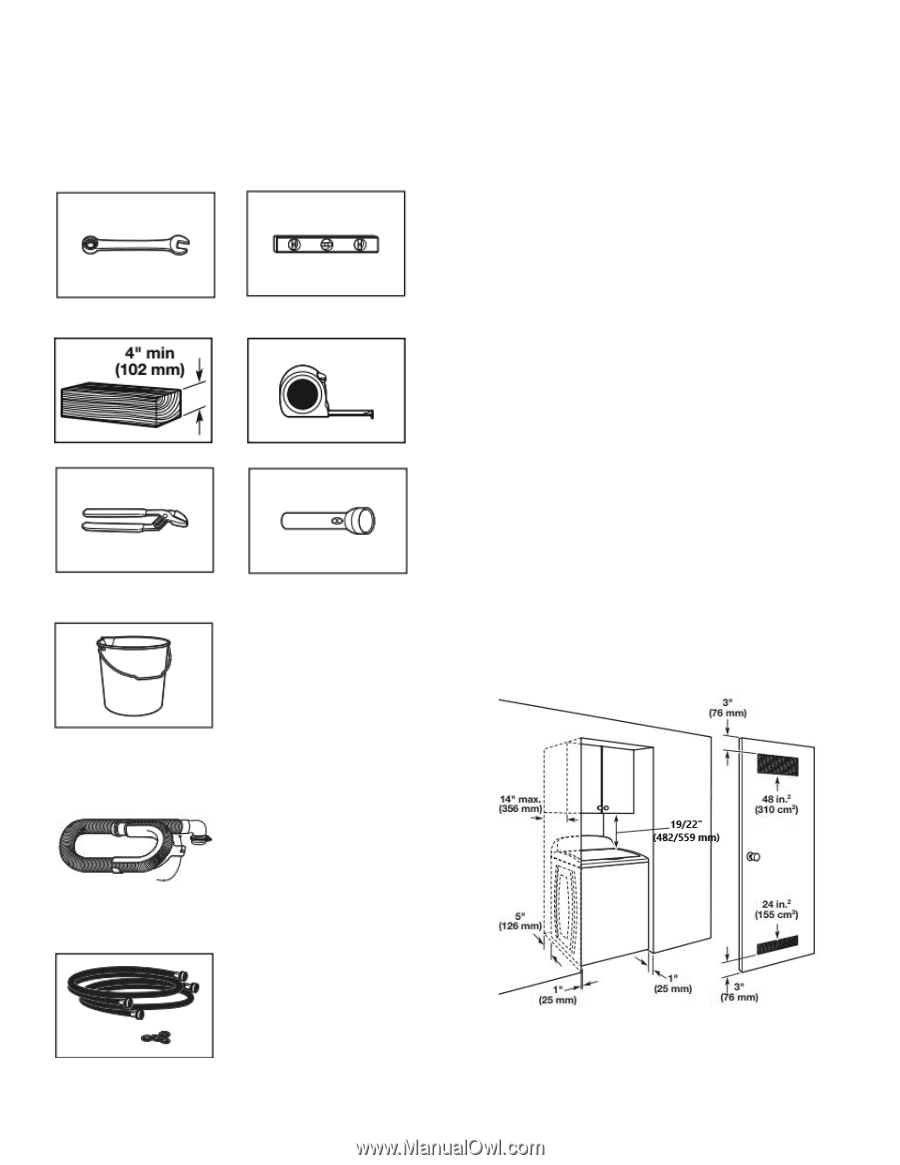
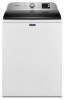
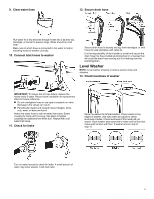
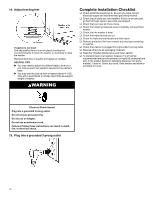
INSTALLATION INSTRUCTIONS REQUIREMENTS Tools and Parts Gather required tools and parts before starting installation. Tools Needed: Adjustable or open end wrench 9/16″ (14 mm) Level Wood block Ruler or measuring tape Adjustable pliers that open to 1 3/4″ (45 mm) Flashlight Bucket Parts Supplied: NOTE: All parts supplied for installations are in the washer. Alternate Parts: (not supplied with washer) Your installation may require additional parts. To order, please refer to the contact information referenced in your Quick Start Guide. If you have: Overhead sewer 1″ (25 mm) standpipe Drain hose too short You will need: Standard 20 gal. (76 L) 39″ (990 mm) tall drain tub or utility sink, sump pump, and connectors (available from local plumbing suppliers) 2″ (51 mm) diameter to 1″ (25mm) diameter standpipe adapter and connector kit Extension drain hose and connector kit Lint-clogged drain Drain protector and connector kit Location Requirements Select proper location for your washer to improve performance and minimize noise and possible "washer walk." Install your washer in a basement, laundry room, closet, or recessed area. IMPORTANT: Do not install, store, or operate washer where it will be exposed to weather or in temperatures below 32°F (0°C). Water remaining in washer after use may cause damage in low temperatures. See "Washer Maintenance and Care" for winterizing information. Proper installation is your responsibility. You will need: A water heater set to 120°F (49°C). A grounded electrical outlet located within 4 ft. (1.2 m) of power cord on back of washer. Hot and cold water faucets located within 3 ft. (0.9 m) of hot and cold water fill valves on washer, and water pressure of 20- 100 psi (138-690 kPa). A level floor with maximum slope of 1″ (25 mm) under entire washer. Installing on carpet or surfaces with foam backing is not recommended. Floor must support washer's total weight (with water and load) of 315 lbs. (143 kgs). Recessed area or closet installation Drain hose with clamp, U-form, and cable tie Parts Needed: (if not supplied with washer) Inlet hoses with flat washers NOTE: Various inlet hose options are available; check your Quick Start Guide for ordering information. NOTE: All 27″ wide washers should have 19″ clearance, while all 29″ wide washers should have 22″ clearance. 05-Aug-2019 13:05:14 EDT | RELEASED 5 In some European factories the letter "W" of the part code mentioned herein will be automatically replaced by the number "4000" (e.g. "W12345678" becomes "400012345678")
-
 1
1 -
 2
2 -
 3
3 -
 4
4 -
 5
5 -
 6
6 -
 7
7 -
 8
8 -
 9
9 -
 10
10 -
 11
11 -
12
-
13
-
14
-
15
-
16
-
17
-
18
-
19
-
20
 |
 |