Maytag MVWB450WQ Installation Instructions - Page 7
Level Washer - model
 |
UPC - 883049179704
View all Maytag MVWB450WQ manuals
Add to My Manuals
Save this manual to your list of manuals |
Page 7 highlights
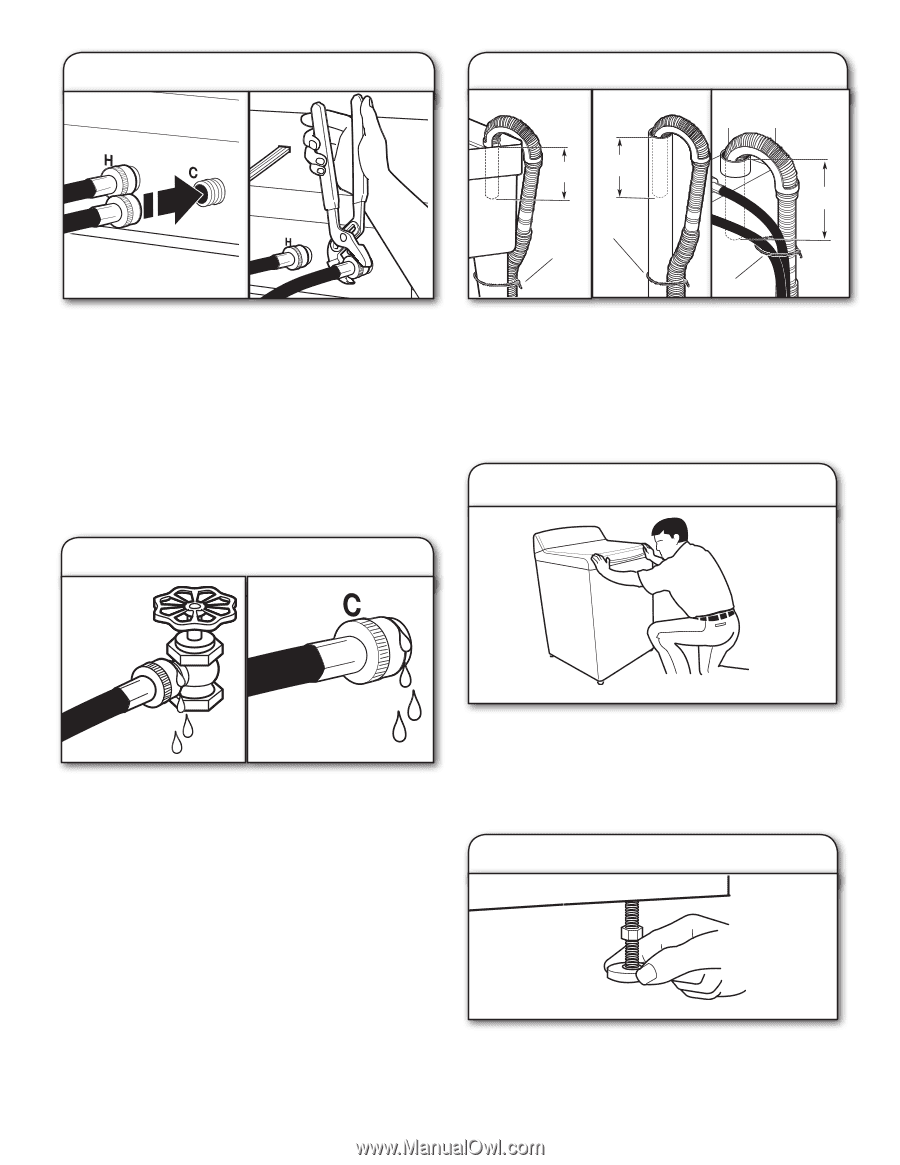
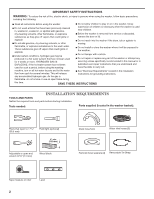
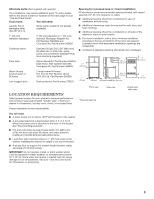
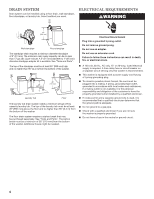
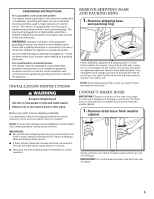
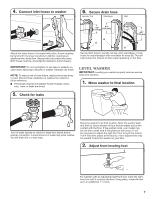
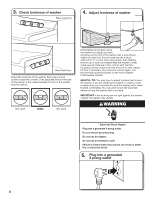
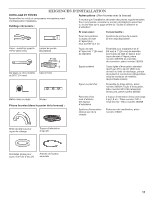
4. Connect inlet hoses to washer 6. Secure drain hose Laundry Tub Standpipe Wall Attach hot water hose to hot water inlet valve. Screw coupling by hand until it is snug. Use pliers to tighten couplings an additional two-thirds turn. Repeat with cold water inlet valve. Both hoses must be connected for washer to work properly. IMPORTANT: Do not overtighten or use tape or sealants on valve when attaching to faucets or washer. Damage can result. NOTE: To reduce risk of hose failure, replace the hoses every 5 years. Record hose installation or replacement dates for future reference. ■■ Periodically inspect and replace hoses if bulges, kinks, cuts, wear, or leaks are found. 4.5" (113 mm) 4.5" (113 mm) 4.5" (113 mm) A A A Secure drain hose to laundry tub leg, drain standpipe, or inlet hoses for wall standpipe with removable tie strap (A). This will help reduce the chance of drain water splashing on the floor. Level Washer IMPORTANT: Leveling your washer properly reduces excess noise and vibration. 1. Move washer to final location 5. Check for leaks Turn on water faucets to check for leaks from faucet and at washer connection. A small amount of water may enter washer. You will drain this in a later step. Move the washer to its final location. Rock the washer back and forth to check whether all four feet are stable and in firm contact with the floor. If the washer rocks, your model may be one that comes with 3 feet preset at the factory. It will be necessary to adjust the right front foot to level the washer. If all 4 feet were preset at the factory, minor adjustments may be needed to level the washer on your floor. 2. Adjust front leveling foot For washers with an adjustable right front foot, lower the right front foot until it contacts the floor. Using pliers, rotate the foot up to an additional 1 1/2 turns. 7
-
 1
1 -
 2
2 -
 3
3 -
 4
4 -
 5
5 -
 6
6 -
 7
7 -
 8
8 -
 9
9 -
 10
10 -
 11
11 -
 12
12 -
13
-
14
-
15
-
16
-
17
-
18
-
19
-
20
 |
 |