Maytag MVWX500BW Installation Guide - Page 9
Troubleshooting - not rinsing
 |
View all Maytag MVWX500BW manuals
Add to My Manuals
Save this manual to your list of manuals |
Page 9 highlights
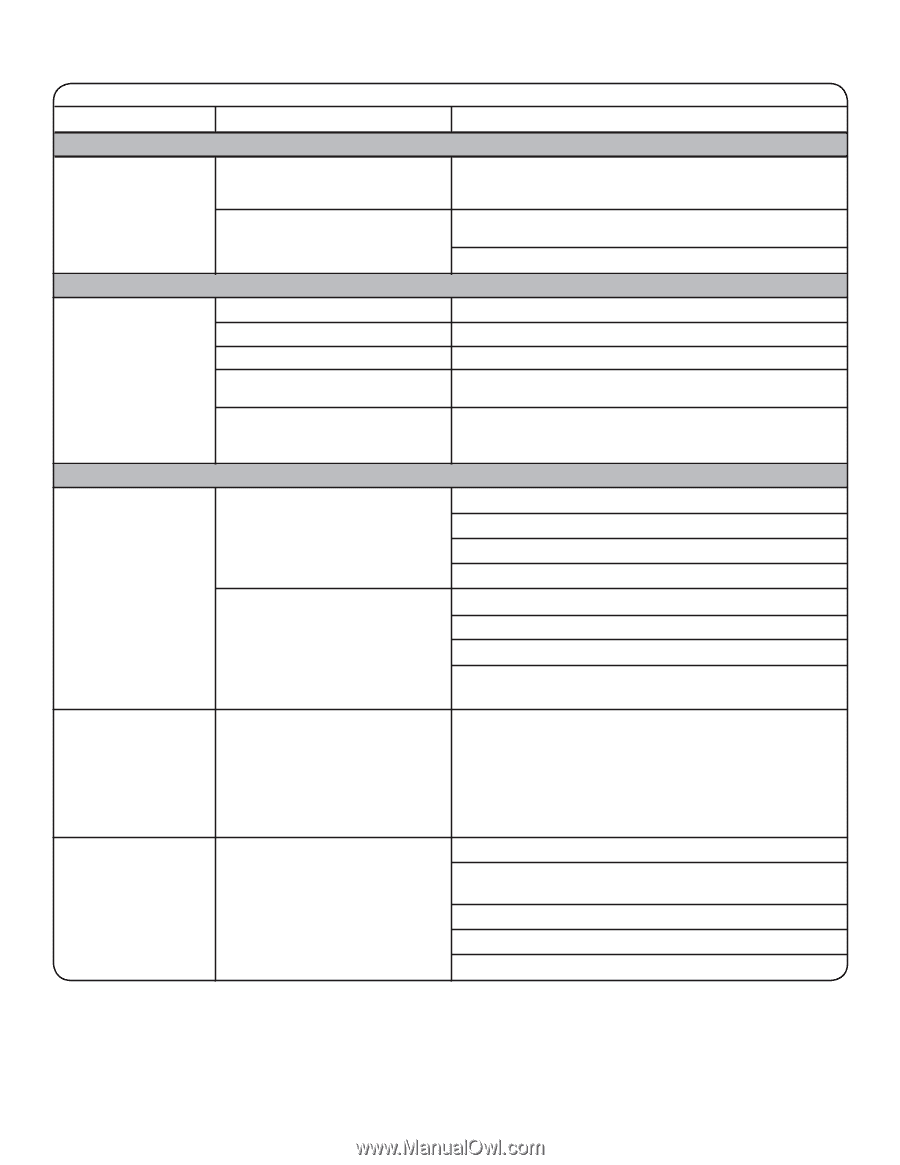
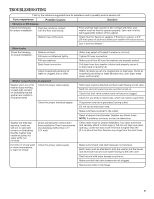
TROUBLESHOOTING First try the solutions suggested here for assistance and to possibly avoid a service call. If you experience Possible Causes Solution Vibration or Off-Balance Check the following for proper installation: Feet may not be in contact with the floor and locked. Front and rear feet must be in firm contact with floor, and washer must be level to operate properly. Jam nuts must be tight against the bottom of the cabinet. Washer may not be level. Check floor for flexing or sagging. If flooring is uneven, a 3/4" (19 mm) piece of plywood under your washer will reduce sound. See "Level the Washer." Water Leaks Check the following for proper installation: Washer not level. Fill hoses not attached tightly. Fill hose washers. Drain hose connection. Check household plumbing for leaks or clogged sink or drain. Water may splash off basket if washer is not level. Tighten fill hose connection. Make sure all four fill hose flat washers are properly seated. Pull drain hose from washer cabinet and properly secure it to drain pipe or laundry tub. Water can back up out of a clogged sink or drain pipe. Check all household plumbing for leaks (laundry tubs, drain pipe, water pipes, and faucets.) Washer not performing as expected Washer won't run or fill, washer stops working, or wash light remains on (indicating that the washer was unable to fill appropriately) Check for proper water supply. Check for proper electrical supply. Washer not draining/ spinning, loads are still wet or spin light remains on (indicating that the washer was unable to pump out water within ten minutes) Check plumbing for correct drain hose installation. Drain hose extends into standpipe farther than 4.5" (114 mm). Incorrect or wrong wash Check for proper water supply. or rinse temperatures, or load not rinsed Both hoses must be attached and have water flowing to inlet valve. Both hot and cold water faucets must be turned on. Check that inlet valve screens have not become clogged. Check for any kinks in inlet hoses, which can restrict water flow. Plug power cord into a grounded 3 prong outlet. Do not use an extension cord. Make sure there is power to the outlet. Reset a tripped circuit breaker. Replace any blown fuses. NOTE: If problems continue, contact an electrician. Check drain hose for proper installation. Use drain hose form and securely attach to drain pipe or tub. Do not tape over drain opening. Lower the drain hose if the end is higher than 96" (2.4 m) above the floor. Remove any clogs from the drain hose. Make sure hot and cold inlet hoses are not reversed. Both hoses must be attached to both the washer and the faucet, and have both hot and cold water flowing to the inlet valve. Both hot and cold water faucets must be on. Make sure that inlet valve screens are not clogged. Remove any kinks in the hoses. 9
-
 1
1 -
2
-
3
-
 4
4 -
 5
5 -
 6
6 -
 7
7 -
 8
8 -
 9
9 -
 10
10 -
 11
11 -
 12
12 -
 13
13 -
 14
14 -
15
-
16
-
17
-
18
-
19
-
20
 |
 |