Meade 10 inch Instruction Manual - Page 51
APPENDIX E, MAINTAINING YOUR LX200, Keeping Your Telescope Clean - hair
 |
View all Meade 10 inch manuals
Add to My Manuals
Save this manual to your list of manuals |
Page 51 highlights
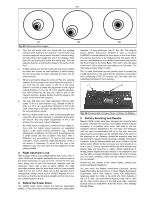
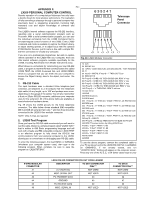
- 51 - APPENDIX E: some small particles on the inside or outside of telescope MAINTAINING YOUR LX200 optics. Should the optics get more dust on them than you would care for, simply use a photographic grade camel hair brush with 1. Keeping Your Telescope Clean very gentle strokes. You can also blow off dust with an ear Prevention is the best recommendation that a telescope owner syringe (available from a local pharmacy). can follow to keep astronomical equipment in top working There is a point, however, when the optics must be cleaned. order. Proper measures taken during observation and when This is when you can easily tell that there is a thin layer of fine storing equipment between observing runs can add many particulates that make the optics look very slightly hazy. To years of trouble free use. clean the optics we must suggest that you make your own lens Dust and moisture are the two main enemies to your instrument. When observing, it is advisable to use a proper fitting dew shield. The dew shield not only prevents dew from forming, and dust from settling on the corrector plate lens, it cleaning solutions, since it is impossible to know all of the ingredients used in commercial lens cleaners. Pure isopropyl alcohol (90% or better) will clean most residual film build-up on optical surfaces (and metal surfaces too). prevents stray light from reducing image contrast. Organic materials (e.g., fingerprints) on the front lens may be Although dew shields go a long way to prevent moisture buildup, there can be times when the telescope optics will have a uniform coating of moist dew. This is not particularly harmful, as long as the instrument is allowed to let the dew evaporate. This removed with a solution of 3 parts distilled water to 1 part isopropyl alcohol. A single drop of biodegradable dishwashing soap may be added per pint of solution. Use soft, white facial tissues and make short, gentle strokes. Change tissues often. can be done with a hair dryer, or just setting up the telescope indoors with the dust covers removed. It is also advisable that you let the foam lined case for the LX200 dry out indoors for a CAUTION: Do not use scented, colored, or lotioned tissues or damage could result to the optics. day if the night was moist. Packing your telescope away in a Sprayer bottles are a convenient dispenser of lens cleaning moist case can result in giving it a steam bath later. solutions onto the tissues. Use soft, white facial tissues and make short, gentle strokes. Change tissues often. If the optics CAUTION: Anytime the LX200 is being stored or are small (such as viewfinders or eyepieces), the tissue can be transported, be sure to release the R.A. and Dec. rolled to the appropriate thickness and then broken in half to locks, to prevent serious damage to the drive gears. create two cleaning wands. It is advised that you avoid many of the so-called lens cleaning papers (many which contain CAUTION: Never attempt to wipe down optics that are covered with dew. Dust and dirt may be trapped with the collected dew, and upon wiping the optics you may scratch them. After the dew has evaporated you will most likely find them in fine condition for the next observing session. fiberglass), lens cloths, or chamois. Before attempting to clean an optical surface with a liquid solution, it is very important that as much dust as possible is removed by using forced air and/or gentle strokes with a photographic grade camel hair brush. The forced air can come from a rubber ear syringe, or canned compressed air from a photographic supply store. Be sure to hold the canned air in a If you live in a very moist climate, you may find it necessary to vertical position and try spraying compressed air on your hand use silica desiccant stored in the telescope's case to ward off before aiming at the optics to see if any of the propellant (solid moisture and the possibility of fungus growing on and within the material) comes out. Propellant is very difficult to remove from coatings of the optics. Replace the desiccant as often as optics, so take care not to tip the can when using it. If you have necessary. access to a compressor hose, be sure that it is filtered to Those living in coastal areas or tropic zones should also cover prevent oil from being sprayed on the optics. the electronic ports on the power panel and the keypad with Once you are confident that you have removed most of the dust gaffers tape to reduce corrosion on the metal contacts. Apply a and large particles, begin cleaning with the mixture described dab of a water displacement solution (i.e. WD-40) with a small above. Pour or spray enough solution onto a pillow or wand of brush on all interior metal contacts and the input cord metal tissue until it is quite wet. If you are cleaning a corrector plate, contacts. The keypad and all separate accessories should be use radial strokes with a smooth pillow of tissue, starting from kept in sealable plastic bags with silica desiccant. the center out, using no pressure. If you are cleaning small A thick layer of dust will attract and absorb moisture on all exposed surfaces. Left unattended, it can cause damaging corrosion. To keep dust at bay when observing, the telescope can be set up on a small section of indoor/outdoor carpet. If you are observing for more than one night in a row, the telescope can be left set up but covered with a large plastic bag (such as the one supplied with the telescope). The rear cell opening of the LX200 can also be sealed off to the elements by threading optical surfaces, use the rolled wands of tissue starting from the edges then spiraling in to the center, again using no pressure. Never pour or spray the solution onto the corrector plate or eyepieces themselves, as the liquid may go behind or in between lenses, where it is difficult or impossible to reach. Never attempt to disassemble an eyepiece to clean the inner elements, as you will certainly not be able to properly center and re-assemble the optical train. on the optional accessory Skylight 1A Dust Seal. Eyepieces, Use dry tissue to make the final clean up, again using no diagonals, and other accessories are best kept in plastic bags pressure. If there is still some sort of residue, repeat the and stored in cases, such as the Meade #50 Accessory Case. procedure using the three part formula described above, again All of the non optical surfaces of the LX200 should be cleaned using the same cleaning techniques. routinely with a soft rag and alcohol to prevent corrosion. The The inside surface of the corrector plate and secondary mirror cast metal surfaces and the individual exposed screws can also may at some point become dirty due to particles falling inside be kept looking new and corrosion free by wiping them down the tube when removing or replacing the rear dust cover or with a water displacement solution. Take care not to smear the threading on accessories. To reduce the chance of interior solution onto any optical surface, and to wipe up any excess contamination, the Meade Skylight 1A Dust Seal is very solution with a clean dry cloth. The painted tube can be effective. If the Dust Seal is not used, it helps to have the rear polished with a liquid car polish and a soft rag. cell pointed downward when replacing the rear dust cover or Surprisingly, the most common telescope maintenance attaching accessories. error is cleaning the optics too often. A little dust on any of Another more serious, but not damaging problem is the the optical surfaces causes virtually zero degradation of optical possibility of a hazy (usually uneven) film building up on the performance. It should be of no concern whatsoever to see inside of the corrector plate. This can be caused by
-
 1
1 -
2
-
3
-
4
-
5
-
6
-
7
-
8
-
9
-
10
-
11
-
12
-
13
-
14
-
15
-
16
-
17
-
18
-
19
-
20
-
21
-
22
-
23
-
24
-
25
-
26
-
27
-
28
-
29
-
30
-
31
-
32
-
33
-
34
-
35
-
36
-
37
-
38
-
39
-
40
-
41
-
42
-
43
-
44
-
45
-
 46
46 -
 47
47 -
 48
48 -
 49
49 -
 50
50 -
 51
51 -
 52
52 -
 53
53 -
 54
54 -
 55
55 -
 56
56 -
57
-
58
-
59
-
60
-
61
-
62
-
63
-
64
 |
 |
