Meade II 90mm User Manual - Page 9
SolarMax II 90 Dedicated H-a Telescope
 |
View all Meade II 90mm manuals
Add to My Manuals
Save this manual to your list of manuals |
Page 9 highlights
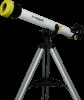
SolarMax II 90 Dedicated H-a Telescope Congratulations on your purchase! Meade Instruments has shipped your Coronado SolarMax II telescope fully assembled and ready for use. Be sure to read the safety and cleaning instructions on page 4 and 13 before using your SolarMax II telescope. You can refer to the diagrams below for questions regarding the components of your system. Please read these instructions in full before setting up your new SolarMax II telescope and contact our customer service if you have any questions. Mounting - The clamshell mounting ring your SolarMax II telescope has been shipped with is compatible with any 1/4 20 thread. Most standard photographic mounts and mounting hardware can be used to provide a safe, stable, and reliable set up. This is also compatible with piggyback mounting systems. Meade manufactures and sells separately one mount suitable for the SolarMax II 90: The LXD75 German equatorial computer controlled mount. Meade also makes a dovetail mounting block (product #DT-LXD75) compatible with the LXD75 mount and many other mounts on the market. Draw Tubes - The SolarMax II 90 telescope has a very fine adjustment helical focuser that rotates around the OTA in order to achieve focus. This focuser also has two drawtubes that will need to be adjusted for "rough focus". To do this locate and loosen the 2 nylon set screws located in-between the gold colored OTA and the helical focuser. Once the nylon set screws are loose, fully extend draw tube #2. Retighten the set screws before proceeding. To extend drawtube # 1 locate the set screws between the helical focuser and the end of the telescope. Once loosened the drawtube will extend but cannot be removed. Retighten the setscrews before proceeding. Most eyepieces will come to focus when the drawtubes are nearly fully extended but some variations in eyepieces may require different positioning of the drawtube. Bino-viewers will require very little extension of the drawtubes and imaging equipment will vary by make. The drawtubes should be fully inserted for storage. All adjustable screws are meant to be finger tight - do not over tighten. WARNINGI Do not insert your eyepiece into the blocking filter until you have confirmed that the telescope is securely mounted and all filter elements attached and secured. Finding the Sun - Meade has included the Coronado Sol Ranger Sun finder. This finder scope sits on top of the clamshell and allows a small, harmless, ball of light to be projected on to the opaque glass at its back end. By standing back from the Sol Ranger you can easily place this ball of light in the center of the glass and the telescope should be aligned with the Sun - Do not put your eye up to the opaque glass. Helical Focuser - Once you have the Sun in the FOV and the draw tubes extended insert the eyepiece into the eyepiece retainer and RichView™ tuning lever for internal Etalon Draw tube #1. Draw tube #2. SolarMax 90 SolarMax II 90 9
-
 1
1 -
2
-
3
-
 4
4 -
 5
5 -
 6
6 -
 7
7 -
 8
8 -
 9
9 -
 10
10 -
 11
11 -
 12
12 -
 13
13 -
 14
14 -
15
-
16
-
17
-
18
-
19
-
20
 |
 |
