Meade NG 102mm User Manual - Page 17
Observing
 |
View all Meade NG 102mm manuals
Add to My Manuals
Save this manual to your list of manuals |
Page 17 highlights
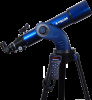
Fig. 14: 26mm and 9.7mm eyepieces. NEVER point the telescope directly at or near the Sun at any time! Observing the Sun, even for the smallest fraction of a second, will result in instant and irreversible eye damage, as well as physical damage to the telescope itself. OBSERVING Observing by Moving the Telescope Manually If you wish to observe a distant land object, such as a mountain top or a bird, you can observe by merely pointing the telescope and looking through the eyepiece. 1. Loosen the telescope's tripod base lock knob (17, Fig. 1 or 2) and Altitude lock (10F, Fig. 1 or 2 b), so that the telescope can move freely. 2. Point your telescope at distant street signs, mountains, trees, and other structures. Use your red dot viewfinder to help site-in on an object. 3. Center the object using the red dot viewfinder and then in the telescope eyepiece. When the object is centered in your eyepiece, re-tighten the base and Altitude locks. 4. Practice focusing objects with the focus knob (1, Fig. 1 or 2). 5. Once you get a feel for how your telescope moves and focuses, try to view something more challenging, like a bird or a distant moving train. You can also observe stars and objects in the night sky using this method, but note that objects begin to slowly drift across the eyepiece field. This motion is caused by the rotation of the Earth. As you become familiar with the AudioStar handbox operation, you can counteract the drift using the automatic tracking feature in the AudioStar Setup menu (see TO TRACK AN OBJECT AUTOMATICALLY, page 19), or by using AudioStar's GO TO capabilities (see GO TO SATURN, page 22). Terrestrial Observing StarNavigator NG refracting telescopes are excellent high-resolution, terrestrial (land) telescopes (reflecting telescopes are designed primarily for astronomical observations). Viewing terrestrial objects requires looking along the Earth's surface through heat waves. These heat waves often cause degradation of image quality. Lower power eyepieces, such as a 26mm eyepiece, magnify these heat waves less than higher power eyepieces. Therefore, lower power eyepieces provide a steadier, higher quality image. If the image is fuzzy or ill-defined, reduce to a lower power eyepiece, where the heat waves do not have such an effect on image quality. Observing in early morning hours, before the ground has built up internal heat, produces better viewing conditions than during late afternoon hours. Observing Using AudioStar's Arrow Keys You may observe land and astronomical objects using AudioStar's Arrow keys to move the telescope. 1. Tighten the Altitude lock knob (10F, Fig. 1 or 2 b) and tripod base lock knob (17, Fig. 1 or 2). 2. Make sure the telescope power switch is in the OFF position. Plug AudioStar into the HBX port of the Control Panel. 3. Flip the telescope power switch to the Too Much Power? Can you ever have too much power? If you're referring to eyepiece power (magnification), yes, you can! The most common beginner's mistake is to "overpower" a telescope by using too high of a magnification, which the telescope's aperture and atmospheric conditions cannot reasonably support. Keep in mind that a smaller, but bright and well-resolved image is far superior to one that is larger, but dim and poorly resolved (see below). Powers above 200X should be employed only under the steadiest atmospheric conditions. AudioStar can calculate the best eyepiece for you to use. Try out the "Eyepiece Calc" feature in the Utilities menu. Most observers should have three or four additional eyepieces to achieve the full range of reasonable magnifications possible with the StarNavigator telescopes. See "OPTIONAL ACCESSORIES," page 35. Fig. 15 & 15: Jupiter; example of too much magnification. Looking at or near the Sun will cause irreversible damage to your eye. Do not point this telescope at or near the Sun. Do not look through the telescope as it is moving. 17
-
 1
1 -
2
-
3
-
4
-
5
-
6
-
7
-
8
-
9
-
10
-
11
-
 12
12 -
 13
13 -
 14
14 -
 15
15 -
 16
16 -
 17
17 -
 18
18 -
 19
19 -
 20
20 -
 21
21 -
 22
22 -
23
-
24
-
25
-
26
-
27
-
28
-
29
-
30
-
31
-
32
-
33
-
34
-
35
-
36
-
37
-
38
-
39
-
40
-
41
-
42
-
43
-
44
-
45
-
46
-
47
-
48
-
49
-
50
-
51
-
52
 |
 |
