Meade NG70-SM Instruction Manual - Page 15
Fig. 6, Fig. 7
 |
View all Meade NG70-SM manuals
Add to My Manuals
Save this manual to your list of manuals |
Page 15 highlights
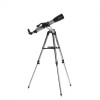
Horizontal adjustment nut Fig. 6: Horizontal adjustment nut. (View of the underside of the base.) • When absolutely necessary, dust on the front lens should be removed with very gentle strokes of a camel hair brush or blown off with an ear syringe (available at most pharmacies). • Fingerprints and organic materials on the front lens may be removed with a solution of 3 parts distilled water to 1 part isopropyl alcohol. You may also add 1 drop of biodegradable dishwashing soap per pint of solution. Use soft, white facial tissues and make short, gentle strokes. Change tissues often. CAUTION: Do not use scented or lotioned tissues or damage could result to the optics. DO NOT use a commercial photographic lens cleaner. ADJUSTING THE HORIZONTAL AND VERTICAL TENSION OF THE OPTICAL TUBE If the horizontal and/or vertical movement of the optical tube seems to be too loose or too tight, you can adjust the amount of tension in the movement of the optical tube to suit your own preference. To adjust the horizontal tension of the optical tube, use an adjustable wrench or nut driver to tighten or loosen the horizontal adjustment nut located under the base of the telescope. See Fig. 6. To adjust the vertical tension of the optical tube, first loosen the attachment knobs (11) and remove the optical tube from the bracket. Use an adjustable wrench or nut driver to tighten or loosen the vertical adjustment nut located on the inner side of the bracket. See Fig. 7. Check the amount of tension by moving the bracket up and down before reattaching the optical tube. 13 OPTIONAL ACCESSORIES #928 45° Erecting Prism (1.25 O.D.): Correctly orients the telescopic image during terrestrial observing and yields an image position at a 45° angle to the main telescope tube, resulting in a more comfortable observing position in Vertical adjustment nut Fig. 7: Vertical adjustment nut. (Bracket shown with optical tube removed.) Looking at or near the Sun will cause irreversible damage to your eye. Do not point this telescope at or near the Sun. Do not look through the telescope as it is moving.
-
 1
1 -
2
-
3
-
4
-
5
-
6
-
7
-
8
-
9
-
 10
10 -
 11
11 -
 12
12 -
 13
13 -
 14
14 -
 15
15 -
 16
16 -
 17
17 -
 18
18 -
 19
19 -
 20
20 -
21
-
22
-
23
-
24
 |
 |
