Meade Polaris 130mm User Manual - Page 6
Setup Your Tripod, Attach The Accessory Tray, Attach The Counterweight Shaft, And Counterweight,
 |
View all Meade Polaris 130mm manuals
Add to My Manuals
Save this manual to your list of manuals |
Page 6 highlights
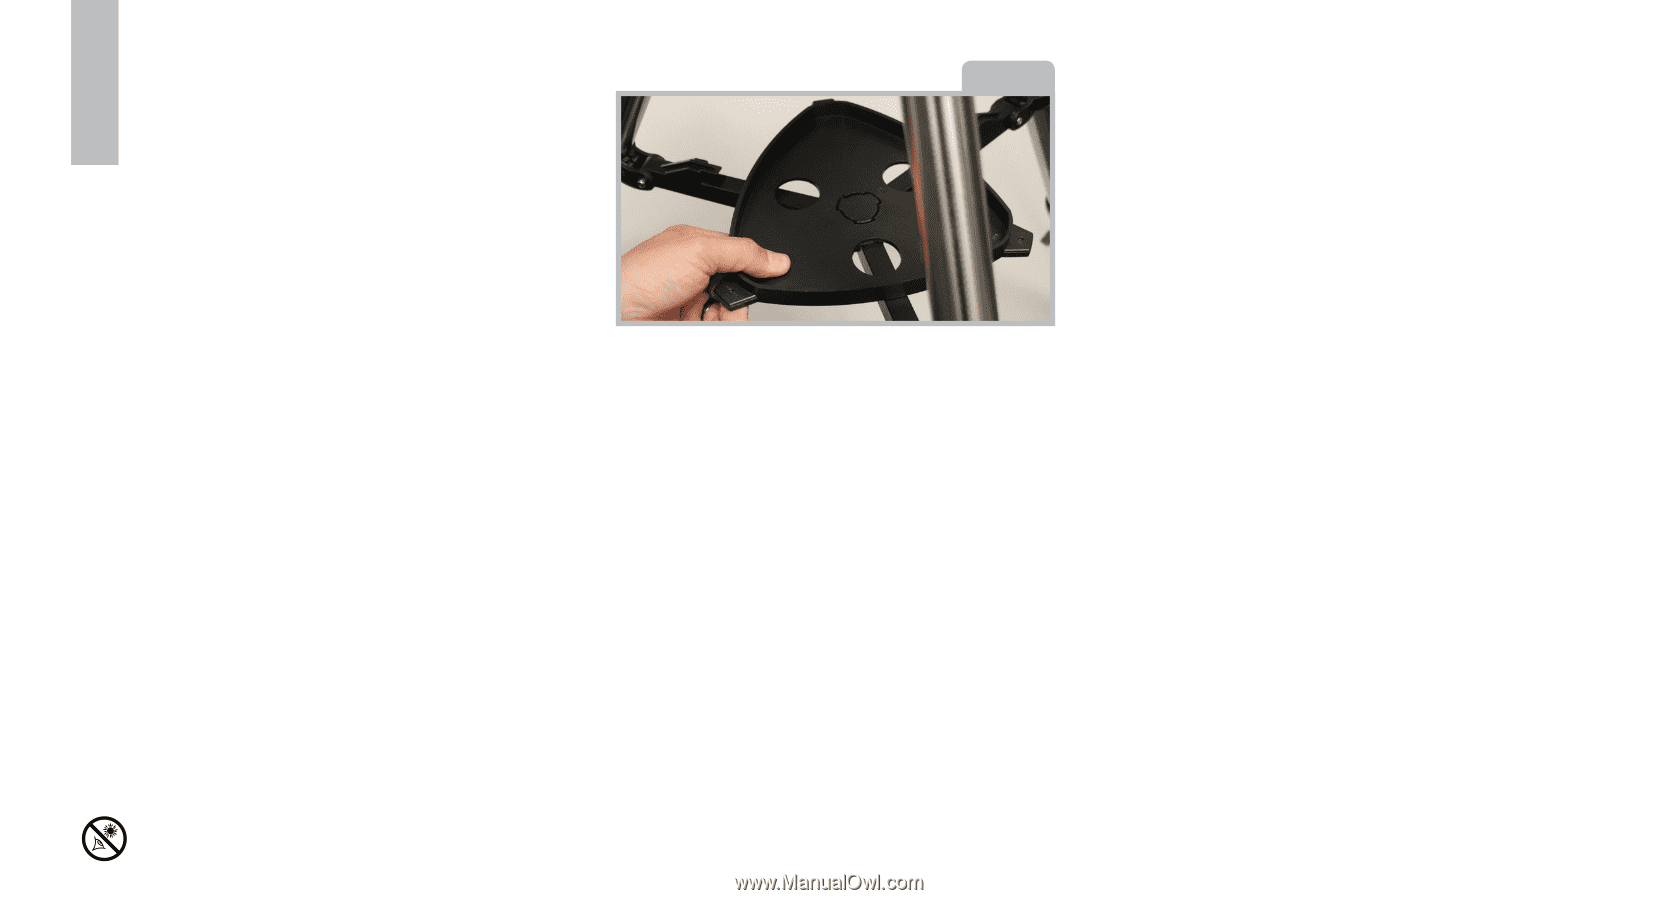
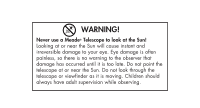
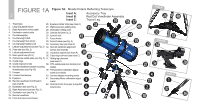
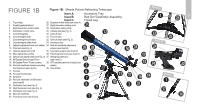
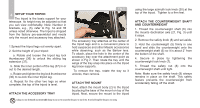
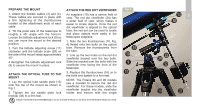
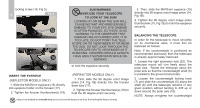
4 SETUP YOUR TRIPOD The tripod is the basic support for your telescope. Its height may be adjusted so that you can view comfortably. Note: Number in brackets, e.g., (3), refer to Fig. 1A and 1B unless noted otherwise. The tripod is shipped from the factory pre-assembled and needs only the mount and accessory tray attached. 1.Spread the tripod legs out evenly apart. 2. Set the height of your tripod: a. Rotate and loosen the tripod leg lock thumbscrew (36) to unlock the sliding leg extension (37). b. Slide the inner portion of the leg (37) in or out to the desired length. c. Rotate and tighten the leg lock thumbscrew (36) to re-lock the inner tripod leg. d. Repeat for the other two legs so when complete, the top of the tripod is level. ATTACH THE ACCESSORY TRAY Fig. 2 The accessory tray attaches at the center of the tripod legs and is a convenient place to hold eyepieces and other Meade accessories while observing, such as the Barlow lens. To attach, place the hole in the center of the accessory tray over the attachment point as shown in Fig 2. Then rotate the tray until the wings of the tray snap into place on the tripod leg brace supports. To remove the tray, rotate the tray so it unlocks, then remove. ATTACH THE MOUNT Next, attach the mount body (2) to the tripod by placing the base of the mount on top of the tripod. Next, secure the mount to the tripod Looking at or near the Sun will cause irreversable damage to your eye. Do not point this telescope at or near the Sun. Do not look through the telescope as it is moving. using the large azimuth lock knob (30) at the top of the tripod. Tighten to a firm feel. ATTACH THE COUNTERWEIGHT SHAFT AND COUNTERWEIGHT 1. Thread the counterweight shaft (6) into the mounts declination axis (21, Fig. 3) until it stops. 2. Remove the safety knob (8) and set aside. 3. Hold the counterweight (5) firmly in one hand and slide the counterweight onto the counterweight shaft (6) so it is about 2" from the bottom of the shaft. 4. Secure in place by tightening the counterweight lock knob (7). 5. Thread the safety nut (8) into the counterweight shaft until tight. Note: Make sure the safety knob (8) always remains in place on the shaft. This safety feature prevents the counterweight from accidentally falling off the shaft.
-
 1
1 -
 2
2 -
 3
3 -
 4
4 -
 5
5 -
 6
6 -
 7
7 -
 8
8 -
 9
9 -
 10
10 -
 11
11 -
 12
12 -
13
-
14
-
15
-
16
-
17
-
18
-
19
-
20
-
21
-
22
-
23
-
24
-
25
-
26
-
27
-
28
 |
 |