Meade TE278W User Manual - Page 6
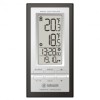
Remote Sensor, Main Unit
 |
View all Meade TE278W manuals
Add to My Manuals
Save this manual to your list of manuals |
Page 6 highlights
BATTERY INSTALLATION REMOTE SENSOR NOTE: Install the batteries and select the channel before mounting the remote sensor. • Remove the screws from the battery compartment with a small Phillips screwdriver (not included). • Set the channel 1 through 3. The switch is located in the battery compartment. Channel 1 is typically selected if only one remote sensor is being used. • Install two (2) AA size batteries (not included) matching polarity as shown in the battery compartment. • Replace the battery compartment door and secure the screws. • Secure the remote sensor in the desired location. MAIN UNIT • Remove the battery door located at the back of the main unit. • Insert two (2) AAA size batteries according to the polarities shown and replace the battery compartment door. • When placing the main unit on the table or other horizontal surface, unfold and adjust the table stand for the desired viewing angle. LOW BATTERY WARNING REMOTE SENSOR A low-battery indicator [ ] will appear next to the outdoor temperature reading of the main unit warning that the corresponding batteries need replacement. MAIN UNIT A low-battery indicator [ ] will appear next to the time display of the main unit warning that the corresponding batteries need replacement. PLACEMENT REMOTE SENSOR • The remote sensor should be placed under eaves or a similar location with free air circulation, sheltered from direct sunlight and extreme weather. • Ideally, place the remote sensor over soil, rather than asphalt, which would cause false readings. • Avoid placing the remote sensor near sources of heat, such as chimneys and heating elements. • Avoid areas that collect heat from the sun and radiate heat, such as metal, brick or concrete structures, paving, and patios. • The international standard for the valid air temperature measurements is 4 feet (1.25 meters) above the ground. MAIN UNIT • Make sure that the main unit is locating within the operating range of all remote sensors. • Ideally the main unit should be placed within line of sight of remote sensors. Avoid placing the main unit where surfaces emitting and radiating heat (e.g. heating ducts or air conditioners) and areas with interference from wireless devices (e.g. cordless phones, radio headsets, baby monitoring devices and other electronics). 6
-
 1
1 -
 2
2 -
 3
3 -
 4
4 -
 5
5 -
 6
6 -
 7
7 -
 8
8 -
 9
9 -
 10
10 -
 11
11 -
 12
12 -
13
-
14
 |
 |
