Meade TE827W User Manual - Page 11
A. Up ?, B. Down ?, C. Set, D. Channel, E. Memory, F. History, G. Alarm/chart, H. Battery,
 |
View all Meade TE827W manuals
Add to My Manuals
Save this manual to your list of manuals |
Page 11 highlights
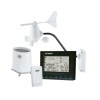
A. UP ? - Mode Selection: selects the next available mode counter-clockwise - When programming: increases parameters B. DOWN ? C. SET D. CHANNEL E. MEMORY F. HISTORY G. ALARM/CHART - Mode Selection: selects the next available mode clockwise - When programming: decreases parameters - Rotates display for current mode - Press and hold: to enter the programming mode - Locks in: set parameters - Manually selects the channel # for receiving temperature and humidity sensor data - Enables the temperature and humidity channel auto-scan mode - Records: moon phase, temperature, humidity, rainfall and wind records. Then stores in memory - Moon phase: Determined by the day of month interval - Sets and stores pressure & altitude units in Memory - Displays sea-level pressure history - Displays alarm times and programmed alerts for temperature, rainfall and wind. - Press and hold, to enter the alarm/alert programming mode - Press and hold in pressure and forecast mode, to view different bar charts H. BATTERY COMPARTMENT - Requires four (4) AA size batteries I. TABEL STAND - Places the main unit on the table or other horizontal surface J. SNOOZE - Activates Snooze delay for alarms (programmable 1 to 15 minutes) K. AC/ DC ADAPTOR INPUT - Connects main unit to the power outlet through the AC to 7.5V DC adapter provided NAVIGATING THROUGH THE MODES The main unit has five (5) different modes (windows) displaying separate data: Weather Forecast, Clock & Alarm, Temperature and Humidity, Rain, and Wind. When a specific mode is selected the corresponding icon begins flashing. Press UP button to cycle through the modes clockwise or DOWN ? button for counter-clockwise. Pressure and Weather Forecast Window Displays: • Current pressure and history bar-chart • Weather forecast • Moon phase 11
-
 1
1 -
2
-
3
-
4
-
5
-
 6
6 -
 7
7 -
 8
8 -
 9
9 -
 10
10 -
 11
11 -
 12
12 -
 13
13 -
 14
14 -
 15
15 -
 16
16 -
17
-
18
-
19
-
20
-
21
-
22
-
23
-
24
-
25
-
26
 |
 |
