Meade TS34C-M User Manual - Page 6
Battery installation, Mounting, Placement tips - model
 |
View all Meade TS34C-M manuals
Add to My Manuals
Save this manual to your list of manuals |
Page 6 highlights
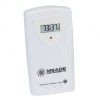
Battery installation • Remove the screws from the battery compartment with a small Phillips screwdriver. • Set the channel 1 through 5. The switch is located in the battery compartment. Channel 1 is typically selected if only one remote thermo-hygrometer is being used. • Install 2 "AA" size alkaline batteries (not included) matching the polarities shown in the battery compartment. • Replace the battery compartment door and secure the screws. • Secure the remote thermo-hygrometer in the desired location. Mounting • The remote thermo-hygrometer can be placed on the flat surface or mounted on the wall in vertical position • Use the wall mount hardware and screws provided when mounting the remote thermo-hygrometer on the wall Placement tips: • The remote thermo-hygrometer should be placed in the area with a free air circulation and sheltered from the direct sunlight and an extreme weather conditions. • Ideally, place the remote thermo-hygrometer above the natural surfaces (such as a grassy lawn). • Avoid placing the remote thermo-hygrometer near sources of heat such as chimneys and heating elements. • Avoid any areas collecting and radiating a heat from the sun, such as metal, brick or concrete structures, paving, patios and decks. • The international standard for the valid air temperature measurements is 4 feet (1.25meters) above the ground. Note: To display the readings from the remote thermohygrometer you must own the main display unit of the Meade Professional Weather Station TE923W-M, model number TE923W-M. Additionally it will work with all other Meade weather station models. 6
-
 1
1 -
 2
2 -
 3
3 -
 4
4 -
 5
5 -
 6
6 -
 7
7 -
 8
8 -
 9
9 -
 10
10 -
 11
11 -
 12
12
 |
 |
