Memorex MB1055 Quick Start Guide - Page 1
Memorex MB1055 - Full Size Cassette Recorder Manual
 |
UPC - 749720105502
View all Memorex MB1055 manuals
Add to My Manuals
Save this manual to your list of manuals |
Page 1 highlights
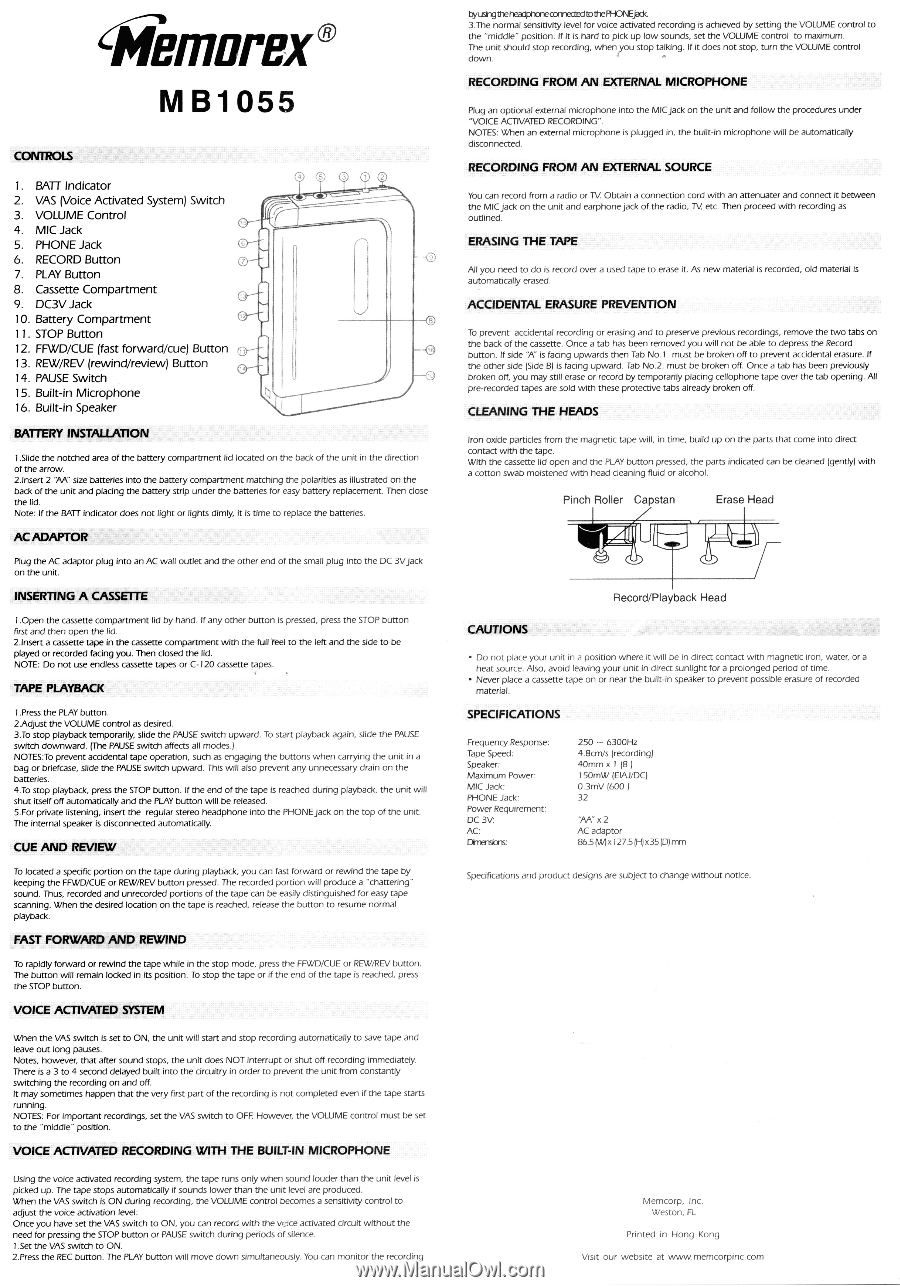
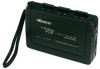
Wemorex° MB1055 COIVTROLS 1. GATT Indicator 4 2 2. VAS (Voice Activated System) Switch 3. VOLUME Control 4. MIC Jack r -- 5. PHONE Jack 6 6. RECORD Button 7 7. PLAY Button 8. Cassette Compartment 9. DC3V Jack 10. Battery Compartment 11. STOP Button 12. FFWD/CUE (fast forward/cue) Button 13. REW/REV (rewind/review) Button 14. PAUSE Switch 15. Built-in Microphone 16. Built-in Speaker BATTERY INSTALLATION I .Slide the notched area of the battery compartment lid located on the back of the unit in the direction of the arrow. 2.Insert 2 "AA" size batteries into the battery compartment matching the polarities as illustrated on the back of the unit and placing the battery strip under the batteries for easy battery replacement. Then close the lid. Note: If the BATT indicator does not light or lights dimly, it is time to replace the batteries. AC ADAPTOR Plug the AC adaptor plug into an AC wall outlet and the other end of the small plug into the DC 3Vjack on the unit. INSERTING A CASSETTE I .Open the cassette compartment lid by hand. If any other button is pressed, press the STOP button first and then open the lid. 2.Insert a cassette tape in the cassette compartment with the full Peel to the left and the side to be played or recorded facing you. Then closed the lid. NOTE: Do not use endless cassette tapes or C-120 cassette tapes. TAPE PLAYBACK I .Press the PLAY button. 2Adjust the VOLUME control as desired. 3.To stop playback temporarily, slide the PAUSE switch upward. To start playback again, slide the PAUSE switch downward. (The PAUSE switch affects all modes.) NOTES:To prevent accidental tape operation, such as engaging the buttons when carrying the unit in a bag or briefcase, slide the PAUSE switch upward. This will also prevent any unnecessary drain on the batteries. 4.To stop playback, press the STOP button. If the end of the tape is reached during playback, the unit will shut itself off automatically and the PLAY button will be released. 5.For private listening, insert the regular stereo headphone into the PHONEjack on the top of the unit. The internal speaker is disconnected automatically. CUE AND REVIEW To located a specific portion on the tape during playback, you can fast forward or rewind the tape by keeping the FFWD/CUE or REW/REV button pressed. The recorded portion will produce a "chattering" sound. Thus, recorded and unrecorded portions of the tape can be easily distinguished for easy tape scanning. When the desired location on the tape is reached, release the button to resume normal playback. FAST FORWARD AND REWIND To rapidly forward or rewind the tape while in the stop mode, press the FFWD/CUE or REW/REV button. The button will remain locked in its position. To stop the tape or if the end of the tape is reached, press the STOP button. VOICE ACTIVATED SYSTEM When the VAS switch is set to ON, the unit will start and stop recording automatically to save tape and leave out long pauses. Notes, however, that after sound stops, the unit does NOT interrupt or shut off recording immediately There is a 3 to 4 second delayed built into the circuitry in order to prevent the unit from constantly switching the recording on and off. It may sometimes happen that the very first part of the recording is not completed even if the tape starts running. NOTES: For important recordings, set the VAS switch to OFF. However, the VOWME control must be set to the "middle" position. VOICE ACTIVATED RECORDING WITH THE BUILT-IN MICROPHONE Using the voice activated recording system, the tape runs only when sound louder than the unit level is picked up. The tape stops automatically if sounds lower than the unit level are produced. When the VAS switch is ON during recording, the VOWME control becomes a sensitivity control to adjust the voice activation level: Once you have set the VAS switch to ON, you can record with the voce activated circuit without the need for pressing the STOP button or PAUSE switch during periods of silence. 1.Set the VAS switch to ON. 2.Press the REC button. The PLAY button will move down simultaneously You can monitor the recording tyushgthe ccrnectedtothePHONEjadc 3.The normal sensitivity level for voice activated recording is achieved by setting the VOWME control to the "middle" position. If it is hard to pick up low sounds, set the VOWME control to maximum. The unit should stop recording, when you stop talking. If it does not stop, turn the VOWME control down. RECORDING AN EXTERNAL II/WM:NW:WE Plug an optional external microphone into the MICjack on the unit and follow the procedures under "VOICE ACTIVATED RECORDING". NOTES: When an external microphone is plugged in, the built-in microphone will be automatically disconnected. RECORDING FROM AN EXTERNAL SOURCE You can record from a radio or TV Obtain a connection cord with an attenuater and connect it between the AMC jack on the unit and earphonejack of the radio, TV etc. Then proceed with recording as outlined. ERASING THE TAPE All you need to do is record over a used tape to erase it. As new material is recorded, old material is automatically erased. ACCIDENTAL ERASURE PREVENTION To prevent accidental recording or erasing and to preserve previous recordings, remove the two tabs on the back of the cassette. Once a tab has been removed you will not be able to depress the Record button. If side 'A' is facing upwards then Tab No.1. must be broken off to prevent accidental erasure. If the other side (Side BI is facing upward. Tab No.2. must be broken off. Once a tab has been previously broken off, you may still erase or record by temporarily placing cellophone tape over the tab opening. All pre-recorded tapes are sold with these protective tabs already broken off. CLEANING THE HEADS Iron oxide particles from the magnetic tape will, in time, build up on the parts that come into direct contact with the tape. With the cassette lid open and the PLAY button pressed, the parts indicated can be cleaned (gently) with a cotton swab moistened with head cleaning fluid or alcohol. Pinch Roller Capstan Erase Head Record/Playback Head CAUTIONS • Do not place your unit in a position where it will be in direct contact with magnetic iron, water, or a heat source. Also, avoid leaving your unit in direct sunlight for a prolonged period of time. • Never place a cassette tape on or near the built-in speaker to prevent possible erasure of recorded material. SPECIFICATIONS Frequency Response: Tape Speed: Speaker: Maximum Power: MIC Jack: PHONE Jack: Power Requirement: DC 3V: AC: Diruoiva 250 - 6300Hz 4.8cm/s (recording) 40mm x I (8 IS0mW (EIAJ/DC) 0.3mV (600 ) 32 'AA" x 2 AC adaptor 86.5 (W)x 127.5(H)x35(D)mm Specifications and product designs are subject to change without notice. Memcorp, Inc. Weston, FL Printed in Hong Kong Visit our website at www.memcorpinc.com
-
 1
1
 |
 |