Miele B 990 E Operating manual - Page 23
Shirts 23, Shoulder yoke, Collar, Front sides
 |
View all Miele B 990 E manuals
Add to My Manuals
Save this manual to your list of manuals |
Page 23 highlights
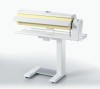
Ironing Tips Shirts ^ Remove the feed board to iron shirts. 1. Shoulder yoke ^ Then turn down the collar and press lightly, holding taut. 3. Front sides ^ Arrange the yoke, collar first, on the roller and smooth out. ^ Hot press the yoke. 2. Collar The collar is ironed on both sides using the left hand end of the roller. Stop ironing when the button comes to the heater plate. ^ Lay the button hole front on the left hand end of the roller with the side seam along the edge of the roller. ^ Iron from the button hem up to the armhole. ^ Now move the shirt out and iron past the armhole to the side seam. ^ Iron the button side inside out so the buttons are pressed into the cushioned surface of the roller. 23
-
 1
1 -
2
-
3
-
4
-
5
-
6
-
7
-
8
-
9
-
10
-
11
-
12
-
13
-
14
-
15
-
16
-
17
-
 18
18 -
 19
19 -
 20
20 -
 21
21 -
 22
22 -
 23
23 -
 24
24 -
 25
25 -
 26
26 -
 27
27 -
 28
28 -
29
-
30
-
31
-
32
-
33
-
34
-
35
-
36
 |
 |

Shirts
^
Remove the feed board to iron shirts.
1. Shoulder yoke
^
Arrange the yoke, collar first, on the
roller and smooth out.
^
Hot press the yoke.
2. Collar
The collar is ironed on both sides using
the left hand end of the roller. Stop
ironing when the button comes to the
heater plate.
^
Then turn down the collar and press
lightly, holding taut.
3. Front sides
^
Lay the button hole front on the left
hand end of the roller with the side
seam along the edge of the roller.
^
Iron from the button hem up to the
armhole.
^
Now move the shirt out and iron past
the armhole to the side seam.
^
Iron the button side inside out so the
buttons are pressed into the
cushioned surface of the roller.
Ironing Tips
23