Motorola H9 User Guide
Motorola H9 Manual
 |
View all Motorola H9 manuals
Add to My Manuals
Save this manual to your list of manuals |
Motorola H9 manual content summary:
- Motorola H9 | User Guide - Page 1
MOTOROLA Miniblue H9 Miniblue H9 Universal BluetoothTM Headset User's Guide - Motorola H9 | User Guide - Page 2
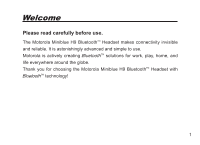
Welcome Please read carefully before use. The Motorola Miniblue H9 BluetoothTM Headset makes connectivity invisible and reliable. It is astonishingly advanced and simple to use. Motorola is actively creating Bluetooth TM solutions for work, play, home, and life everywhere around the globe. Thank you - Motorola H9 | User Guide - Page 3
and regulations on the use of these products. MOTOROLA and the Stylized M Logo are registered in the US Patent & Trademark Office. The Bluetooth trademarks are owned by their proprietor and used by Motorola, Inc. under license. All other product or service names are the property of their respective - Motorola H9 | User Guide - Page 4
欢迎使用 Miniblue H9 BluetoothTM Miniblue H9 3 - Motorola H9 | User Guide - Page 5
MOTOROLA及Stylized M 2007 4 - Motorola H9 | User Guide - Page 6
欢迎使用 Miniblue H9 BluetoothTM Miniblue H9 5 - Motorola H9 | User Guide - Page 7
MOTOROLA及Stylized M 2007 6 - Motorola H9 | User Guide - Page 8
BEFORE YOU BEGIN ① CHARGE Your Headset's Battery ② START BLUETOOTH FEATURE Your Phone ③ PAIR Your Headset ③ PAIR Continued Your Phone ④TEST AND USE USING YOUR PORTABLE CHARGER BASE USING HEADSET TURNING ON AND OFF EARTIPS AND YOUR HEADSET INSTALLING EARTIP WEARING HEADSET CHANGING VOLUME BUTTON - Motorola H9 | User Guide - Page 9
- Motorola H9 | User Guide - Page 10
- Motorola H9 | User Guide - Page 11
GET CONNECTED IN 4 QUICK STEPS 1 - Motorola H9 | User Guide - Page 12
your new H9 Bluetooth Handsfree Headset. Along with your headset, a portable charger base is provided for both storage and on-the-go remote charging. Volume Buttons Earpiece Speaker Eartip Microphone Call Button Indicator Light 2 Headset Battery Indicator Charger Battery Indicator Charger Plug - Motorola H9 | User Guide - Page 13
① CHARGE Your Headset's Battery 1 Plug the Motorola power supply into charger port on portable charger base. The charger battery indicator light( ) turns on. Note: if using a Dual Charging Adapter (sold separately), plug the "Phone side" of cable into the charger base. 3 - Motorola H9 | User Guide - Page 14
turns on. When headset's battery is fully charged (about 3 hours), the headset battery indicator light turns off. 3 When headset is fully charged, proceed to step 2. Do not remove the headset from the charger base until step 3. Note: Once the headset is fully charged, the charger base will continue - Motorola H9 | User Guide - Page 15
Connection >Bluetooth Link > Setup. 2 Scroll to Power. 3 Select Change. 4 Scroll to On. 5 Press Select to turn on the Bluetooth feature. The Bluetooth feature remains on until you turn the feature off. Note: These steps are for most Motorola phones. For other phones, see your phone's user's guide. 5 - Motorola H9 | User Guide - Page 16
from charger base. The indicator light flashes to initiate easy pairing. After a few moments, the indicator light will be steadily lit in blue to indicate headset is in pairing mode. Indicator Light (steadily blue for pairing mode) If the headset does not enter pairing mode, see TROUBLESHOOTING for - Motorola H9 | User Guide - Page 17
Link >Handsfree > Look for Devices. The phone lists Bluetooth devices it finds. 2 Select Motorola Miniblue. 3 Select OK or Yes to pair your headset with your phone. 4 Enter the passkey: 0000 5 Select OK. When your headset successfully pairs and connects with your phone, the indicator light changes - Motorola H9 | User Guide - Page 18
phone. 3 If your phone and headset are successfully paired, you will hear ringing on the headset. After you have successfully paired your phone and headset, you don't need to repeat these steps. For daily use, ensure that your headset is turned ON and that your phone's Bluetooth feature is ON. 8 - Motorola H9 | User Guide - Page 19
off" your headset's battery. Using the included Motorola power supply, you can charge both the portable charger base and headset at the same time. The portable base charger provides two indicator lights for charging status. See "Indicator Lights" in the reverse side of this guide for information on - Motorola H9 | User Guide - Page 20
USING HEADSET Features and Functions Guide See Features and Functions Guide on using your H9. IMPORTANT: Be sure to first follow the MOTOSTART User Manual to complete initial setup of your H9 10 - Motorola H9 | User Guide - Page 21
on, press and hold the Call button until the indicator light flashes. To turn you headset off, press and hold the Call button until the indicator light flashes rapidly and then turns off. To conserve battery power, store your headset in the included charger base. Indicator Light Call Button 11 - Motorola H9 | User Guide - Page 22
EARTIPS AND YOUR HEADSET Your H9 headset is supplied with multiple eartips. The eartip is fitted onto the end of your headset's earpiece speaker, and placed into your ear when using your headset. Flanged Tip Your headset's performance is greatly dependent upon achieving a good seal in your ear. - Motorola H9 | User Guide - Page 23
INSTALLING EARTIP When installing an eartip, carefully place it onto the tip of the earpiece speaker. 1 Pull back largest flange on eartip. 2 Twist eartip onto earpiece starting at an angle and pushing onto headset. 3 Pull flange back to wearing position. 13 - Motorola H9 | User Guide - Page 24
WEARING HEADSET To wear your headset, insert the headset's earpiece speaker with installed eartip into your ear. The eartip should form a comfortable seal. 14 - Motorola H9 | User Guide - Page 25
CHANGING VOLUME BUTTON ORIENTATION You can also change the orientation of the volume buttons on your headset. 1 Turn the headset power off. 2 Press both the Call button and Volume button you want to assign as the "volume up" button until the indicator light flashes twice. - Motorola H9 | User Guide - Page 26
you hear a medium beep Press and hold the Call button until you hear a medium beep (places first call on hold). Note: Your H9 supports both Handsfree and Headset Profiles. Accessing call functions depends upon which profile your phone supports. See your phone's user's guide for more information. 16 - Motorola H9 | User Guide - Page 27
resume a call on hold you hear a medium beep. Transfer a call from the Tap the Call button phone to the headset Transfer a call from the Press and hold the Call button until headset to the phone you hear a low beep Mute or unmute a call Tap both Volume buttons Disable or enable the Press - Motorola H9 | User Guide - Page 28
volume button Five rapid high tones repeated every 20 sec. No audio indications; detereriorating quality Ring tone Single very high tone Single high tone Headset Status Volume at minimum or maximum Low battery Out of range Incoming call All calls ended Tapping Call button or both volume buttons 18 - Motorola H9 | User Guide - Page 29
medium tone Single low tone Single high tone repeated every 5 sec Two ascending tones Two descending tones Four ascending tones Four descending tones Headset Status Pressing Call button or both Volume buttons for 1-2 sec Pressing and holding Call button or both Volume buttons for greater than - Motorola H9 | User Guide - Page 30
charger base status. Charger Base Indicator Charger Battery ( ) Headset Battery ( ) Status (On) Charging (Flashing) Battery low (Off) charging complete (On) Charging (Off) charging complete Headset Indicator Off On (steady) 10 rapid flashes Slow pulse Quick flash Status Power off Pairing - Motorola H9 | User Guide - Page 31
is now in pairing mode. My phone doesn't find my headset. Make sure the indicator light on your headset is on (lit in blue) and steady when your phone is searching for devices (see step 3). My headset worked before but now it's not working. Make sure your phone is on and the Bluetooth feature is - Motorola H9 | User Guide - Page 32
SUPPORT If you need more help, contact us at 1- 877-MOTOBLU or visit us at www.hellomoto.com/Bluetoothsupport Motorola, Inc. Consumer Advocacy Office 1307 East Algonquin Road Schaumburg, IL 60196 www.hellomoto.com 1-877-MOTOBLU 1-888-390-6456 (TTY/TDD United States for hearing impaired) 22 - Motorola H9 | User Guide - Page 33
use of wireless devices and their accessories may be prohibited or restricted in certain areas. Always obey the laws and regulations on the use of these products. The Bluetooth trademarks are owned by their proprietor and used by Motorola, Inc. under license. All other product or service names are - Motorola H9 | User Guide - Page 34
an example of a typical Product Approval Number. You can view your product's Declaration of Conformity (DoC) to Directive 1999/5/EC (to R&TTE Directive) at www.motorola.com/rtte. To find your DoC, enter the product Approval Number from your product's label in the "Search" bar on the Web site. 24 - Motorola H9 | User Guide - Page 35
4 25 - Motorola H9 | User Guide - Page 36
准备工作 在使用H9 音量按钮 指示灯 26 - Motorola H9 | User Guide - Page 37
1 27 - Motorola H9 | User Guide - Page 38
2 3 3 2步。第3 6.5 28 - Motorola H9 | User Guide - Page 39
29 - Motorola H9 | User Guide - Page 40
A 30 - Motorola H9 | User Guide - Page 41
31 - Motorola H9 | User Guide - Page 42
1 2 3 32 - Motorola H9 | User Guide - Page 43
USB 33 - Motorola H9 | User Guide - Page 44
H9 H9 34 - Motorola H9 | User Guide - Page 45
指示灯 通话按钮 35 - Motorola H9 | User Guide - Page 46
H9 36 - Motorola H9 | User Guide - Page 47
1 2 3 37 - Motorola H9 | User Guide - Page 48
佩戴耳机 38 - Motorola H9 | User Guide - Page 49
1 2 音量按钮 通话按钮 指示灯 39 - Motorola H9 | User Guide - Page 50
通话 注意:H9 40 - Motorola H9 | User Guide - Page 51
功能 操作步骤 切换通话 低提示音 41 - Motorola H9 | User Guide - Page 52
42 - Motorola H9 | User Guide - Page 53
一声低音 每5 1-2 2 43 - Motorola H9 | User Guide - Page 54
指示灯 指示灯 状态 耳机电池 ( ) 耳机 10 耳机状态 5 44 - Motorola H9 | User Guide - Page 55
10 3)。 2 2 3)。 45 - Motorola H9 | User Guide - Page 56
46 - Motorola H9 | User Guide - Page 57
MOTOROLA M Inc. 2007 47 - Motorola H9 | User Guide - Page 58
48 - Motorola H9 | User Guide - Page 59
部件名称 铅(Pb) 汞(Hg) 镉(Cd Cr6+) (PBB) (PBDE) SJ/T 11363-2006 SJ/T 11363-2006 手机 x o o o o o 电池 x o o o o o 配件 x o o o o o 以下2 电池 49 - Motorola H9 | User Guide - Page 60
4 50 - Motorola H9 | User Guide - Page 61
备工作 在使用H9 音量按鈕 指示燈 51 - Motorola H9 | User Guide - Page 62
1 52 - Motorola H9 | User Guide - Page 63
2 3 3 2步。第3 6.5 53 - Motorola H9 | User Guide - Page 64
54 - Motorola H9 | User Guide - Page 65
A 55 - Motorola H9 | User Guide - Page 66
56 - Motorola H9 | User Guide - Page 67
1 2 3 57 - Motorola H9 | User Guide - Page 68
USB 58 - Motorola H9 | User Guide - Page 69
H9 H9 59 - Motorola H9 | User Guide - Page 70
指示燈 通話按鈕 60 - Motorola H9 | User Guide - Page 71
H9 61 - Motorola H9 | User Guide - Page 72
1 2 3 62 - Motorola H9 | User Guide - Page 73
佩戴耳机 63 - Motorola H9 | User Guide - Page 74
1 2 音量按鈕 通話按鈕 指示燈 64 - Motorola H9 | User Guide - Page 75
通话 注意:H9 65 - Motorola H9 | User Guide - Page 76
功能 操作步骤 切換通話 低提示音 66 - Motorola H9 | User Guide - Page 77
提示音 5 20 超出範圍 67 - Motorola H9 | User Guide - Page 78
一聲低音 每5 1-2 2 68 - Motorola H9 | User Guide - Page 79
指示灯 指示灯 状态 耳機電池 ( ) 耳机 10 耳机状态 5 69 - Motorola H9 | User Guide - Page 80
疑难排解 10 3)。 2 2 3)。 70 - Motorola H9 | User Guide - Page 81
技术支援 1-877-MOTOBLU www.hellomoto.com/Bluetoothsupport Motorola, Inc 1307 East Algonquin Road Schaumburg, IL 60196 www.hellomoto.com 1-877-MOTOBLU 1-888-390-6456 TTY/TDD服務) 886-2-27051811 852-25063888(香港) 71 - Motorola H9 | User Guide - Page 82
MOTOROLA M Inc. 2007 72 - Motorola H9 | User Guide - Page 83
73 - Motorola H9 | User Guide - Page 84
6881050B86
-
 1
1 -
 2
2 -
 3
3 -
 4
4 -
 5
5 -
 6
6 -
 7
7 -
8
-
9
-
10
-
11
-
12
-
13
-
14
-
15
-
16
-
17
-
18
-
19
-
20
-
21
-
22
-
23
-
24
-
25
-
26
-
27
-
28
-
29
-
30
-
31
-
32
-
33
-
34
-
35
-
36
-
37
-
38
-
39
-
40
-
41
-
42
-
43
-
44
-
45
-
46
-
47
-
48
-
49
-
50
-
51
-
52
-
53
-
54
-
55
-
56
-
57
-
58
-
59
-
60
-
61
-
62
-
63
-
64
-
65
-
66
-
67
-
68
-
69
-
70
-
71
-
72
-
73
-
74
-
75
-
76
-
77
-
78
-
79
-
80
-
81
-
82
-
83
-
84
 |
 |

MOTOROLA
Miniblue H9
迷你型蓝牙耳机用户手册
Miniblue H9 Universal Bluetooth
TM
Headset User's Guide