Motorola HMEZ2000 User Guide - Page 4
Installing Your Camera - drivers
 |
UPC - 612572126226
View all Motorola HMEZ2000 manuals
Add to My Manuals
Save this manual to your list of manuals |
Page 4 highlights
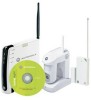
Installing the Software and Wireless System Controller Do not connect your Wireless System Controller to your computer until the Installation Wizard instructs you to do so. 1 Insert the enclosed Motorola homesight CD in the CD-ROM drive. The Motorola homesight Installation Wizard is displayed. a. If the application does not appear or autorun, right-click the Start button and select Explore. b. Select your CD-ROM and double-click to open. c. Double-click Launch.exe to start the application. 2 Click Next. The Choose Destination Location window is displayed. 3 Click Next to accept the default destination folder or click Browse to select a new one. After you click Next, the Select Program Folder window is displayed. 4 Accept the default folder or choose a new one. Click Next. The file installation begins. After a few moments, the Install Motorola homesight Hardware and Driver window is displayed. 5 Plug the AC adapter into the Power port on the Wireless System Controller and into an AC wall outlet. This powers on your Wireless System Controller. 6 Connect the USB cable on the Wireless System Controller to the USB port on your computer. Windows automatically installs the required drivers. 7 If desired, replace the Wireless System Controller back cover as described in the Motorola homesight User Guide. 8 Once the driver installation is complete, click Next. "The Software installation was successful window" is displayed. Be sure the checkbox "Launch Motorola homesight" is selected. Wireless System Controller 9 Click Finish. The Motorola Setup Wizard is displayed. Follow the steps for PC installing The Motorola homesight software. Installing Your Camera Your camera can either be mounted on a wall or just sit on a level surface. Wall Mount Your Wireless Motion Sensor Camera Make sure the power adapter cord is long enough to reach your mounting location. Also, be sure the AC outlet cannot be switched on and off with a wall switch. 1 Using the holes on the drilling template found later in this guide, mark the position of the holes to be drilled. For drywall or other composite surfaces, use a 7/32" drill bit. Drill a hole for each of the mounting screws and insert a plastic wall anchor into each hole. For other solid surfaces, use a 1/16" drill bit. Drill a pilot hole for each of the mounting screws. 2 Using the screws provided, secure the camera mounting bracket to the wall. Pull off the camera base by pulling straight down. The base detaches from the upper back side. Slide the camera down on to the bracket until it is firmly seated and you feel it click as the contacts engage. 4
-
 1
1 -
 2
2 -
 3
3 -
 4
4 -
 5
5 -
 6
6 -
 7
7 -
 8
8 -
 9
9 -
 10
10 -
11
 |
 |
