Motorola MOTONAV TN30 TN30 - Getting Started Guide - Page 4
power - car charger
 |
View all Motorola MOTONAV TN30 manuals
Add to My Manuals
Save this manual to your list of manuals |
Page 4 highlights
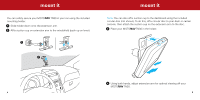
power it Once mounted, apply power to your MOTONAV TN30 using the included car charger. 1 Plug the charger into the power outlet in your vehicle. 2 Plug the charger into the USB port on your device. power it Note: Your battery is designed to last the life of the product. It should only be removed by a recycling facility. ANY ATTEMPT TO REMOVE OR REPLACE YOUR BATTERY WILL DAMAGE THE PRODUCT. For more details on powering and charging your MOTONAV TN30, see "power and charging" on page 20. When plugged into a charger, the indicator light is orange to indicate the device's internal battery is charging. When fully charged, the indicator light turns green. 6 7
-
 1
1 -
 2
2 -
 3
3 -
 4
4 -
 5
5 -
 6
6 -
 7
7 -
 8
8 -
 9
9 -
 10
10 -
11
-
12
-
13
 |
 |
6
7
power it
Note:
Your battery is designed to last the life of the product. It should only
be removed by a recycling facility. ANY ATTEMPT TO REMOVE OR REPLACE
YOUR BATTERY WILL DAMAGE THE PRODUCT.
For more details on powering and charging your MOTO
NAV
TN30, see
“power and charging” on page 20.
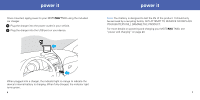
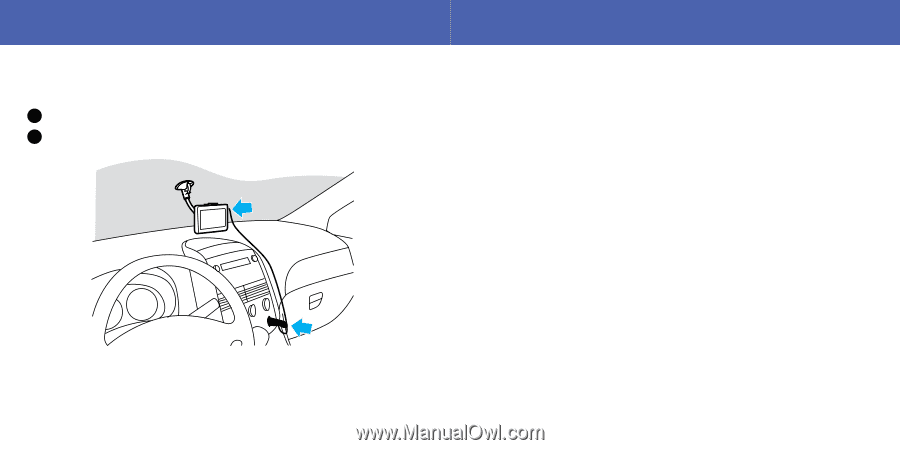
power it
Once mounted, apply power to your MOTO
NAV
TN30 using the included
car charger.
1
Plug the charger into the power outlet in your vehicle.
2
Plug the charger into the USB port on your device.
When plugged into a charger, the indicator light is orange to indicate the
device’s internal battery is charging. When fully charged, the indicator light
turns green.