Motorola P1001 Quick Start Guide - Page 2
Getting started
 |
View all Motorola P1001 manuals
Add to My Manuals
Save this manual to your list of manuals |
Page 2 highlights
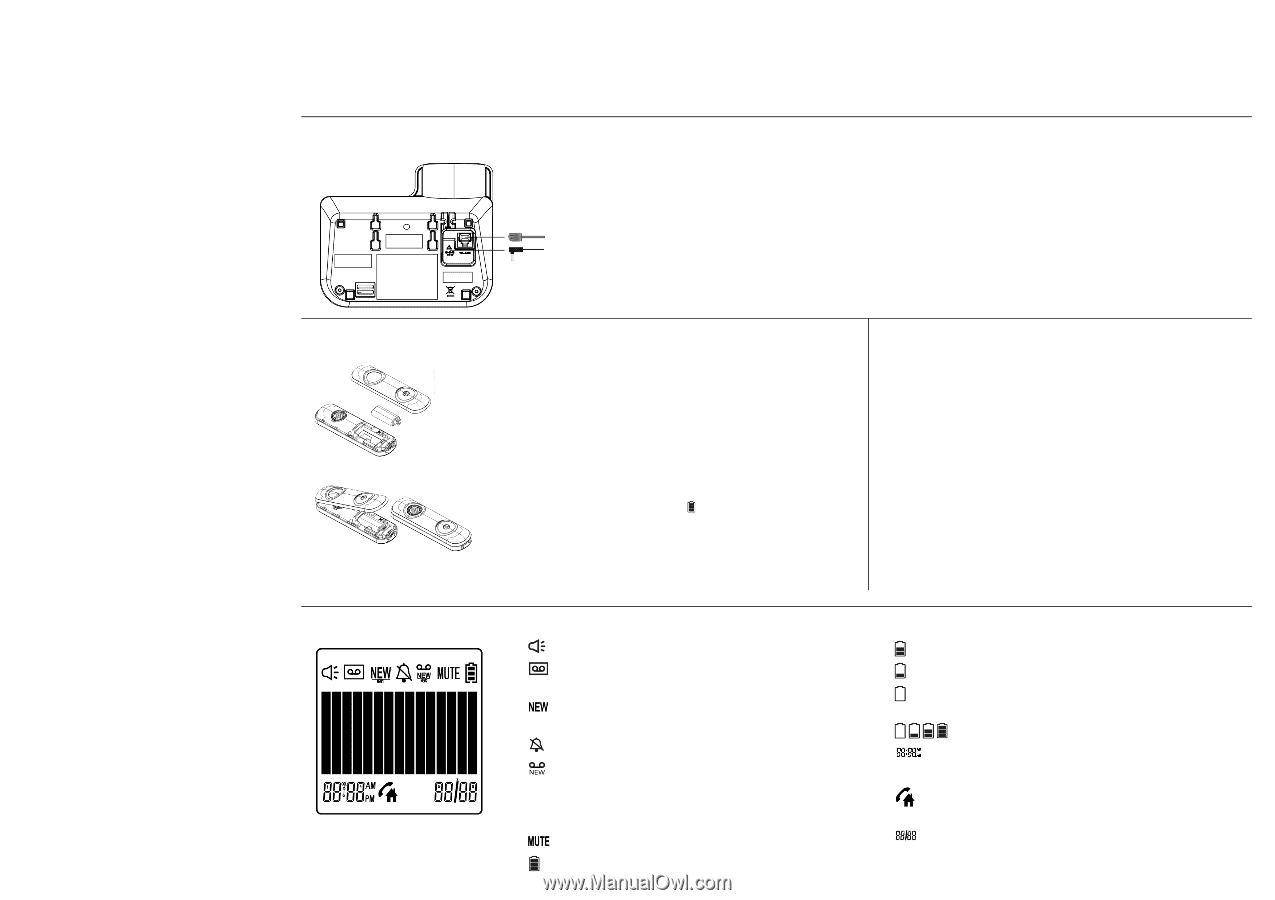
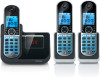
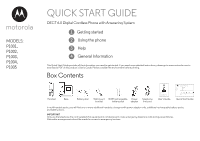
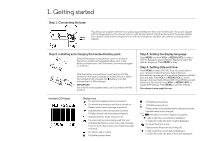
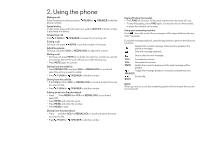
1. Getting started Step 1. Connecting the base Plug the power adapter with the red crystal plug and telephone line cord into the base. The power adapter with the bigger pin is for the charger (only in multi-handset packs). Plug the other end of the power adapter into a power outlet and the telephone line cord into a telephone wall jack. Use only the provided power adapter. Step 2. Installing and charging the handset battery pack Slide off the battery compartment cover to remove it. Place the supplied rechargeable battery pack in the battery compartment, with the battery connector plugged in, as shown. Slide the battery compartment cover back on. Put the handset on the base to charge for at least 24 hours. When the handset is fully charged, the (battery icon) will indicate that it is fully charged. IMPORTANT Use only the rechargeable battery pack provided with this product. Step 3. Setting the display language Press MENU and then VOL+ or REDIAL/VOL- to select SETUP HS. Repeat to select LANGUAGE. Repeat to select the desired language. Press MENU to save. Step 4. Setting date and time Press MENU to select DATE & TIME. If you're a subscriber to your network's Caller ID service, date and time is automatically set when a call is received. Repeat to edit the year and date. Press VOL+ or REDIAL/VOL- to move between the input fields YEAR and DATE. Press MENU and edit the time in 12hr format. Press VOL+ or REDIAL/VOL- to toggle AM/PM settings. Press MENU to save the settings. Your phone is now ready for use. Handset LCD Display Display icons On when the speakerphone is turned on. On when the answering machine is turned on. Flashes when a new message is received. Indicates that a new call has been received. Off after all new calls have been reviewed. Indicates that the ringer volume is off. If a voice mail service is being used, this icon indicates that there is a new voice mail message. The icon is off after all new voice mails have been reviewed. On when a call is muted. Full battery power level. 2/3 battery power level. 1/3 battery power level. Flashes when a low battery level is detected and the handset needs to be charged. Animation in motion. Battery is charging. In idle mode, the current time is displayed. In Caller ID mode, the time of call is displayed. On when the line is in use. Flashes when there is an incoming call. In idle mode the current date is displayed. In Caller ID mode, the date of the call is displayed.
-
 1
1 -
 2
2 -
 3
3 -
 4
4
 |
 |