Motorola moto g stylus User Guide - Page 21
Take portraits, Take close ups and change the background, Action Cam video
 |
View all Motorola moto g stylus manuals
Add to My Manuals
Save this manual to your list of manuals |
Page 21 highlights
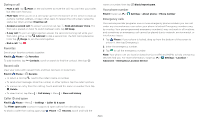
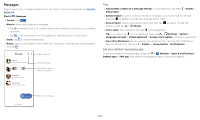
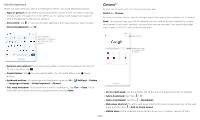
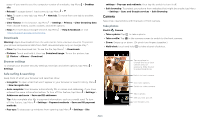
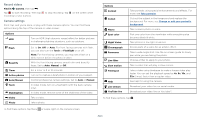
Options Photo size (rear or selfie camera) Video size (rear or selfie camera) Action Cam video size Slow motion size HDR Selfie photo mirror Quick capture Tap anywhere to capture Shutter sound Assistive grid Leveler Watermark Auto smile capture Set the photo resolution for the camera. Set the video resolution. Set the Action Cam Video size. Set the video resolution for a slow motion video. Turn on HDR (high dynamic range) effect for better pictures in challenging lighting situations, such as outdoors. Turn on to take a mirrored selfie. Note that the viewfinder will not show a mirrored selfie, but the photo will be mirrored after you take it. (If your phone has Active Photos, it must be turned off to use this feature.) Twist twice to open or switch between front and back cameras. Capture photos or videos by tapping anywhere on the screen. Zoom by scrolling up or down with one finger. Turn the shutter sound on or off. Overlay a grid to help align the subjects in your photos or videos. Take perfectly level photos using a guide line in the viewfinder. Add a watermark or signature to your photos. Automatically detect smile and take a photo when all of the subjects (limited to five faces) in the viewfinder are smiling. Options Gesture selfie Smart composition Shot optimization Google Lens Storage Save location Hold up your palm to start a two-second timer to take a selfie. Generate an alternate shot that uses the professional photography rule of thirds. Turn on automatic tuning and scene detection. Find out more about the things you see in the viewfinder. See Identify items using Google Lens™. Choose a storage location for your photos and videos (Phone or Memory card). Turn on to tag photos with a location. Take portraits You can use the portrait mode to add a blur effect and make portions of your photo black and white, while keeping the main subject in perfect focus. Find it: Camera > Menu > Portrait 1 Line up your subjects. The closest subject is prioritized automatically. Tap the screen to change the focal point. 2 Slide the bar to increase or decrease the background blur. 3 Tap to take the photo and hold your camera steady. Tip: For best results, subjects should be 2-6 feet away and not side-by-side. When photographing people, aim for the waist up. Take close ups and change the background Use cutout mode to get a close portrait, cut it out from the background, and replace the background with something else. Note: Available when using the back camera only. Find it: Camera > Menu > Cutout Apps
-
 1
1 -
2
-
3
-
4
-
5
-
6
-
7
-
8
-
9
-
10
-
11
-
12
-
13
-
14
-
15
-
 16
16 -
 17
17 -
 18
18 -
 19
19 -
 20
20 -
 21
21 -
 22
22 -
 23
23 -
 24
24 -
 25
25 -
 26
26 -
27
-
28
-
29
-
30
-
31
-
32
-
33
-
34
-
35
-
36
-
37
-
38
-
39
 |
 |
