Mr. Coffee SKX23-RB User Manual - Page 3
Introduction, Special Cord Set Instructions - parts
 |
View all Mr. Coffee SKX23-RB manuals
Add to My Manuals
Save this manual to your list of manuals |
Page 3 highlights
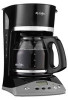
operation for this appliance. Please save these instructions and refer to them for cleaning and care tips. INTRODUCTION Welcome and congratulations on the purchase of your new MR. COFFEE® Coffeemaker. Your new coffeemaker will wake up with you in the morning and provide you breaks and treats during your hectic daily activities.How you enjoy your MR. COFFEE® Coffeemaker is up to you! SPECIAL CORD SET INSTRUCTIONS 1. For your convenience the plug is stored inside the cord storage. 2. A short power supply cord is provided to reduce the hazards resulting from a person or pet becoming entangled in, or tripping over, a longer cord. 3. An extension cord may be purchased and used if care is exercised in its use. 4. If an extension cord is used, the marked electrical rating of the extension cord must be at least 10 amps and 120 volts. The resulting extended cord must be arranged so that it will not drape over a countertop or tabletop where it can be pulled on by children or tripped over accidentally. 5. This appliance has a polarized plug (one blade is wider than the other). To reduce the risk of electric shock, this plug will fit in a polarized outlet only one way. If the plug does not fit fully in the outlet, reverse the plug. If it still does not fit, contact a qualified electrician. Do not modify the plug in any way. You can customize the length of the power cord so that it is the exact length you desire. To increase the length of the power cord: grasp the power cord (not the power plug) and gently lift it out of the slot, then pull it away from the coffeemaker. To decrease the length of the power cord: Grasp the E3 BVMC-SK_15ESM1 .indd 5-6 power cord (not the power plug), lift it out of the slot and gently feed it into the coffeemaker. Lock the cord in the slot when finished. DIAGRAM OF PARTS 1 Dual Water Windows 2 Water Reservoir 3 Filter Basket Lid 4 Pause 'n Serve 5 Cord Storage 6 Warming Plate (not on thermal models) 7 Control Panel (see detail on next page) 8 Glass Decanter or Thermal Carafe 9 Removable Filter Basket 10 Shower Head 3 5 2 1 4 10 9 8 6 E4 1/30/15 11:17 AM
-
 1
1 -
 2
2 -
 3
3 -
 4
4 -
 5
5 -
 6
6 -
 7
7 -
 8
8 -
 9
9 -
10
-
11
-
12
-
13
-
14
-
15
-
16
-
17
-
18
-
19
-
20
-
21
-
22
-
23
-
24
-
25
 |
 |
