NEC 240K User Manual
NEC 240K - LT XGA DLP Projector Manual
 |
UPC - 050927241666
View all NEC 240K manuals
Add to My Manuals
Save this manual to your list of manuals |
NEC 240K manual content summary:
- NEC 240K | User Manual - Page 1
CD-ROM version Portable Projector LT260K/LT240K User's Manual About this user's manual The fastest way to get started is to take your time and do everything right the first time. Take a few minutes now to review the user's manual. This may save you time later on. At the beginning of each section of - NEC 240K | User Manual - Page 2
center of the rooms screen. • The LT260K/LT240K projector provides wired and wireless networking. When using as a wireless LAN projector, no physical signal cable connection to a PC is required.*2 *2 A wireless LAN card is required. The NEC optional wireless LAN card is available. (SWL-2100N-N∗) E-2 - NEC 240K | User Manual - Page 3
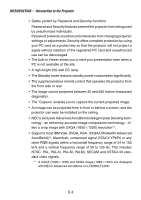
even when a PC is not available at the site. • A high-bright 220 watt DC lamp. • The Standby mode reduces standby power consumption significantly. • The supplied wireless remote control that operates the projector from the front side or rear. • The image can be projected between 30 and 500 inches - NEC 240K | User Manual - Page 4
INTRODUCTION Ͼ Introduction to the Projector NOTE: Composite video standards are as follows: NTSC: U.S. TV standard for video in U.S. and Canada. PAL: TV standard used in Western Europe. PAL-N: TV standard - NEC 240K | User Manual - Page 5
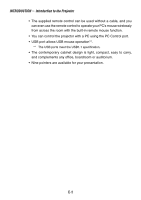
control can be used without a cable, and you can even use the remote control to operate your PC's mouse wirelessly from across the room with the built-in remote mouse function. • You can control the projector with a PC using the PC Control port. • USB port allows USB mouse operation*4. *4 The USB - NEC 240K | User Manual - Page 6
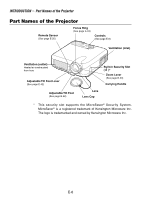
Projector Part Names of the Projector Remote Sensor (See page E-20) Focus Ring (See page E-43) Controls (See page E-8) ON STAND BY PO SWTEALRTAUMSP ALIGNMENT AUTO ADJUST PC-CARD Carrying Handle Lens Lens Cap * This security slot supports the MicroSaver® Security System. MicroSaver® is a - NEC 240K | User Manual - Page 7
INTRODUCTION Ͼ Part Names of the Projector PC Card Slot Remote Sensor (See page E-20) PC Card Eject Button Monaural Speaker (2W) Lamp cover (See page E-121) Ventilation (outlet) Lamp cover screw Rear Foot Rear Foot Rotate to make the projector level. (See page E-43) AC Input Connect the - NEC 240K | User Manual - Page 8
a minimum of two seconds. 2. STATUS Indicator If this light blinks red rapidly, it indicates that an error has occurred, the lamp cover is not attached properly or the projector has overheated. If this light remains orange, it indicates that you have pressed a cabinet key while the Control Panel Key - NEC 240K | User Manual - Page 9
INTRODUCTION Ͼ Part Names of the Projector Ͼ Top Features 4. SOURCE Button Use this button to select a video source such as a PC, VCR, DVD player, Viewer (PC card), or LAN. Press and release this button quickly to display the Source List. Each time this button is pressed for a minimum of ONE second, - NEC 240K | User Manual - Page 10
INTRODUCTION Ͼ Part Names of the Projector Ͼ Top Features ̇̈ : Use these buttons to change the of service. After this light appears, replace the lamp as soon as possible. (See page E-121). If this is lit green continually, it indicates that the lamp mode is set to Eco. See the Lamp Indicator - NEC 240K | User Manual - Page 11
INTRODUCTION Ͼ Part Names of the Projector Ͼ Terminal Panel Features Terminal Panel Features 13 12 9 10 11 the same function as the RGB IN 1 connector. NOTE: The RGB IN 2 does not support SCART output signal and Plug & Play. 3. RGB AUDIO IN Mini Jack (Stereo Mini) This pages E-31 and 100. E-11 - NEC 240K | User Manual - Page 12
Part Names of the Projector external source like a VCR. NOTE: S-Video provides more vivid color and higher resolution than the traditional composite video format. 7. VIDEO the projector. The NEC optional serial cable (CA03D) is required to use this port. You can also control the projector by using - NEC 240K | User Manual - Page 13
port (type A) of your PC using the supplied USB cable. You can operate your computer's mouse functions from the remote control. 12. PC CARD Eject Button Press to eject a PC card partially. 13. PC CARD Slot Insert a PC card, commercially available LAN card or NEC optional wireless LAN card here. E-13 - NEC 240K | User Manual - Page 14
ASPECT INTRODUCTION Ͼ Part Names of the Remote Control Part Names of the Remote Control SLIDE VIEWER 21 and hold the POWER ON button for a minimum of two seconds. 17 20 5. POWER OFF Button 22 You can use this button to turn your 23 projector off. 24 25 NOTE: To turn off the projector - NEC 240K | User Manual - Page 15
INTRODUCTION Ͼ Part Names of the Remote Control 6. VIDEO Button Press this button to select an NTSC, PAL, PAL-N, PAL-M, PAL60, SECAM or NTSC4.43 compatible video source from a VCR, DVD player, - NEC 240K | User Manual - Page 16
INTRODUCTION Ͼ Part Names of the Remote Control 13. SELECT ̆̄̇̈ (Mouse) Button When you are in the Computer mode, these buttons work as a computer mouse. When you are in the Projector mode, which is indicated by lighting the PJ button. See page E-52. ̆̄ : Use these buttons to select the menu of the - NEC 240K | User Manual - Page 17
INTRODUCTION Ͼ Part Names of the Remote Control 44. 20. HELP Button Provides the online help or the set information. 21. POINTER Button Press this button to display one of the eight pointers; press page E-55. 24. PICTURE Button Press this button to display the Picture adjustement screen such - NEC 240K | User Manual - Page 18
INTRODUCTION Ͼ Part Names of the Remote Control 25. to select Viewer source to display a list of folders included in a PC card. See page E-67. 29. SLIDE LIST Button Press this button to select Viewer source you are in the Projector mode. If no buttons are pressed within 60 seconds, the light goes out and the - NEC 240K | User Manual - Page 19
INTRODUCTION Ͼ Part Names of the Remote Control Battery Installation 1. Press the catch and remove the battery cover. 2. Remove both old batteries and install new ones (AA). Ensure that you have the - NEC 240K | User Manual - Page 20
Part Names of the Remote Control Remote Control Precautions • Handle the remote control carefully. • If the remote control gets wet, wipe it dry immediately. • Avoid excessive heat and humidity. • If you will not be using the remote ˚ 30˚ Remote sensor on the projector cabinet Remote control • - NEC 240K | User Manual - Page 21
projector and how to connect video and audio sources. 1 2 3 To the wall outlet. Your projector is simple to set up and use. But before you get started, you must first: z Set up a screen and the projector . x Connect your computer or video equipment to the projector. See page - NEC 240K | User Manual - Page 22
the Screen and the Projector Selecting a Location The further your projector is from the screen projector is about 80.83 feet (24.64 m) from the wall or screen. Use the drawing below as a guide 15.3.6/4.3) 2.6(/28.0.5/6.6)3.5(/21.17./58.9)4.4(/31.44/.411.2)5.3(/41.17/.413.5) 6.6(/52.21/.717.1) 7.( - NEC 240K | User Manual - Page 23
AND CONNECTIONS Ͼ Setting Up the Screen and theProjector Throw Distance and Screen Size The following shows the proper relative positions of the projector and screen. Refer to the table to determine the position of installation. Distance Chart Screen Width Screen Height Screen Diagonal Screen - NEC 240K | User Manual - Page 24
100 80 60 42.1 158.7 - 193.0 12.1 120 96 72 50.5 190.8 - 231.8 14.5 150 120 90 63.2 239.0 - 290.1 18.2 180 144 108 75.8 287.1 - 348.4 21.8 200 160 120 84.2 319.2 - 387.2 24.2 210 168 126 88.4 335.3 - 406.7 25.4 240 1178 - 1448 1586 - 1942 2401 - 2928 2686 - 3274 - NEC 240K | User Manual - Page 25
LT240K 240 180 350 280 210 400 320 240 450 360 270 500 400 300 B inch 12.6 16.8 25.2 28.1 30.2 33.6 35.3 37.8 42.0 50.4 63.0 75.6 84.0 88.2 100.8 109.7 113.4 126.1 147.1 168.1 189.1 210.1 C Wide - Tele inch 35.7 - 43.4 48.2 - 58.4 73.2 - 88.5 81 12.0 14.4 18.0 21.6 24.0 25.2 28.8 31.4 - NEC 240K | User Manual - Page 26
and theProjector WARNING * Installing your projector on the ceiling must be done by a qualified technician. Contact your NEC dealer for more information. * Do not attempt to install the projector yourself. • Only use your projector on a solid, level surface. If the projector falls to the ground, you - NEC 240K | User Manual - Page 27
. In most cases signal cannot be output from RGB output unless the notebook PC is turned on after connecting with the projector. * If the screen goes blank while using your remote control, it may be the result of the computer's screen-saver or power management software. * If you accidentally hit the - NEC 240K | User Manual - Page 28
for this connection. • The RGB IN 2 connector does not support SCART signal and Plug & Play. ON STAND BY PO SWTEALRTAUMSP ALIGNMENT AUTO ADJUST PC-CARD TER SELECT CANCE L SOURCE Video equipment such as DVD player Projector EN MEN U Commercially available SCART cable Female To RGB IN - NEC 240K | User Manual - Page 29
Your PC or Macintosh Computer AUDIO IN RGB IN1 RGB IN2 RGB signal cable (supplied) To mini D-Sub 15-pin connector on the projector. It is recommended that you use a commercially available distribution amplifier if connecting a signal cable longer than the supplied one. Audio cable (not supplied - NEC 240K | User Manual - Page 30
. 3. Turn on the projector and the computer. 4. If the projector goes blank after a period of inactivity, it may be caused by a screen saver installed on the computer you've connected to the projector. NOTE: The LT260K/LT240K is not compatible with video decoded outputs of NEC ISS-6020 and ISS-6010 - NEC 240K | User Manual - Page 31
, monitor and the computer. NOTE: The RGB OUT connector outputs RGB signal during idle mode (See page E-100). When the projector goes into idle mode, the image on an external monitor disappears for a moment. Note that the RGB OUT connector will not output RGB signal during - NEC 240K | User Manual - Page 32
, use common RCA cables (not provided) to connect a composite VIDEO output of the DVD player to the Video Input of the projector. 3. Turn on the projector and DVD player. NOTE: Refer to your DVD player's owner's manual for more information about your DVD player's video output requirements, E-32 - NEC 240K | User Manual - Page 33
to the video output connector on the back of your VCR or laser disc player, connect the other end to the Video input on your projector. Use an audio cable (not supplied) to connect the audio from your VCR or laser disc player to your audio equipment (if your VCR or - NEC 240K | User Manual - Page 34
INSTALLATION AND CONNECTIONS Ͼ Making Connections 3. Turn on the projector and the VCR or laser disc player. NOTE: Refer to your VCR or laser disc player owner's manual for more information about your equipment's video output requirements. NOTE: An image may not be displayed correctly when a Video - NEC 240K | User Manual - Page 35
AND CONNECTIONS Ͼ Making Connections Connecting the Supplied Power Cable Connect the supplied power cable to the projector. First connect the supplied power cable's three-pin plug to the AC IN of the projector, and then connect the other plug of the supplied power cable in the wall outlet. E-35 - NEC 240K | User Manual - Page 36
switch and POWER button (POWER ON and OFF on the remote control) • The projector has a feature to prevent itself from being used by unauthorized individuals. To use this feature, register your PC card as a protect key. See "Security" in "Projector Options" on page E-114 for more details. To turn on - NEC 240K | User Manual - Page 37
Note on Startup screen (Menu Language Select screen) When you first turn on the projector, you will get the Startup screen. This screen gives you the opportunity to select one of the seven menu languages: English, German, French, Italian, Spanish, - NEC 240K | User Manual - Page 38
to protect the internal system. If this happens, wait for the projector's internal components to cool down. * When the lamp reaches its end of usable life, the projector will not turn on. If this happens, replace the lamp. * If the lamp fails to light, and if the STATUS indicator flashes on and off - NEC 240K | User Manual - Page 39
video source Using the Remote Control OFF POWER VIDEO NOTE: If no input signal is available, the projector will display a blue background (factory preset). Selecting from output) , "Viewer" (slides on a PC card), or "LAN" (wired or wireless signal aired from a PC). To display the selected source, - NEC 240K | User Manual - Page 40
PROJECTING AN IMAGE Ͼ Selecting a Source Detecting the Signal Automatically Press and hold the SOURCE button for a minimum of ONE second, the projector will search for the next available input source. Each time you press and hold the SOURCE button, the input source will change as follows: → RGB1 → - NEC 240K | User Manual - Page 41
Tool) enables the geometrical distortion correction of an image when projected onto a special shaped screen with a NEC projector. Additionally, this program allows control of the projector via a computer. For additional information visit: US : http://www.necvisualsystems.com Europe : http://www - NEC 240K | User Manual - Page 42
AN IMAGE Ͼ Adjusting the Picture Size and Position Adjust the Tilt Foot q Lift the front edge of the projector. ON STAND BY PO SWTEALRTAUMSP ALIGNMENT AUTO ADJUST PC-CARD TER SELECT CANCE L SOURCE MEN U Adjustable Tilt Foot Lever Adjustable Tilt Foot w Push up the Adjustable Tilt Foot - NEC 240K | User Manual - Page 43
bottom to the desk or floor should be 1" (25 mm) to make the projector horizontal on the flat surface. Up Down Up Down * If the projected image does gripping the tilt-foot or hanging on the wall can cause damage to the projector. Zoom Use the Zoom lever to fine adjust the image size on the screen - NEC 240K | User Manual - Page 44
the screen with the one of the image. Projected image Screen (The drawing shows the upper right corner.) 3. Press the 3D REFORM button on the remote control. The CORNERSTONE adjustment screen is displayed. NOTE: Press the 3D REFORM button to toggle between "Cornerstone" and "Keystone." E-44 - NEC 240K | User Manual - Page 45
another icon which points in the direction. Screen On the Cornerstone adjustment screen, select "Exit" and then "OK", or press the CANCEL button on the remote control. The confirmation screen is displayed. E-45 - NEC 240K | User Manual - Page 46
may not be available. Should this happen, first reset the 3D Reform data and then do each setting. Max ±30° approx. (Max ±25° approx. on LT240K) Vertical Max ±40° approx. * The following are in Wide (Zoom) • Resolution is XGA Higher resolution than XGA limits 3D Reform in its adjustable range - NEC 240K | User Manual - Page 47
might appear and to reduce video noise, dot interference or cross talk (this is evident when part of your image appears to be shimmering). This function adjusts the clock frequencies that eliminate the horizontal optimize the RGB signal, try to adjust Clock and Phase manually. See page E-88. E-47 - NEC 240K | User Manual - Page 48
PROJECTING AN IMAGE Turning Up or Down Volume Sound level from the speaker and the AUDIO OUT mini jack on the projec- tor can be adjusted. VOLUME increase volume Volume bar decrease volume Using the Laser Pointer You can use the laser to draw your audience's attention to a red dot that you can - NEC 240K | User Manual - Page 49
whether to enable or disable laser, then set these switches as necessary using the tip of a thin ballpoint pen. On this model, an applicable projector selector switch (1) is not used. OFF ON Switch (2) On: Enabled (the laser lights when the LASER button is pressed) [Factory default] Off: Disabled - NEC 240K | User Manual - Page 50
projector cabinet or the POWER OFF button on the remote control for a minimum of two seconds. The power indicator will glow orange. After the projector to work for 90 seconds after the projector is turned off). • While accessing a PC card. (The PC Card Access indicator lights.) OFF POWER VIDEO S- - NEC 240K | User Manual - Page 51
for clicking through your computer-generated presentations. To return to the projector operation mode (Projector mode), press the PJ button (lit red). Connecting to your computer for the remote mouse fuction If you wish to use the remote mouse function, use the supplied USB cable to connect the USB - NEC 240K | User Manual - Page 52
FEATURES Ͼ Using the Remote Mouse Function Switching operation mode between computer and projector The three shaded buttons FOCUS ZOOM SHIFT HELP POINTER PC CARD KEYSTONE MAGNIFY SLIDE FREEZE VOLUME FOLDER PIC-MUTE SLIDE LIST Works as the Cancel button on the projector. Lit red Works as a - NEC 240K | User Manual - Page 53
CONVENIENT FEATURES Ͼ Using the Remote Mouse Function • When the MENU button is pressed, the PJ button lights red to indicate that you are in the Projector mode, which allows the projector menu operation using the three buttons. • When the POINTER button is pressed, the PJ button lights red to - NEC 240K | User Manual - Page 54
the image and sound. PIC-MUTE Freezing a Picture Press the Freeze button to freeze a picture. Press again to resume motion. FREEZE Using the Projector Pointer You can use one of nine pointers to draw your audience's attention to the portion of a projected image you want. POINTER Press the - NEC 240K | User Manual - Page 55
a Picture You can enlarge the area you want up to 400 percent. To do so: 1. Press the Pointer button to display the projector pointer. POINTER 2. Move the projector pointer to the area you want to enlarge. SELECT 3. Enlarge the selected area. When the Magnify (+) button is pressed, the pointer is - NEC 240K | User Manual - Page 56
get the contents about Help. HELP SELECT Display Help Exit Help USB Memory Device or USB Memory Card Reader Support The projector is compatible with either a USB memory device or USB memory card reader which supports the viewer and security features. • To use a USB memory device or USB memory - NEC 240K | User Manual - Page 57
readers may not work. • You cannot use a USB memory device and a USB memory card reader when connecting a USB mouse to the projector. Using a USB HUB that allows multiple USB memory devices or card readers is not supported either. • Do not do the following while the USB memory device or USB memory - NEC 240K | User Manual - Page 58
Setting Display You can select a menu item and click with a mouse button to make adjustments and setting. Using the middle button on the mouse The projector supports the middle button on your mouse. With the middle button you can use a scroll bar when it is available or click the middle button to - NEC 240K | User Manual - Page 59
Changing Background Logo You can change the default background logo using the PC Card Files feature. NOTE: File size must be 256KB or less. Other Logo button allows you to select a background logo from graphic files on a PC card and change to it as the background logo. 3. Use the SELECT ̆ or ̄ - NEC 240K | User Manual - Page 60
and then ̄ button to select "Logo". 5. Press the ENTER on the remote control or the cabinet. You will get the confirmation dialog box. 6. Select logo for the background. * Once you have changed the background from the NEC logo to another, you cannot return the logo to background even by using - NEC 240K | User Manual - Page 61
you prefer by leftclicking. Color ..... Selects a color. Left-click to display the color palette from which you can select a color you prefer by left-clicking. Capture Left-click to capture and save freehand drawings in the PC card. Eraser ... Left-click and drag to erase part of a drawing. Left - NEC 240K | User Manual - Page 62
PC using the Dynamic Image Utility 2.0 contained on the supplied NEC Projector User Supportware CD-ROM. For installation, see the printed Application Guide. For creating presentation materials, see the Slide show function on the on-line manual of the Dynamic Image Utility 2.0. Making the Most out of - NEC 240K | User Manual - Page 63
of slides and editing * Microsoft, Windows and PowerPoint are registered trademarks of Microsoft Corporation. Inserting and Removing a PC Card Inserting the PC Card • Hold the PC card horizontally and insert it slowly into card slot with its top facing up. • The eject button pops out once the PC - NEC 240K | User Manual - Page 64
. Attempting to force it into the slot in the wrong direction may break the internal pin and damage the card slot. Refer to the PC card's operating instructions for the proper direction of insertion. PC Card Type The PC Card slot accepts PCMCIA Type II only. CAUTION: • Do not use CompactFlash type - NEC 240K | User Manual - Page 65
displays a list of the folders in the PC card and if "Auto Play" is checked the projector automatically starts to play slides at the first slide of tool bar will appear when you press the MENU button on the remote control or the projector cabinet or clicking with the right button of a mouse. Prev - NEC 240K | User Manual - Page 66
. This allows you to move on to the next slide when "Manual Play" is selected. Stop This allows you to stop Auto Play the PC CARD slot, there is no signal, and a black, blue or logo background is displayed, depending on the setting. Playback is stopped when SLIDE +/- button on the remote control or - NEC 240K | User Manual - Page 67
When the tool bar is not displayed: Press the FOLDER LIST button or the SLIDE LIST button on the remote control to display folders or slides from a PC card in the projector's PC Card slot. FOLDER Multi cursor (blue marks) Folder Folder Folder Folder Folder Current folder number 02 : 0001 / 0008 - NEC 240K | User Manual - Page 68
on the remote control to select folders or slides. If you use the ̇ and ̈ button on the remote control for Viewer operation, press the PJ button to switch to the Projector mode . The PC card editing operation cannot be performed from the projector. Do so using the Dynamic Image Utility 2.0 software. - NEC 240K | User Manual - Page 69
MS-DOS format PC card • If the image can be stored in a format supported by the Viewer. With the Viewer, images on the card are searched for in slides within one directory is 128. Storing Images Displayed on the Projector on the PC card (Capture) The Capture features allows you to capture an image - NEC 240K | User Manual - Page 70
first. * Press the eject button to eject the card. 1. Project the image you wish to store on the projector. Capture Drag Freeze Exit Drive 2. Select the " the blue part (for USB mouse operation only). Capture ...... Captures an image and save it as a JPEG file on a PC card. Freeze ........ - NEC 240K | User Manual - Page 71
press MENU or CANCEL button on the remote control or projector cabinet. NOTE: You can compress projector's display. Do not eject the PC card or turn off the projector's power while this icon is displayed. Doing so will damage the PC card data. If the PC card data is damaged, use a computer to repair - NEC 240K | User Manual - Page 72
to the Viewer source. See also page E-81. NOTE: This option is not available for selection unless a PC card is inserted properly. Selecting "Execute" displays on the remote or the cabinet, or "Execute" on the above, you will get a toolbar. This toolbar is used to return to the PC Card Files screen. - NEC 240K | User Manual - Page 73
NOTE: The on-screen menu may not be displayed correctly while interlaced motion video image is projected. 1. Press the MENU button on the remote control or projector cabinet to display the Basic, Advanced or Custom Menu. NOTE: When using a USB mouse, click the mouse button to display the menu. For - NEC 240K | User Manual - Page 74
"Reset" then press the ENTER button. The default Custom Menu items are: Source Select (RGB 1/2, Video, S-Video, Viewer and LAN), Picture, Volume, Image Options (Aspect Ratio), Picture Management, Projector Options (3D Reform, Menu, Setup, Screen and LAN Mode), Tools (Sleep Timer, Capture, PC Card - NEC 240K | User Manual - Page 75
USING ON-SCREEN MENU Ͼ Basic Menu Operation NOTE: If the "Advanced Menu" item has been selected on the Menu mode, you get the "Confirmation Change Menu" upon completion of "Custom Menu" editing. In this case, selecting "Yes" then "Enter" will close all the menus and apply the changes from the - NEC 240K | User Manual - Page 76
Menu Source Select Picture Volume Image Options Picture Management Projector Options Tools Help Factory Default RGB1 RGB2 Video S-Video Viewer LAN more User1 User2 User3 Entry List Picture Volume Brightness, Contrast, Color, Hue, Sharpness Aspect Ratio Blanking Position/Clock Resolution - NEC 240K | User Manual - Page 77
Menu, Custom Menu, Advanced Menu Custom Menu Edit Projector Pointer Pointer 1-9 Mouse Pointer Pointer 1-9 Menu Display Time Manual, Auto 5sec, Auto 15sec, Auto 45sec Page 2 Source Display Message Menu Color Select On, Off On, Off Color, Monochrome Page 3 Signal Select RGB1 RGB/Component - NEC 240K | User Manual - Page 78
Card Files ChalkBoard Contents Information Factory Default All Data, Current Signal Security Enable, Disable, Keyword, Use Protect key, Drive, Read, Register, Delete Menu Logo Screen Type 4:3, 16:9 / Position LAN Mode IP Address Automatic Manual IP Address, Subnet Mask,Gateway Projector - NEC 240K | User Manual - Page 79
USING ON-SCREEN MENU Ͼ Basic Menu Operation Menu Elements Tab Title bar Highlight Check box Help Button Close Button Radio button OK Button Cancel Button Solid triangle Drag Tool bar Slide bar Menu windows or dialog boxes typically have the following elements: Title bar Indicates the menu - NEC 240K | User Manual - Page 80
that feature is available (USB mouse only). Press the Help button on the remote control to display help. Toolbar Contains several icons for specific tasks. It characters are used for your IP address or projector name. To enter IP Address or projector name, use the software keyboard. For using the software - NEC 240K | User Manual - Page 81
Press the SELECT ̆̄ button on the projector cabinet or on your remote control to highlight the menu for the enables you to make presentations using a PC card that contains captured images and slides created with CD-ROM. See the supplied Application Guide for installing the Dynamic Image Utility 2.0. - NEC 240K | User Manual - Page 82
Play Plays back automatically or manually depending on the setting on Viewer Options of the menu. folders while you are playing back. Drive Switches between PC Card slot and USB port (type A). Setup Displays the Viewer Options projector cabinet or the remote control to highlight the menu for the item you - NEC 240K | User Manual - Page 83
ON-SCREEN MENU Ͼ Menu Descriptions & Functions LAN Selects a signal from a LAN card plugged into the projector's card slot. Entry List Displays the list of the entry signals. Use the SELECT ̆̄ buttons on your remote control or the projector cabinet to select the signal and press the ENTER button on - NEC 240K | User Manual - Page 84
USING ON-SCREEN MENU Ͼ Menu Descriptions & Functions able for RGB signal; Video and S-Video are available for composite signal. Source List: Set signal selection method. Lock: Set so that the selected signal cannot be deleted when "All Delete" is executed. Skip: Set so that the selected signal will - NEC 240K | User Manual - Page 85
intensity of the image according to the incoming signal. Color Increases or decreases the color saturation level (not valid for RGB). Hue Varies the color level from +/- green to +/-blue. The red RGB). Volume Controllling Volume Adjusts the sound level of the projector speaker and AUDIO OUT. E-85 - NEC 240K | User Manual - Page 86
adjust image positions vertically for source with black borders. See page E-101 for setting image positions. Copyright Please note that using this projector for the purpose of commercial gain or the attraction of public attention in a venue such as a coffee shop or hotel and employing compression - NEC 240K | User Manual - Page 87
Reform adjustment, "Aspect Ratio" may not be available. Should this happen, first reset the 3D Reform data and then do setting again. Second repeat the 3D or ̈ button. Adjusting Position and Clock This allows you to manually adjust the image horizontally and vertically, and adjust Clock and Phase - NEC 240K | User Manual - Page 88
or to reduce video noise, dot interference or cross talk. (This is evident when part of your image appears to be shimmering.) Use the SELECT ̇ and ̈ buttons to feature. Auto Turns on the Advanced AccuBlend feature. The projector automatically reduces or enlarges the current image to fit the - NEC 240K | User Manual - Page 89
", "3D Reform", "Aspect Ratio" and "Screen" are not available. * While you are displaying an image with higher resolution than the projector's native resolution, "Resolution" is not available. Selecting Overscan Percentage Select overscan percentage (0%, 5%, 10% and 25%) for signal. NOTE: When - NEC 240K | User Manual - Page 90
User 1 to 4) When selecting one of four user adjustable presettings (User 1 through 4), the submenu will be displayed. You can customize each gamma or color. To do so, first select [Setting] and press the ENTER button, and then proceed the following steps. Selecting Gamma Correction Mode Use the - NEC 240K | User Manual - Page 91
bar and disables the "White Balance" button. Press the White Balance button to access the Contrast/Brightness adjustment for each R, G, and B. NOTE: "Color Temperature" and "White Balance" are a trade-off. The White Balance is not available for Viewer and LAN. NOTE: When "Presentation" is selected - NEC 240K | User Manual - Page 92
Base Setting This feature allows you to use color correction or gamma values as reference data to optimize for various types of images. You can select one of the following five settings. • Presentation • Video • Movie • Graphic • sRGB Projector Options Using 3D Reform This feature corrects - NEC 240K | User Manual - Page 93
Menu: See page E-74 for instructions about how to customize the Menu. Selecting a Projector Pointer Icon [Projector Pointer]: This enables you to select one of nine different Pointer icons for the "Pointer" button on your remote - NEC 240K | User Manual - Page 94
long the projector waits after the last touch of a button to turn off the menu. The preset choices are "Manual", "Auto lamp life warning, 3-minute before power off time and "Please wait a moment". Selecting Menu Color [Menu Color Select]: You can choose between two color modes for menu color: color - NEC 240K | User Manual - Page 95
to increase the lamp life (80% Brightness). Selecting Projector Orientation [Orientation]: This reorients your image for your type of projection. The options are: desktop front projection, ceiling rear projection, desktop rear projection, and ceiling front projection. Selecting a Color or Logo for - NEC 240K | User Manual - Page 96
Options [Viewer Options] Show Folder List: If this option is checked, when the Viewer source is selected on the projector, the folder lists will be displayed and allows you to select the presentation from a PC card. Auto Play: If this option is checked, when the Viewer source is selected on the - NEC 240K | User Manual - Page 97
. NOTE: The Auto Play Interval time set on "Slide Show Settings" of the Dynamic Image Utility 2.0 overrides the one set here. Manual Play: Views a slide manually when the Viewer source is selected. Selecting Capture Options [Capture Option]: (available for JPEG only) These options are used for the - NEC 240K | User Manual - Page 98
4] Enabling Auto Adjust [Auto Adjust]: When "Auto Adjust" is set to "On", the projector automatically determines the best resolution for the current RGB input signal to project an image using NEC's Advanced AccuBlend Intelligent Pixel Blending Technology. The image can be automatically adjusted for - NEC 240K | User Manual - Page 99
into an active power outlet and the main power switch is turned on. This eliminates the need to always use the "Power" button on the remote control or projector cabinet. Enabling Power Management [Power Management]: When this option is on and there is no input for five minutes or more, the - NEC 240K | User Manual - Page 100
during the Standby mode. * Via the serial interface the projector can be turned on from your PC using Dynamic Image Utility 2.0 during the Help" button on the remote control for ten seconds to reset the lamp clock back to zero. Do this only after replacing the lamp. [Page 5] Selecting - NEC 240K | User Manual - Page 101
......... Displays the selected source input every time the projector is started up. Select an input from the This Control Panel Key Lock does not affect the remote control and the PC Control functions. * When not be available. To make available, first reset the 3D Reform data and then do settings - NEC 240K | User Manual - Page 102
This feature allows you to set various setting items when the projector is used on your network. Consult with your network administrator about these settings. NOTE: A LAN card is required for LAN connection; NEC's optional wireless LAN card is available. For more information on inserting or ejecting - NEC 240K | User Manual - Page 103
Automatic ........ Automatically assigns an IP address to the projector from a DHCP server. Manual Provides a space for you to register the IP the set default route valid. When data is sent from the LAN card, the transfer location will be searched according to the previously set routing - NEC 240K | User Manual - Page 104
connected to the wireless or wired LAN network via an access point. 802.11 Ad Hoc Select this option when using the wireless LAN to communicate This is a method that meets the IEEE802.11 wireless standard. Ad Hoc Select this option when using the wireless LAN to communicate with a computer in a - NEC 240K | User Manual - Page 105
LAN when selecting [Infrastructure] or [802.11 Ad Hoc] in [Mode]. Communication can be done only with equipment whose SSID matches SSID for your wireless LAN. Up to 32 alphanumeric characters can be used. NOTE: To disable SSID, select a space (null) or "ANY"(All caps). Channel: Set this option - NEC 240K | User Manual - Page 106
to use of 64bit datalength encryption. NOTE: The WEP settings must be the same as communication devices such as PC or access point in your wireless network. When you use WEP, your image transmission speed will slow down. Key Select: Selects one key from the four keys below when selecing [64bit - NEC 240K | User Manual - Page 107
when there is a LAN card in the PC card slot of the projector. Alert Mail: Checking this box enables Alert Mail feature. This option notifies your computer of an error message via e-mail when using wireless or wired LAN. The error message will be notified when the projector lamp has reached the end - NEC 240K | User Manual - Page 108
-SCREEN MENU Ͼ Menu Descriptions & Functions Sample of a message sent from the projector: The lamp is at the end of its usable life. Please replace the lamp. Projector Name: X X X X Lamp Hour Meter: xxxx [H] Projector Usage: xxxxxx [H] Sender's Address: Specify the senders address. Use the Software - NEC 240K | User Manual - Page 109
...... Indicates the IP address of the projector. Subnet Mask ... Indicates the subnet mask of the projector. Gateway .......... Indicates the gateway of the network connected to the projector. MAC Address .. Indicates the MAC address of the LAN card. Reconnect ....... Use this button to connect - NEC 240K | User Manual - Page 110
USING ON-SCREEN MENU Ͼ Menu Descriptions & Functions DHCP Depending on your network environment, acquiring an IP address from a DHCP server may not be possible. Should this happen, consult your network administrator to make changes to the following settings. Host Name option Select whether or not to - NEC 240K | User Manual - Page 111
USING ON-SCREEN MENU Ͼ Menu Descriptions & Functions Client-identifier option Select whether or not to add option client identifier for DHCP. None Not add Request Add at the time of DHCP_REQUEST. Discover/Request ...... Add at the time of DHCP_DISCOVER and DHCP_REQUEST. Use MAC address Turn on to - NEC 240K | User Manual - Page 112
Functions Setting a Password A password can be set for your projector to avoid operation by an unauthorized person. There are two custom menu For Logo: * Changing the background * Changing the logo data in PC Card Files Procedures for Password setting apply to both Menu and Logo. Entry To assign - NEC 240K | User Manual - Page 113
USING ON-SCREEN MENU Ͼ Menu Descriptions & Functions Delete To delete your password: 1. Highlight [Delete] and press the ENTER button. The "Current Password" screen will be displayed. 2. Use the Software keyboard to type your password. Highlight "OK" on the "Current Password" screen and then press - NEC 240K | User Manual - Page 114
is also an option to lock the projector by using a registered PC card as a protect key. Once you have registered your PC card as a protect key, you are required to insert the registered PC card into the PC card slot of the projector each time you turn on the projector. You can enable the Security - NEC 240K | User Manual - Page 115
appear. Use the SELECT ̇̈ button and press the ENTER button. The Security function takes effect. To register a PC card as a protect key 1. Insert a PC card into the PC card slot of the projector. 2. Use the SELECT ̆̄ button to select "Use Protect key" and press the ENTER button. A check mark will be - NEC 240K | User Manual - Page 116
you forget your keyword, NEC or your dealer will provide you with your Release Code. See more information at the end of this section. To turn on the projector when Security is enabled (when using a PC card as a protect key) 1. Insert your registered PC card into the PC card slot. 2. Press and hold - NEC 240K | User Manual - Page 117
registered PC card, proceed as follows: NOTE: NEC or your dealer will provide you with your Release Code in exchange for your registered keyword and Request Code. See more information at the end of this section. 1. Press and hold the POWER button for a minimum of two seconds. The projector will be - NEC 240K | User Manual - Page 118
required for a PC card. Using Sleep Timer 1. Select your desired time between 30 minutes and 16 hours: Off, 0:30, 1:00, 2:00, 4:00, 8:00, 12:00, 16:00. 2. Select "Set" and press the ENTER button on the remote control. 3. The remaining time starts counting down. 4. The projector will turn off after - NEC 240K | User Manual - Page 119
Background Logo: You can change the default background logo using the PC Card Files feature. NOTE: File size must be 256KB or less. Other file . Information Displays the status of the current signal, and the lamp and the projector usage hours. This dialog box has three pages. The information - NEC 240K | User Manual - Page 120
the factory preset except Remaining Lamp Time, Lamp Hour Meter, Projector Usage, Language, Background, Entry List, Communication Speed, LAN Mode, Security and Password. (To reset the lamp usage time, see "Clear Lamp Hour Meter" on page E-100) Current Signal . Resets the adjustments for the current - NEC 240K | User Manual - Page 121
electric shock. • The projector will turn off and go into stand by mode after 2100 hours (up to 3100 hours : Eco mode) of service. If this happens, be sure to replace the lamp. If you continue to use the lamp after 2000 hours (up to 3000 hours : Eco mode) of use, the lamp bulb may shatter, and - NEC 240K | User Manual - Page 122
MAINTENANCE To replace the lamp: 1. Loosen the lamp cover screw until the screwdriver goes into a freewheeling condition and remove the lamp cover. The lamp cover screw is not removable. 2. Loosen the two screws securing the lamp housing until the screwdriver goes into a freewheeling condition. The - NEC 240K | User Manual - Page 123
4. Insert a new lamp housing until the lamp housing is plugged into the socket. CAUTION Do not use a lamp other than the NEC replacement lamp (LT60LPK). 5. Secure it in place with the two screws. Be sure to tighten the screws. 6. Reattach the lamp cover. 7. Tighten the lamp cover screw. Be sure - NEC 240K | User Manual - Page 124
SWTEALRTAUMSP ALIGNMENT AUTO ADJUST PC-CARD TER SELECT CANCE L SOURCE EN EN MEN U MAINTENANCE 8. After you install a new lamp, from the menu select [Projector Options] → [Setup] → [Page 4] → [Clear Lamp Hour Meter] to reset the lamp usage hours. If the projector will not be turned on after - NEC 240K | User Manual - Page 125
The lens barrel has threads on the outside for mounting a commercially available lens protector (φ 62mm for LT260K and φ 72mm for LT240K) to protect the lens from dirt, dust, scratches as ND (Neutral Density) filters and color filters, can absorb heat, resulting in damage to the filter and the - NEC 240K | User Manual - Page 126
TROUBLESHOOTING This section helps you resolve problems you may encounter while setting up or using the projector. Power Lamp error 0.5 sec OFF) Re-firing the lamp Control key locked Green Idle condition Note - Replace the lamp cover correctly. The projector is overheated. Move the projector - NEC 240K | User Manual - Page 127
TROUBLESHOOTING Lamp Indicator Blinking light Indicator Condition Off Red Steady light Red Green Projector Condition Note Normal - Lamp has reached its end of Replace the lamp. life. Lamp replacement mes- sage will be displayed. Lamp has been used beyond Replace the lamp. its limit. - NEC 240K | User Manual - Page 128
TROUBLESHOOTING Common Problems & Solutions Problem Does not turn on Check These Items • Check that the power cable is plugged in and that the power button on the projector cabinet or the remote control is on. See pages E-35 and 36. • Ensure that the lamp cover is installed correctly. See page E- - NEC 240K | User Manual - Page 129
TROUBLESHOOTING When using the Viewer function Problem No picture Check These Items • Is "Viewer" selected from the Source menu? • Is the PC card seated in the PC Card slot completely? • Are slide data stored in the PC card? • Have the contents of the PC card been destroyed? Contents of PC Card - NEC 240K | User Manual - Page 130
information about the LT260K/LT240K Projector's performance Model Number LT260K/LT240K Optical DMD™ Resolution Lens Lamp Image Size Projection Distance Projection Angle Single Chip Digital Micromirror Device(DMD™) 1024ן768 pixels* up to UXGA with Advanced AccuBlend Manual zoom and focus - NEC 240K | User Manual - Page 131
0A (100 - 120V AC) / 1.5A (200 - 240V AC) 280W (0.6W at Standby) Mechanical Installation Orientation: Desktop/Front, Desktop/Rear, Ceiling/Front, Ceiling/Rear com Europe : http://www.nec-europe.com/ Global : http://www.nec-pj.com/ Digital Light Processing, DLP, Digital Micromirror Device and - NEC 240K | User Manual - Page 132
APPENDIX Cabinet Dimensions 92 (3.6") 300 (11.8") * 275 (10.83") 120 (4.7") 107 (4.2") 260 (10.24") 57 (2.24") 83 (3.27") * LT240K: 319mm (12.56") E-132 Unit = mm (inch) - NEC 240K | User Manual - Page 133
APPENDIX Pin Assignments of D-Sub RGB Input Connector Mini D-Sub 15 Pin Connector 54321 10 9 8 7 6 15 14 13 12 11 Signal Level Video signal : 0.7Vp-p (Analog) Sync signal : TTL level * RGB 1 Input only Pin No. 1 2 3 4 5 6 7 8 9 10 11 12 13 14 15 RGB Signal (Analog) YCbCr Signal Red Green or - NEC 240K | User Manual - Page 134
68.681 61.796 71.736 60 63.981 60 50 50 59.94 60 60 66.67 66.67 72.81 75 75 85.01 70.09 85.04 87.85 87.85 56.25 60.32 72.19 75 85.06 .06 65.95 76.05 60 60.02 Dot Clock ( MHz ) - - - 25.175 25.175 25.175 31.334 30.24 31.5 31.5 31.49 36 28.322 35.5 35.5 35.5 36 40 50 49.5 56.25 57.283 44.9 65 75 80 - NEC 240K | User Manual - Page 135
HDTV (720p)(750p) 1280 ן720 # SDTV (480p)(525p) - # VESA 1600 ן1200 # VESA 1600 ן1200 # VESA 1600 ן1200 # VESA 1600 ן1200 DVD YCbCr - DVD YCbCr - Frequency H. Refresh Rate ( kHz ) ( Hz ) Dot Clock ( MHz ) 69.89 78.125 81 on LT260K and LT240K. NOTE: Some composite - NEC 240K | User Manual - Page 136
. PC Control Connector (DIN-8P) To RxD of PC 87 5 4 2 6 3 1 To GND of PC To TxD of PC NOTE: Pins 2, 3, 5, 6 and 8 are used inside the projector. E-136 - NEC 240K | User Manual - Page 137
APPENDIX Using Software Keyboard 1 to 0 and Characters ......... Use to type in IP address or projector name SP Inserts a space BS Deletes one character backward Returns to the previous Advances to the next OK Executes the selection Cancel Cancels the selection - NEC 240K | User Manual - Page 138
, wait a moment and repeat. If you still can't get any response, pull out and then re-insert the LAN card. Access is gained to the HTTP server functions by specifying http:// - NEC 240K | User Manual - Page 139
been set in the "HOSTS" file of the computer being used. Example 1: Example 2: When the host name of the projector has been set to "pj.nec.co.jp", http://pj.nec.co.jp/index.html is specified for the address or the entry column of the URL. When the IP address of the - NEC 240K | User Manual - Page 140
Increments the volume adjustment value Decrements the volume adjustment value. Mute: This controls the mute function of the projector. All On Mutes each of the video, audio, and on-screen display functions. All Off Cancels the muting of each of the video, audio, and - NEC 240K | User Manual - Page 141
Color Increments the color adjustment value. Color Decrements the color projector. Remaining Lamp Time ... Displays the remaining life of the lamp as a percentage. Lamp Hour Meter ...... Displays how many hours the lamp has been used. Projector Usage ........ Displays how many hours the projector - NEC 240K | User Manual - Page 142
business days, not including shipping time. During the term of warranty, the cost of maintenance parts, labor costs for repairs and shipping costs within the service station's coverage area are covered by the warranty. 2 Replacement product rental service If the customer desires, he or she can rent - NEC 240K | User Manual - Page 143
the replacement product rental service. 3 In the following cases, repairs may be charged, even if the product's warranty is still in effect: 1) If the term of warranty, model name, serial number and name of the store of purchase are not indicated on the warranty or have been altered. 2) Problems or - NEC 240K | User Manual - Page 144
under normal usage conditions. 8) Problems or damage to lamps and other expendable supplies, included parts or optional parts. 9) Other conditions stipulated in the warranty included with the product also apply. ✍ The product can be used overseas with voltages of 100 to 120V and 200 to 240V by using - NEC 240K | User Manual - Page 145
Telephone: +1 800 836 0655 Fax Line: +1 800 356 2415 Email Address: [email protected] WEB Address: http://www.necvisualsystems.com (Regions Covered) U.S.A. *, Canada* In Oceania NEC Australia Pty., Ltd. Address: New South Wales; 184 Milperra Road, Reversby 2212 Victoria; 480 - NEC 240K | User Manual - Page 146
-1, Nishioi, Oi-Machi, Ashigarakami-Gun, Kanagawa 258-0017, Japan Telephone: +81 465 85 2369 Fax Line: +81 465 85 2393 Email Address: [email protected] WEB Address: http://www.nec-pj.com (Regions Covered) Japan* NEC Hong Kong Ltd. Address: 11th Floor, Tower B, New Mandarin Plaza - NEC 240K | User Manual - Page 147
.sg WEB Address: http://www.nec.com.sg (Regions Covered) Singapore Hyosung Data System, Ltd. Address: 7th Floor, Cheongdam Building, 52, Cheongdam-Dong, Kangnam-Ku, Seoul, Korea 135-100 Telephone: +82 2 510 0234 Fax Line: +82 2 540 3590 Email Address: [email protected] (Regions Covered - NEC 240K | User Manual - Page 148
, Saudi Arabia Telephone: +966 2 6828219 Fax Line: +966 2 6830820 Email Address: [email protected] (Regions Covered) Saudi Arabia ✍ In countries designated with an asterisk(*), replacement product rental service are offered. E-148 - NEC 240K | User Manual - Page 149
Model Name : Date of Purchase : Serial No. on cabinet : Problem of units per User : Required Service : (1) Repair and Return (2) Loan unit Requested period of Loan unit : Payment method : (1) Credit Card (2) Travelers Cheque (3) Cash In Case of Credit Card : Card No. w/Valid Date : E-149 - NEC 240K | User Manual - Page 150
time. There may have a case, repair and return can't be done by NEC Authorized Service Station, because of shortage of spare parts due to same model is not sold in the territory. 2) Repair and Return with Loan: (This service is limited to some Service Stations) This service is offered to the Enduser - NEC 240K | User Manual - Page 151
supplied by NEC or its agents which do not form part of the Product service cost to the Enduser with reason. 4. Dead on Arrival (DOA): Enduser must take this issue up with their original supplier in the country of purchase. NEC Authorized Service Station will repair the DOA unit as a Warranty repair - NEC 240K | User Manual - Page 152
Loan Service Charges and Conditions: Upon acceptance of this NEC Projector, Customer agrees to assume liability for this loan unit. The current cost of use of this loan the full list price to Credit Cards, which price will be informed by NEC Authorized Service Stations. Please see the attached
-
 1
1 -
 2
2 -
 3
3 -
 4
4 -
 5
5 -
 6
6 -
 7
7 -
8
-
9
-
10
-
11
-
12
-
13
-
14
-
15
-
16
-
17
-
18
-
19
-
20
-
21
-
22
-
23
-
24
-
25
-
26
-
27
-
28
-
29
-
30
-
31
-
32
-
33
-
34
-
35
-
36
-
37
-
38
-
39
-
40
-
41
-
42
-
43
-
44
-
45
-
46
-
47
-
48
-
49
-
50
-
51
-
52
-
53
-
54
-
55
-
56
-
57
-
58
-
59
-
60
-
61
-
62
-
63
-
64
-
65
-
66
-
67
-
68
-
69
-
70
-
71
-
72
-
73
-
74
-
75
-
76
-
77
-
78
-
79
-
80
-
81
-
82
-
83
-
84
-
85
-
86
-
87
-
88
-
89
-
90
-
91
-
92
-
93
-
94
-
95
-
96
-
97
-
98
-
99
-
100
-
101
-
102
-
103
-
104
-
105
-
106
-
107
-
108
-
109
-
110
-
111
-
112
-
113
-
114
-
115
-
116
-
117
-
118
-
119
-
120
-
121
-
122
-
123
-
124
-
125
-
126
-
127
-
128
-
129
-
130
-
131
-
132
-
133
-
134
-
135
-
136
-
137
-
138
-
139
-
140
-
141
-
142
-
143
-
144
-
145
-
146
-
147
-
148
-
149
-
150
-
151
-
152
 |
 |
Portable Projector
LT260K/LT240K
User’s Manual
About this user's manual
The fastest way to get started is to take your time and do every-
thing right the first time. Take a few minutes now to review the
user's manual. This may save you time later on. At the begin-
ning of each section of the manual you'll find an overview. If the
section doesn't apply, you can skip it.
CD-ROM version