NEC LCD1970GX-BK MultiSync LCD1970GX Users Manual - Page 5
Display Setup - manual
 |
UPC - 805736012606
View all NEC LCD1970GX-BK manuals
Add to My Manuals
Save this manual to your list of manuals |
Page 5 highlights
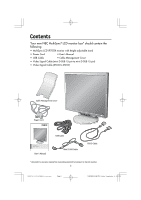
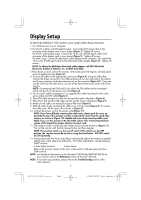
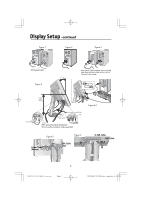
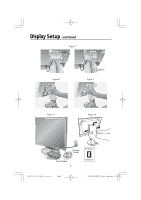
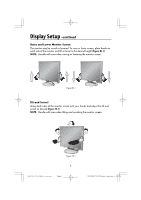
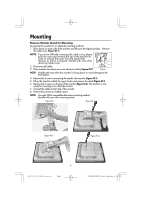
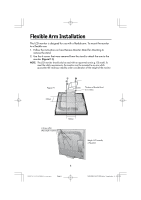
Display Setup To attach the MultiSync® LCD monitor to your system, follow these instructions: 1. Turn off the power to your computer. 2. For the PC or MAC with DVI digital output : Connect the DVI signal cable to the connector of the display card in your system (Figure 1). Tighten all screws. For the PC with Analog output: Connect the 15-pin mini D-SUB signal cable to the connector of the display card in your system (Figure 2). Tighten all screws. For MAC setup: Connect the Macintosh cable adapter to the computer, then attach the 15-pin mini D-SUB signal cable to the Macintosh cable adapter (Figure 3). Tighten all screws. NOTE: To obtain the MultiSync Macintosh cable adapter, call NEC-Mitsubishi Electronics Display of America, Inc. at (800) 632-4662. 3. Place hands on each side of the monitor, tilt the LCD panel 30-degrees. Lift LCD panel up to the highest position (Figure 4). 4. Connect all cables to the appropriate connectors (Figure 4). Using the USB cable, connect the B type connector to the USB upstream port on the right side of the monitor and A type connector to the downstream port on the computer (Figure 4-1). If you can use the cord from the USB device, use one of the downstream ports on the side of the monitor. NOTE: If connecting both DVI and D-sub cable, the DVI cable must be connected along side the rib on the power cord side (Figure 4). 5. For successful cable management, it is suggested the cables be placed in this order: power cable and DVI cable (Figure 5). 6. Place DVI cable and power cable into the specific hooks indicated in (Figure 6). 7. Place the D-Sub and the USB cable into the specific hooks indicated in (Figure 7). 8. Make sure all cables are resting flat against the stand (Figure 7). 9. Hold all cables firmly and place the cable cover onto the stand (Figure 8). To remove the cable cover, lift the cover off as shown in (Figure 9). 10. Connect the power cord to the power outlet (Figure 11). NOTE: If you have difficulty removing the cable cover, please push the cover up (towards the top of the monitor) in order to unhook the cover from the stand, then remove, as shown in (Figure 10). Handle with care when removing cable cover. NOTE: If you use this monitor at AC125-240V, please refer to Recommended Use section of this manual for proper selection of power cord. 11. The vacation switch on the back side of the monitor must be turned on (Figure 11). Turn on the monitor with the front power button and the computer. NOTE: The vacation switch is a true on/off switch. If this switch is in the OFF position, the monitor cannot be turned on using the front button. DO NOT switch on/off repeatedly. 12. Analog input only: No-Touch Auto Adjust automatically adjusts the monitor to optimal settings upon initial setup most of the time. For further adjustments, use the following OSM® controls: • Auto Adjust Contrast • Auto Adjust Refer to the Controls section of this User 's Manual for a full description of these OSM controls. NOTE: For download information on the Windows® 95/98/Me/2000/XP INF file for your monitor, refer to the References section of this User's Manual. NOTE: If you have any problems, please refer to the Troubleshooting section of this User's Manual. 3 15503782-LCD1970GX(A)-content Page 3 2/2/2005, 7:50 PM Adobe PageMaker 6.5C/PPC
-
 1
1 -
 2
2 -
 3
3 -
 4
4 -
 5
5 -
 6
6 -
 7
7 -
 8
8 -
 9
9 -
 10
10 -
 11
11 -
12
-
13
-
14
-
15
-
16
-
17
-
18
-
19
-
20
-
21
-
22
-
23
-
24
-
25
-
26
-
27
-
28
-
29
-
30
-
31
-
32
-
33
-
34
-
35
-
36
-
37
-
38
-
39
-
40
-
41
-
42
-
43
-
44
-
45
-
46
-
47
-
48
 |
 |
