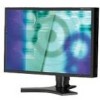
NEC LCD2490WUXI-BK User Manual - Page 19
Advanced OSM Controls
 |
UPC - 805736016413
View all NEC LCD2490WUXI-BK manuals
Add to My Manuals
Save this manual to your list of manuals |
Page 19 highlights
Advanced OSM Controls In addition to the standard On Screen Menu (OSM), the Advanced OSM Control menu allows the user to have much more control over regular OSM functions as well as access to functions not available in the standard OSM. To use the advanced menu • Turn off your monitor using the front "POWER" button. • Turn on your monitor by pushing the "POWER" and "INPUT/SELECT" button simultaneously for at least one second. Then press one of the following front OSM buttons: EXIT, LEFT, RIGHT, UP, or DOWN. • You will see the Advanced OSM Control menu. This menu is larger than the standard OSM and has numbered tags instead of icons. • To exit the Advanced OSM, turn off and restart your monitor in the normal way. To adjust the setting, use the buttons on the front panel to highlight the desired tag and press "SELECT". Use the buttons to make the adjustment. Once the setting is at the desired level press "SELECT" and then "EXIT" to go back to the previous menu. Tag 1 Brightness Contrast Auto Contrast (Analog input only) Adjusts the overall image and screen background brightness. Press "Left" or "Right" to adjust. When AUTO LUMINANCE is OFF or 2, the brightness level is adjusted/measured using percentage (%). When AUTO LUMINANCE is 1 or 3, brightness level is adjusted/measured using cd/m2. This is the "Estimated Brightness" level. Adjusts the image brightness and contrast in relation to the background. Adjusts the image displayed for non-standard video inputs. Auto Black Level Adjusts the black level for non-standard video inputs. (Analog input only) ECO Mode Decreases the amount of power consumed by reducing the brightness level. 1: Decreases the brightness by 25%. 2: Decreases the brightness by 50%. CUSTOM: Decreases the brightness level as determined by the user. ECO Mode Custom Allows the user to set a preferred brightness level when ECO Mode is in use. Auto Brightness AUTO BRIGHTNESS has three settings. OFF: Auto Brightness does not function. 1: Adjusts the brightness automatically by detecting the brightness level of your environment and adjusting the monitor accordingly with the best BRIGHTNESS setting (see page 36 for AmbiBright™ explanation), making the viewing experience more comfortable. 2: Adjusts the BRIGHTNESS level of the monitor to the best setting based on the amount of white being displayed on the monitor. This function does not utilize the Ambibright sensor. NOTE: Do not cover AmbiBright sensor. When "AUTO LUMINANCE" is ON, this function is disabled. Black Level Adjusts the black level. AUTO LUMINANCE Stabilizes the luminosity and color of the image. While the BRIGHTNESS level is adjusting, the numerical value blinks. OFF: No function 1: Stabilize Luminance 2: Stabilize Color 3: Stabilize Luminance and color Note: The AUTO LUMINANCE function is only available when "AUTO BRIGHTNESS" is OFF. When "AUTO LUMINANCE" is 1 or 3, maximum value of the Brightness level is limited. When "AUTO LUMINANCE" is OFF or 2, the brightness level is adjusted/ measured using percentage(%). When "AUTO LUMINANCE" is 1 or 3, brightness level is adjusted/measured using cd/m2. This is the "Estimated Brightness" level. 16
-
 1
1 -
2
-
3
-
4
-
5
-
6
-
7
-
8
-
9
-
10
-
11
-
12
-
13
-
 14
14 -
 15
15 -
 16
16 -
 17
17 -
 18
18 -
 19
19 -
 20
20 -
 21
21 -
 22
22 -
 23
23 -
 24
24 -
25
-
26
-
27
-
28
-
29
-
30
-
31
-
32
-
33
-
34
-
35
-
36
-
37
-
38
-
39
-
40
-
41
-
42
-
43
-
44
-
45
-
46
-
47
-
48
-
49
-
50
-
51
-
52
-
53
-
54
-
55
-
56
-
57
-
58
-
59
-
60
-
61
-
62
-
63
-
64
-
65
-
66
-
67
-
68
-
69
-
70
-
71
-
72
-
73
-
74
-
75
-
76
-
77
-
78
-
79
-
80
-
81
-
82
-
83
-
84
-
85
-
86
-
87
-
88
-
89
-
90
-
91
-
92
-
93
-
94
-
95
-
96
-
97
-
98
-
99
-
100
-
101
-
102
-
103
-
104
-
105
-
106
-
107
-
108
-
109
-
110
-
111
-
112
-
113
-
114
-
115
-
116
-
117
-
118
-
119
-
120
-
121
-
122
-
123
-
124
-
125
-
126
-
127
-
128
-
129
-
130
-
131
-
132
-
133
-
134
-
135
-
136
 |
 |
