NEC NP-M322X MP300CM Installation Manual - Page 8
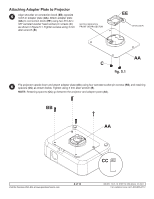
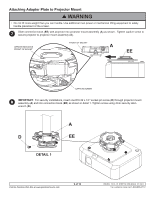
Attaching Adapter Plate to Projector
 |
View all NEC NP-M322X manuals
Add to My Manuals
Save this manual to your list of manuals |
Page 8 highlights
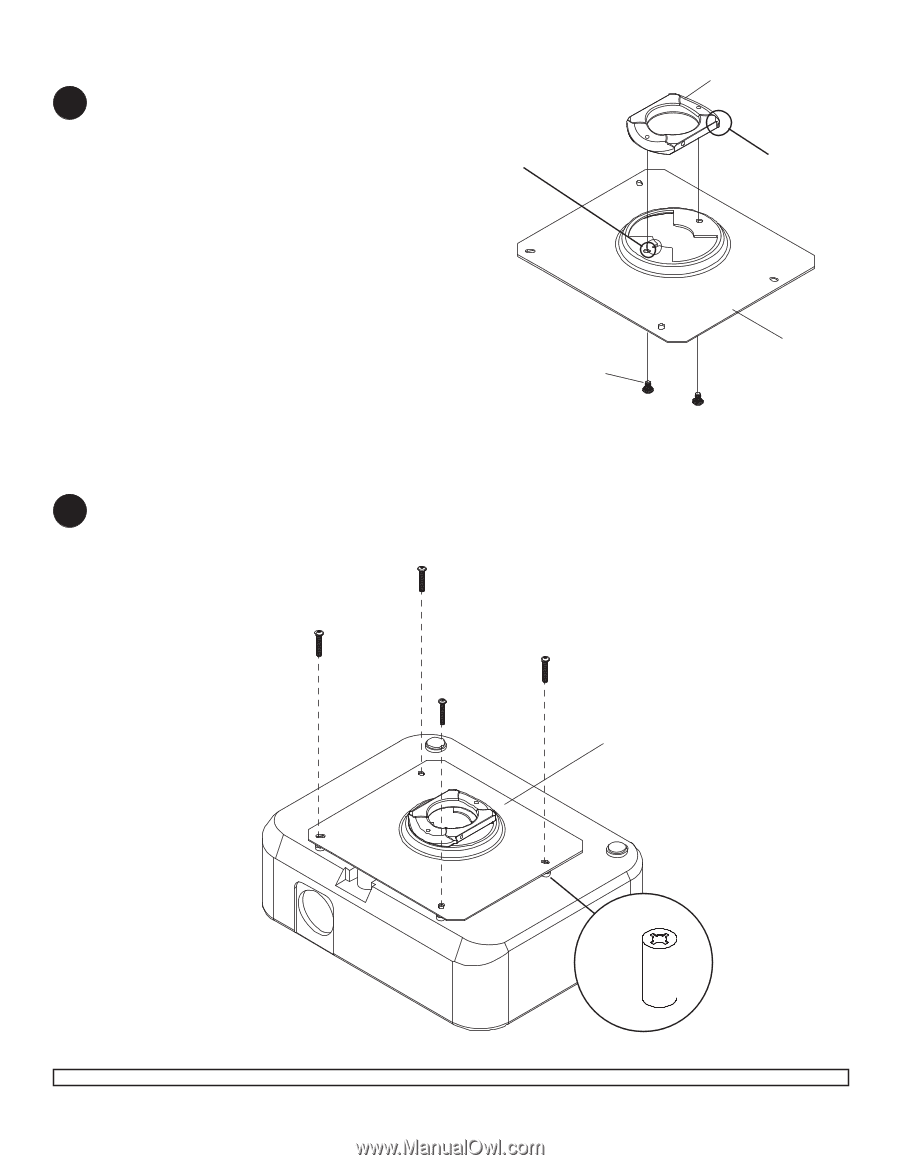
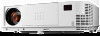
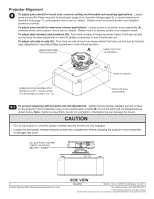
Attaching Adapter Plate to Projector 5 Align shoulder on connection block (EE) opposite notch in adapter plate (AA). Attach adapter plate (AA) to connection block (EE) using two #10-32 x 3/8" serrated washer head socket pin screws (C) as shown in figure 5.1. Tighten screws using 4 mm allen wrench (B). NOTCH INDICATES FRONT OF PROJECTOR EE SHOULDER AA C fig. 5.1 6 Flip projector upside down and attach adapter plate (AA) using four serrated socket pin screws (BB) and retaining spacers (CC) as shown below. Tighten using 4 mm allen wrench (B). NOTE: Retaining spacers (CC) go between the projector and adapter plate (AA). BB AA CC Visit the Peerless Web Site at www.peerlessmounts.com 8 of 10 ISSUED: 10-01-10 SHEET #: 056-9034-4 07-29-11 For customer care call 1-800-865-2112
-
 1
1 -
2
-
 3
3 -
 4
4 -
 5
5 -
 6
6 -
 7
7 -
 8
8 -
 9
9 -
 10
10
 |
 |