NEC NP60 NP40/50/60 UM
NEC NP60 - XGA DLP Projector Manual
 |
UPC - 050927253782
View all NEC NP60 manuals
Add to My Manuals
Save this manual to your list of manuals |
NEC NP60 manual content summary:
- NEC NP60 | NP40/50/60 UM - Page 1
Portable Projector NP60/NP50/NP40 User's Manual The projector's model name indicated on the projector's label is NP60, NP50, NP40, NP60G, NP50G, and NP40G respectively. All six models are referred to as NP60, NP50 and NP40 throughout the user's manual except some of the specifications pages. - NEC NP60 | NP40/50/60 UM - Page 2
© NEC Viewtechnology, Ltd. 2006 First edition September 2006 • DLP is a trademark of Texas Instruments. • IBM is a trademark (1) The contents of this user's manual may not be reprinted in part or whole without permission. (2) The contents of this user's manual are subject to change without notice. - NEC NP60 | NP40/50/60 UM - Page 3
carefully before using your NEC NP60/NP50/NP40 projector and keep the manual handy for future reference. Your serial number is located on the bottom of your projector. Record it here: CAUTION To turn off main power, be sure to remove the plug from power outlet. The power outlet socket should be - NEC NP60 | NP40/50/60 UM - Page 4
consult your dealer for more information. Place the projector in a horizontal position The tilt angle of the projector should not exceed 10 degrees, nor should the projector be installed in any way other than the desktop and ceiling mount, otherwise lamp life could decrease dramatically. 10˚ ii - NEC NP60 | NP40/50/60 UM - Page 5
service personnel. • Do not place any objects on top of the projector. • Do not touch the power plug during a thunderstorm. Doing so can cause electrical shock or fire. • The projector is designed to operate on a power supply of 100-240V AC 50/60 Hz (NP60/NP50/NP40) or 200-240V AC 50/60 Hz (NP60G - NEC NP60 | NP40/50/60 UM - Page 6
that you have the batteries' polarity (+/-) aligned correctly. • Do not use new and old batteries together, or use different types of batteries together. • Dispose of used batteries according to your local regulations. Lamp Replacement • To replace the lamp, follow all instructions provided on page - NEC NP60 | NP40/50/60 UM - Page 7
in the Box? ...1 ➋ Introduction to the Projector 2 ➌ Part Names of the Projector 4 Top Features ...6 Terminal Panel Features 6 ➍ Part Names of the Remote Control 7 Battery Installation 8 Remote Control Precautions 8 Operating Range for Wireless Remote Control 8 2. Installation and Connections - NEC NP60 | NP40/50/60 UM - Page 8
[Information 45 ➑ Menu Descriptions & Functions [Reset 46 6. Maintenance ...47 ➊ Cleaning the Lens and the Focus Sensor 47 ➋ Cleaning the Cabinet 47 ➌ Replacing the Lamp and the Cooling Pump 48 7. Appendix ...52 ➊ Troubleshooting ...52 ➋ Specifications ...55 ➌ Cabinet Dimensions 57 ➍ Pin - NEC NP60 | NP40/50/60 UM - Page 9
if you ever need to ship your projector. Projector SOURCE ON/STAND BY SELECT ADAJ.UTO FOCUS POWSETRATLUASMP Lens cap (24FT9981) Power cable (US: 7N080216) ( UP PAGE DOWN Remote control Batteries (AAA×2) (7N900681) Quick Setup Guide Important Information CD-ROM User's manual For North - NEC NP60 | NP40/50/60 UM - Page 10
The remote control can be used wirelessly. *1 Do not attempt to mount the projector on a ceiling yourself. The projector must be installed by qualified technicians in order to ensure proper operation and reduce the risk of bodily injury. In addition, the ceiling must be strong enough to support the - NEC NP60 | NP40/50/60 UM - Page 11
way to get started is to take your time and do everything right the first time. Take a few minutes now to review the user's manual. This may save you time later on. At the beginning of each section of the manual you'll find an overview. If the section doesn't apply, you can skip - NEC NP60 | NP40/50/60 UM - Page 12
Part Names of the Projector Front/Top Zoom Lever (→ page 22) Lens Lens Cap SOURCE SELECT ADAJ.UTO FOCUS POWSETRATLUASMP ON/STAND BY Remote AC IN AC Input Connect the supplied power cable's three-pin plug here, and (inlet) * This security slot supports the MicroSaver ® Security System. - NEC NP60 | NP40/50/60 UM - Page 13
Bottom Rear Feet (→ page 21) Lamp Cover (→ page 48) Cooling Pump Cover (→ page 50) 1. Introduction 5 - NEC NP60 | NP40/50/60 UM - Page 14
Top Features 4 35 67 1. Introduction LAMP STATUS POWER FOCUS AUTO ADJ. SELECT SOURCE ON/STAND BY 21 8 9 1. POWER Button (ON / STAND BY) ( ) (→ page 16, 27) 2. POWER Indicator (→ page 15, 16, 27, 52) 3. STATUS Indicator (→ page 52) 4. LAMP Indicator (→ page 48, 52) 5. FOCUS Button (→ - NEC NP60 | NP40/50/60 UM - Page 15
❹ Part Names of the Remote Control 1 OFF ON 3 POWER 2 FOCUS PIC-MUTE PAGE UP 4 6 DOWN 5 7 MENU 8 1. Introduction 9 11 13 14 18 ENTER EXIT L-CLICK R-CLICK MOUSE VIDEO COMPUTER AUTO ADJ. S-VIDEO LAMP MODE VOLUME ASPECT HELP PICTURE FREEZE 10 12 15 17 16 19 21 22 20 1. - NEC NP60 | NP40/50/60 UM - Page 16
(+/-) aligned correctly. • Do not use new and old batteries together, or use different types of batteries together. • Dispose of used batteries according to your local regulations. Operating Range for Wireless Remote Control 30° 30° Remote control 7m/22 feet Remote sensor on projector cabinet - NEC NP60 | NP40/50/60 UM - Page 17
to connect video and audio sources. Your projector is simple to set up and use. But before you get started, you must first: ➊ Set up a screen and the projector. ➋ Connect your computer or video equipment to the projector. See pages 12 to 14. ➌ Connect the supplied power cable. See page 15. To the - NEC NP60 | NP40/50/60 UM - Page 18
Projector bottom Screen center 2.28"/58 mm B Screen bottom D Lens center Screen Size Diagonal Width Height inch inch inch 33 26 20 40 32 24 60 Vertical distance between lens center and bottom of screen(top of screen for ceiling application) α=Throw angle C B wide - tele mm mm 321 - NEC NP60 | NP40/50/60 UM - Page 19
to enjoy a much larger image when a smaller space is required. Contact your NEC dealer if you need a mirror system. If you're using a mirror system and your image is inverted, use the MENU and SELECT buttons on your projector cabinet or your remote control to correct the orientation. (→ page 42) 11 - NEC NP60 | NP40/50/60 UM - Page 20
sure to connect the projector and notebook PC while the projector is in standby mode and before turning on the power to the notebook PC correctly: Project an image to fill the screen and then press the AUTO ADJ button on the remote control or the projector cabinet. • The COMPUTER IN connector supports - NEC NP60 | NP40/50/60 UM - Page 21
supplied) Audio Equipment AUDIO IN LR Y Cb Cr DVD player LR Component AUDIO OUT Audio cable (not supplied) NOTE: Refer to your DVD player's owner's manual for more information about your DVD player's video output requirements. 13 - NEC NP60 | NP40/50/60 UM - Page 22
IN LR Audio cable (not supplied) NOTE: Refer to your VCR or laser disc player owner's manual for more information about your equipment's video output requirements. NOTE: An image may not be displayed correctly when a Video or S-Video source is played back in fast-forward or fast-rewind via a scan - NEC NP60 | NP40/50/60 UM - Page 23
to the projector. First connect the supplied power cable's three-pin plug to the AC IN of the projector, and then connect the other plug of the supplied power cable in the wall outlet. The projector will go into its standby mode and the power indicator will glow orange. LAMP STATUS POWER FOCUS - NEC NP60 | NP40/50/60 UM - Page 24
lens cap is removed. LAMP STATUS POWER FOCUS AUTO ADJ. SELECT ON/STAND BY OFF ON POWER FOCUS PIC-MUTE PAGE UP MENU DOWN Standby LAMP STATUS POWER Blinking LAMP STATUS POWER Power On LAMP STATUS POWER Steady orange light Blinking green light Steady green light See page 52 for more - NEC NP60 | NP40/50/60 UM - Page 25
components to cool down. • When the lamp reaches its end of usable life, the projector will not turn on. If this happens, replace the lamp. • If the lamp fails to light, and if the STATUS indicator flashes on and off in a cycle of six times, wait a full minute and then turn on the power. 17 - NEC NP60 | NP40/50/60 UM - Page 26
equipment connected to the projector. Adjusting with buttons on the cabinet 1. Press the SELECT ▶ button with no menus displayed. The Source list will be displayed. - When the menu is displayed, press the EXIT button to close the menu and start the operation. LAMP STATUS POWER FOCUS AUTO ADJ - NEC NP60 | NP40/50/60 UM - Page 27
Operation) Selecting Default Source You can set a source as the default source so that the default source will be displayed each time the projector is turned on. 1. S ele ct [S etup - Options] → [D efault Source Select] from the menu. The [Default Source Select] screen will be displayed. 2. Select - NEC NP60 | NP40/50/60 UM - Page 28
then use the Keystone feature for proper adjustment. (→ page 25) About Auto Focus Just placing the projector on a flat level surface makes a focused image. (→ page 22) About Auto Keystone Correction Adjusting the height of a projected image or changing the projection angle will result in the Auto - NEC NP60 | NP40/50/60 UM - Page 29
the projector is turned on and 1 during its cool down correcting the vertical distortion. 3 CAUTION: Do not use the tilt-foot for purposes other than originally intended. Misuses such as using the tilt foot to carry or hang (from the wall or ceiling) the projector can cause damage to the projector - NEC NP60 | NP40/50/60 UM - Page 30
not work correctly and that you need to use the FOCUS button to adjust the focus manually. NOTE: In some cases, the Auto Focus may not work correctly or the distance to the screen. • When moving the screen, not the projector, because the focus sensor cannot detect the distance to the screen TIP: - NEC NP60 | NP40/50/60 UM - Page 31
. Place the projector so that the lens surface is parallel to the screen. Also, adjust the height to keep the projector level by rotating Keystone] is turned on, [Keystone] can be adjusted manually. NOTE: Auto and Manual Keystone correction angle could be less than 16 degrees depending on some - NEC NP60 | NP40/50/60 UM - Page 32
adjustment screen will be closed. LAMP STATUS POWER FOCUS AUTO ADJ. SELECT SOURCE ON/STAND BY Adjusting with the remote control 1. Press the FOCUS + ADJ button on the remote control causes the Auto Focus to work when the Focus adjustment screen is displayed if the projector is placed within the - NEC NP60 | NP40/50/60 UM - Page 33
input. Adjust the keystone distortion manually in the following cases: • To fine tune Keystone correction even after performing the [Auto The slide bar will be closed. LAMP STATUS POWER FOCUS AUTO ADJ. SELECT SOURCE ON/STAND BY Adjusting with the remote control 1. Press the MENU button. - NEC NP60 | NP40/50/60 UM - Page 34
projector. (→ page 41) ➏ Optimizing RGB Picture Automatically Adjusting the Image Using Auto Adjust This adjustment may be necessary when you connect your computer for the first remote control • Press the AUTO ADJ. button to optimize an RGB image automatically. [Poor picture] LAMP STATUS POWER - NEC NP60 | NP40/50/60 UM - Page 35
you cannot turn off the projector for 60 seconds. Power On LAMP STATUS POWER Steady green light Fan running LAMP STATUS POWER Standby LAMP STATUS POWER Blinking or- Steady orange ange light light About Direct Power Off The projector has a feature called "Direct Power Off". This feature allows - NEC NP60 | NP40/50/60 UM - Page 36
Brightness). Select this mode to increase the lamp life (NP60: approx. 80% Brightness, NP50/NP40: approx. 90% Brightness). Status of LAMP indicator Off Steady Green light ➍ Preventing the Unauthorized Use of the Projector A keyword can be set for your projector using the Menu to avoid operation by - NEC NP60 | NP40/50/60 UM - Page 37
background. To display an image at this time, press the MENU button to display the Keyword input screen. Type in the correct keyword and press the ENTER button. The projector will display an image. NOTE: The security disable mode is maintained until the main power is turned off or unplugging the - NEC NP60 | NP40/50/60 UM - Page 38
] and press the ENTER button. The Keyword confirmation screen will be displayed. 4. Type in your keyword and press the ENTER button. When the correct keyword is entered, the Security function will be disabled. NOTE: If you forget your keyword, contact your dealer. Your dealer will provide you with - NEC NP60 | NP40/50/60 UM - Page 39
30° 30° Remote sensor on the remote mouse receiver When connecting using the USB terminal For PC, the mouse receiver can only be used with a Windows 98/Me/XP*, Windows 2000 or Mac OS X 10.0.0 or later operating system. * NOTE: In Windows XP, if the mouse cursor will not move correctly, do the - NEC NP60 | NP40/50/60 UM - Page 40
4. Convenient Features About Drag Mode By pressing the MOUSE L-CLICK or R-CLICK button for 2 or 3 seconds then releasing, the drag mode is set and the drag operation can be performed simply by pressing the SELECT button. To drop the item, press the MOUSE L-CLICK (or R-CLICK) button. To cancel it, - NEC NP60 | NP40/50/60 UM - Page 41
menu may not be displayed correctly while an interlaced motion video image is projected. 1. Press the MENU button on the remote control or projector cabinet to display the main menu. OFF POWER FOCUS PIC-MUTE ON PAGE UP MENU DOWN ENTER EXIT LAMP STATUS POWER FOCUS AUTO ADJ. SELECT SOURCE - NEC NP60 | NP40/50/60 UM - Page 42
item or selecting an item. 5. Using On-Screen Menu Slide bar Solid triangle OFF ON POWER FOCUS PIC-MUTE PAGE UP MENU DOWN Return key symbol ENTER EXIT Radio button LAMP STATUS POWER FOCUS AUTO ADJ. SELECT SOURCE For Adjusting items (Slide bar) Slide bar Indicates settings or - NEC NP60 | NP40/50/60 UM - Page 43
to cancel your setting. You will return to the previous menu. Key Lock symbol Indicates the Control Panel Lock is enabled. Thermometer symbol Indicates the lamp mode is forcibly set to Eco mode because the internal temperature is too high. 35 - NEC NP60 | NP40/50/60 UM - Page 44
Reference Gamma Correction Color Temperature White Peaking Contrast Brightness Sharpness Color Hue Reset 5. Using Ceiling Rear, Desktop Rear, Yes Ceiling Front 38400bps 4800bps/9600bps/19200bps/38400bps - Off Off, On Yes Off Off, On - Color Color, Monochrome Yes Auto 45 sec Manual - NEC NP60 | NP40/50/60 UM - Page 45
Hours Used Horizontal Frequency Vertical Frequency Video Type Sync Type Sync Polarity Scan Type Product Serial Number Firmware Data Reset Current Signal All Data Clear Lamp Hours 5. Using On-Screen Menu Item NTSC, NTSC3.58, NTSC4.43, PAL, PAL-M, PAL-N, PAL60, SECAM Separate Sync, Composite Sync - NEC NP60 | NP40/50/60 UM - Page 46
be displayed. You can customize each gamma or color. To do so, first select [Preset] and press the ENTER button, and then proceed with the Recommended for graphics. sRGB Standard color values. Selecting Gamma Correction Mode [Gamma Correction] Each mode is recommended for: Dynamic Creates a high- - NEC NP60 | NP40/50/60 UM - Page 47
, No=Not adjustable, Yes* = depending on the signal Reset The settings and adjustments for [Picture] will be returned to Aspect Ratio window by pressing the ASPECT button on the remote control. (→ page 7) When 4:3 is selected from the projector displays the current image in its true resolution. 39 - NEC NP60 | NP40/50/60 UM - Page 48
manually the first time. This is evident when part of your image appears projector will call up from memory the stored values for the source. To clear the stored adjustment values, select the [Reset] → [Current Signal] or [All Data] from the menu to reset or 2:2 pull down correction to eliminate jitter - NEC NP60 | NP40/50/60 UM - Page 49
are saved when the projector is off. NOTE: When [Auto Keystone] is set to [On], [Keystone Save] is not available. Next time you turn on the power, the Auto Keystone function will work and the data stored with [Keystone Save] will be invalid. Selecting Wall Color Correction Mode [Wall Color] This - NEC NP60 | NP40/50/60 UM - Page 50
ceiling front projection. Desktop front Ceiling rear Desktop rear Ceiling front Selecting Communication Speed [Communication Speed] This feature sets the baud rate of the PC Control port (Mini DIN 8 Pin). It supports affected even when [Reset] is done from not affect the remote control or PC - NEC NP60 | NP40/50/60 UM - Page 51
feature turns on or off the Security function. Unless the correct keyword is entered, the projector cannot project an image. (→ page 28) Selecting Menu you to select how long the projector waits after the last touch of a button to turn off the menu. The preset choices are "Manual", "Auto 5 sec", " - NEC NP60 | NP40/50/60 UM - Page 52
projector on automatically when the power cable is inserted into an active power outlet. This eliminates the need to always use the POWER button on the remote control or projector cabinet. Enabling Power Management [Power you wish to cool down the temperature inside the projector quickly, select [ - NEC NP60 | NP40/50/60 UM - Page 53
video standards automatically or manually. In the case where the projector has difficulty detecting the lamp time reaches 0 hours, the projector will not turn on regardless of whether the lamp mode is set to Normal or Eco. Product NP60 NP50/NP40 Normal 2000 Lamp life(H) Eco 3000 Replacement lamp - NEC NP60 | NP40/50/60 UM - Page 54
mode after 2100 hours (up to 3100 hours in Eco mode) of service. If this happens, press the HELP button on the remote control for 10 seconds to reset the lamp clock back to zero. When the lamp time clock is reset to zero, the LAMP indicator goes out. Do this only after replacing the lamp. 46 - NEC NP60 | NP40/50/60 UM - Page 55
should follow to clean the focus sensor, lens and replace the lamp and the cooling pump. ➊ Cleaning the Lens and Focus Sensor Cleaning the lens ADAJ.UTO FOCUS POWSETRATLUASMP ➋ Cleaning the Cabinet 1. Turn off the projector before cleaning. 2. Vacuum the ventilation inlet of the cabinet. PC - NEC NP60 | NP40/50/60 UM - Page 56
If this happens, contact your NEC dealer for lamp replacement. To replace the lamp: Optional lamp, cooling pump and tools needed for replacement: • Replacement lamp with cooling pump: NP03LP (NP60) or NP02LP (NP50/NP40) • Phillips screwdriver or equivalent 1. Place the projector on a soft cloth and - NEC NP60 | NP40/50/60 UM - Page 57
lamp other than the NEC replacement lamp NP03LP (NP60) or NP02LP (NP50/NP40). Order this from your NEC dealer. Secure it in place with the two screws. NOTE: Tighten the two screws alternately until both screws are completely tightened. Failure to do this can result in air leak from the cooling pump - NEC NP60 | NP40/50/60 UM - Page 58
the lamp replacement. Go on to the cooling pump replacement. To replace the cooling pump: 6. Remove the cooling pump. (1) Loosen the cooling pump cover screw until the screwdriver goes into a freewheeling condition. - The cooling pump cover screw is not removable. (2) Remove the cooling pump cover - NEC NP60 | NP40/50/60 UM - Page 59
cooling pump replacement. Go on to the next step. 8. Connect the supplied power cable and turn on the projector. 9. Finally, select the menu → [Reset] → [Clear Lamp Hours] to reset the lamp usage hours. NOTE: When the lamp exceeds 2100 hours (up to 3100 hours in Eco mode) of service, the projector - NEC NP60 | NP40/50/60 UM - Page 60
0.5 sec Off) Fans will not work correctly. 6 c y c l e (0. 5 s e c Lamp error On, 0.5 sec Off) Lamp fails to light. Wait a full minute and then turn on again. 8 c y c l e (0 . 5 s e c Cooling pump error On, 0.5 sec Off) • The two screws on the lamp housing are not completely tightened. Tighten - NEC NP60 | NP40/50/60 UM - Page 61
the power button on the projector cabinet or the remote control is on. (→ page 15, 16) • Ensure that the lamp cover is installed correctly. (→ page 49) • Ensure that the two screws on the lamp housing are completely tightened.(→ page 49) • Ensure that the cooling pump is installed correctly. (→ page - NEC NP60 | NP40/50/60 UM - Page 62
correctly. 7. Appendix • Power on process for the projector and the PC. Be sure to connect the projector and notebook PC while the projector is in standby mode and before turning on the power on or off. For example, NEC laptops use Fn + F3, while those supported by your Macintosh and the projector, - NEC NP60 | NP40/50/60 UM - Page 63
Green / Sync on Video Power Requirement/Input Current: NP60 : 100-240 V AC, 3.2 - 1.3 A NP50/NP40 : 100-240 V AC, 3.0 - 1.2 A NP60G : 200-240 V AC, 50/60 Hz, 1.5 A NP50G/40G : 200-240 V AC, 50/60 Hz, 1.4 A * Effective pixels are more than 99.99%. ** This is the light output value (lumens) when - NEC NP60 | NP40/50/60 UM - Page 64
Power Consumption 7. Appendix NP60: 285W in Lamp Normal mode, 240W in Lamp Eco mode, 6.0W in Standby mode NP50/NP40: 265W in Lamp Normal mode, 240W in Lamp Eco mode, 6.0W in Standby mode Mechanical Installation Orientation Desktop/Front, Desktop/Rear, Ceiling/Front, Ceiling/Rear Dimensions - NEC NP60 | NP40/50/60 UM - Page 65
57 246 (9.7") 73 (2.9") Lens center Unit: mm (inch) 59 (2.3") 79 (3.1") Lens center 177 (7.0") LAMP STATUS POWER FOCUS AUTO ADJ. SELECT SOURCE ON/STAND BY 72 (2.8") PC CONTROL COMPUTER IN VIDEO IN S-VIDEO IN AC IN ➌ Cabinet Dimensions 7. Appendix - NEC NP60 | NP40/50/60 UM - Page 66
7. Appendix ➍ Pin Assignments of D-Sub COMPUTER Input Connector Mini D-Sub 15 Pin Connector 11 12 13 14 15 6 7 8 9 10 1 23 4 5 Signal Level Video signal : 0.7Vp-p (Analog) Sync signal : TTL level Pin No. 1 2 3 4 5 6 7 8 9 10 11 12 13 14 15 RGB Signal (Analog) Red Green or Sync on Green Blue - NEC NP60 | NP40/50/60 UM - Page 67
48.08 46.88 53.67 49.72 48.36 56.48 60.24 60.02 68.68 61.80 60.00 63.98 69.87 - 75.00 87.50 93.75 displayed correctly. If this should happen, change the re- fresh rate or resolution on your PC. Refer to Display Properties help section of your PC for procedures. • UXGA (1600 x 1200) is supported for - NEC NP60 | NP40/50/60 UM - Page 68
➏ PC Control Codes and Cable Connection PC Control Codes Function POWER ON POWER OFF INPUT SELECT COMPUTER INPUT SELECT VIDEO INPUT SELECT S-VIDEO PICTURE MUTE ON PICTURE MUTE OFF To GND of PC 12 34 5 6 78 To RxD of PC NOTE : Pins 2, 3, 5 and 6 are used inside the projector. 7. Appendix 60 - NEC NP60 | NP40/50/60 UM - Page 69
). The cooling pump is installed correctly. Lamp Hour Used (lamp operation hours) was cleared after lamp replacement. No power even though you press and hold the POWER button for a minimum of 1 second. Video No image is displayed from your PC or video equipment to the projector. Still no - NEC NP60 | NP40/50/60 UM - Page 70
light □ Orange □ Green Flashing light [ ] cycles Remote control model number: Projector PC Installation environment Screen size: inch Screen type: □ White matte □ Beads □ Polarization □ Wide angle □ High contrast Throw distance: feet/inch/m Orientation: □ Ceiling mount □ Desktop Power - NEC NP60 | NP40/50/60 UM - Page 71
vehicles, boats or ships, etc. 6) Problems or damage caused by expendable supplies or devices connected to the product other than those designated by NEC. 7) Problems caused by natural consumption, wear or deterioration of parts under normal usage conditions. 8) Problems or damage to lamps and other - NEC NP60 | NP40/50/60 UM - Page 72
Line: +6 03 2178 3789 Email Address: [email protected] WEB Address: http://www.necarecenter.com (Regions Covered) Malaysia Tele Service Co., Ltd. Address: 2nd Fl., Ire B/D. Saudi Arabia NOTE: In countries designated with an asterisk(*), replacement product rental service are offered. 64 - NEC NP60 | NP40/50/60 UM - Page 73
period. I also confirm following information is correct. Regards. Application Sheet for TravelCare Service Program Country, product purchased : User's : User's Model Name : Date of Purchase : Serial No. on cabinet : Problem of units per User : Required Service : (1) Repair and Return (2) - NEC NP60 | NP40/50/60 UM - Page 74
Station will repair the DOA unit as a Warranty repair, but will not exchange DOA unit with new units. 7. Appendix 5. Loan Service Charges and Conditions: Upon acceptance of this NEC Projector, Customer agrees to assume liability for this loan unit. The current cost of use of this loan unit is $200
-
 1
1 -
 2
2 -
 3
3 -
 4
4 -
 5
5 -
 6
6 -
 7
7 -
8
-
9
-
10
-
11
-
12
-
13
-
14
-
15
-
16
-
17
-
18
-
19
-
20
-
21
-
22
-
23
-
24
-
25
-
26
-
27
-
28
-
29
-
30
-
31
-
32
-
33
-
34
-
35
-
36
-
37
-
38
-
39
-
40
-
41
-
42
-
43
-
44
-
45
-
46
-
47
-
48
-
49
-
50
-
51
-
52
-
53
-
54
-
55
-
56
-
57
-
58
-
59
-
60
-
61
-
62
-
63
-
64
-
65
-
66
-
67
-
68
-
69
-
70
-
71
-
72
-
73
-
74
 |
 |
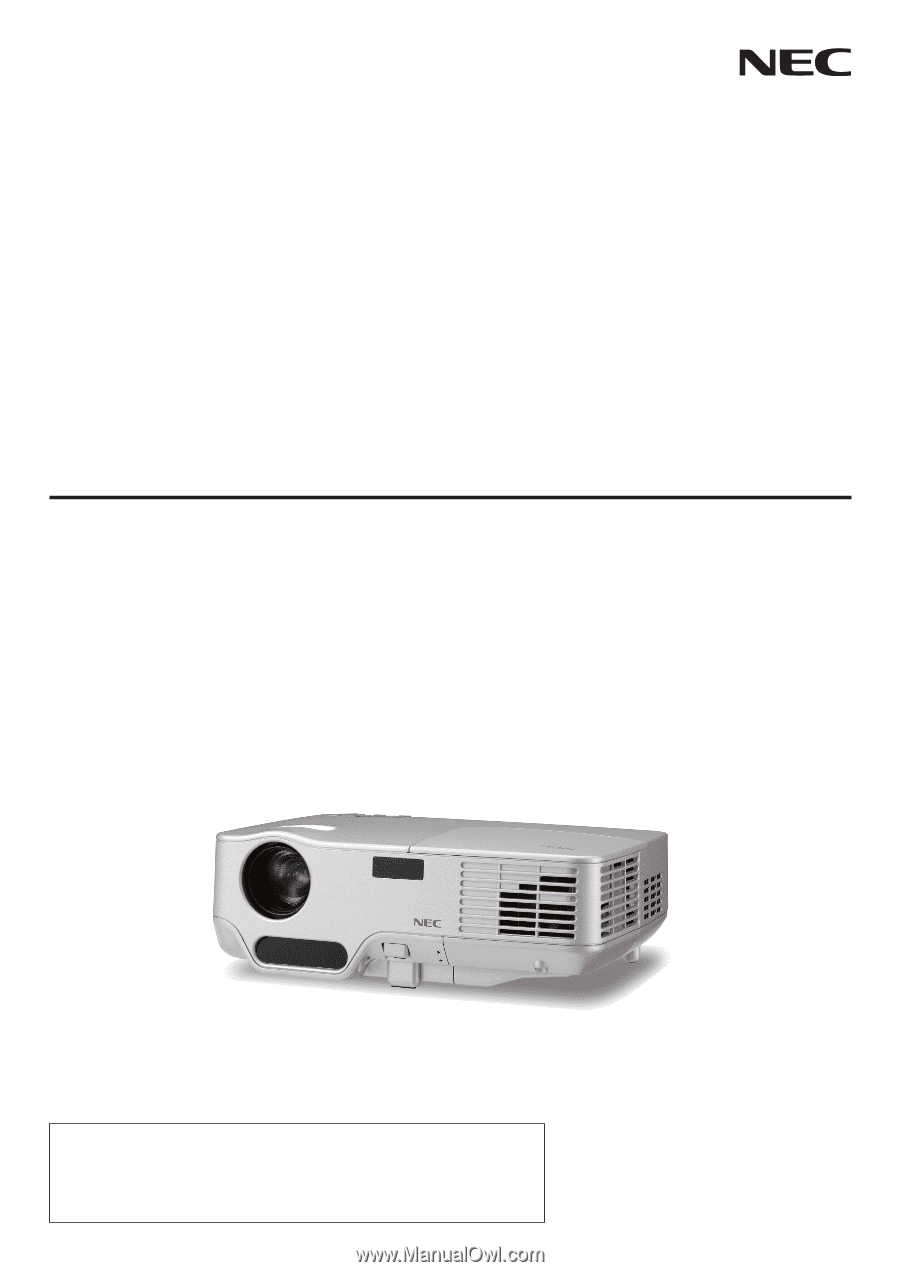
Portable Projector
NP60/NP50/NP40
User’s Manual
The projector's model name indicated on the projector's label is NP60, NP50,
NP40, NP60G, NP50G, and NP40G respectively.
All six models are referred to as NP60, NP50 and NP40 throughout the user's
manual except some of the specifications pages.