NaceCare TP18SX HT1800 Heater Owners Manual - Page 6
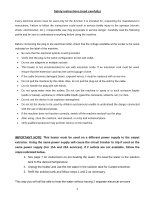
Preparation for Use, Note: Must be a separate, circuit to the carpet extractor., ATTENTION, Do
 |
View all NaceCare TP18SX manuals
Add to My Manuals
Save this manual to your list of manuals |
Page 6 highlights
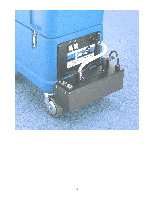
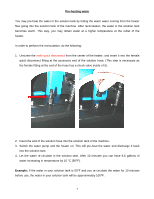
Preparation for Use 1. Mount the heater to the machine as indicated above. 2. Ensure the switch for the heater is in the "OFF" position. 3. Connect the outlet of the carpet extractor to the inlet of the heater. 4. Connect the outlet of the heater to the cleaning accessory, by using the solution hose provided. 5. Switch the pump on and be sure that the solution is sprayed normally through the accessory. 6. Insert the plug of the heater into a grounded electrical socket. Note: Must be a separate circuit to the carpet extractor. 7. Switch the heater on. The green light will be switched on also the 2 lights (red and green) for the 2 thermal protectors will be switched on as well. 8. Spray water for approximately 30 seconds to achieve a temperature rise. The water will reach a steady temperature after 1 minute. In normal conditions, both the green and red light of the thermal protectors are illuminated. The red light "ON" indicates the heating element inside the heater is on. The red light will shut off if you release the spray trigger for more than 30-40 seconds. Once you resume use, the red light will turn on again, indicating that the element is heating. The green light is connected to the high limit switch situated inside the heater. The high limit switch will shut the heater down at 70°C (158°F) +/- 4° (39°F). The high limit switch will shut down the heating element for 2 reasons: 1. The water inside the heater has become hotter than 70°C (158°F). 2. The main thermostat has failed and the unit now requires service. ATTENTION: • If you want to stop spraying water for more than 30-40 seconds, you should switch the heater off. This will cause less stress to the thermostat. • Do not let the heater work without water. • Do not open the cover of the heater for any reason. The heating element and other parts are very hot and can cause severe burns. • Do not try to service the heater yourself. • Repairs may be made by qualified personnel only! 6
-
 1
1 -
 2
2 -
 3
3 -
 4
4 -
 5
5 -
 6
6 -
 7
7 -
 8
8
 |
 |