Nady DKW-1 HT Manual - Page 4
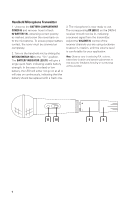
Handheld Microphone Transmitter
 |
View all Nady DKW-1 manuals
Add to My Manuals
Save this manual to your list of manuals |
Page 4 highlights
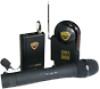
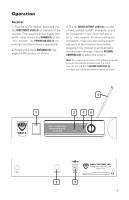
Handheld Microphone Transmitter 1. Unscrew the BATTERY COMPARTMENT COVER (8) and remove. Insert a fresh 9V BATTERY (9), observing correct polarity as marked, and screw the cover back on to the microphone. To ensure proper battery contact, the cover must be screwed on completely. 2. Turn on the handheld mic by sliding the OFF/ON SWITCH (10) to the "On" position. The BATTERY INDICATOR LED (11) will give a single quick flash, indicating usable battery strength. In the case of a dead or low battery, the LED will either not go on at all or will stay on continuously, indicating that the battery should be replaced with a fresh one. 3. The microphone is now ready to use. The corresponding RX LED (7) on the DKW‑3 receiver should now be lit, indicating a received signal from the transmitter. Adjust the VOLUME (6) control of the receiver channels you are using clockwise to about 3/4 rotation, until the volume level is comfortable for your application. Note: Observe care in selecting P.A. volume, transmitter location and speaker placement so that acoustic feedback (howling or screeching) will be avoided. 11 10 9 8 4
-
 1
1 -
 2
2 -
 3
3 -
 4
4 -
 5
5 -
 6
6 -
 7
7 -
 8
8
 |
 |
