Nady GTA-1260 Manual - Page 5
Front Controls And Connections
 |
View all Nady GTA-1260 manuals
Add to My Manuals
Save this manual to your list of manuals |
Page 5 highlights
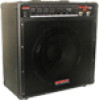
FRONT CONTROLS AND CONNECTIONS (4) (5) (6) (7) (8) (9) (10) (11) (12) (3) (2) (1) 1. POWER SWITCH This switch turns the main power on and off. Flipping the toggle switch up to the ON+ position will turn on the amp "in phase" with the main AC line voltage. Flipping the switch down to the ON- position will reverse the polarity. In some cases, AC hum (caused by ground loops) can be reduced by reversing the polarity. Select the On position which has the least amount of AC hum. 2. POWER INDICATOR LIGHT Lights when the unit is powered on. 3. STANDBY SWITCH Flipping this toggle switch to ON/OFF (STBY) will respectively enable/disable the audio to the amplifier and the outputs. This allows for proper warm-up of the tubes before applying signal to them, and allows the amp to stay warm when not in immediate use. To extend the life of the tubes, always turn the Main Power Switch on first, for 1-2 minutes, before flipping ON the Standby Switch. 4. INPUT JACK Input for instrument outputs - guitar, keyboard, highoutput mics for harmonicas, and other effects devices. • For maximum distortion adjust the VOLUME to maximum, the MASTER to a very low setting, and the DISTORTION to Position 3. 6. VOLUME CONTROL This adjusts the level of the input signal to the amp. Increasing this level will create distortion dependent on the DISTORTION setting. 7. MASTER VOLUME CONTROL Adjusts overall loudness of the amp. 8. TREBLE CONTROL Adjusts the level of treble/Hi frequencies. 9. MID CONTROL Adjusts the level of mid-range frequencies. 10. BASS CONTROL Adjusts the level of bass frequencies. 11. PRESENCE CONTROL Adjusts the high overtones, texture, and feel of the amp. 5. DISTORTION SELECTOR This three-way switch selects the input sensitivity and amount of overdrive distortion. Position 1 offers the cleanest signal with least amount of distortion. Position 3 has the maximum amount of distortion. 12. REVERB CONTROL Adjusts the level of reverb mixed with the dry signal. Note: The VOLUME and MASTER controls also affect the final signal level and the amount of distortion. • For cleanest operation (least distortion) adjust the VOLUME to a very low setting, the MASTER to maximum, and the DISTORTION to Position 1. • For medium distortion ( or crunch) adjust the VOLUME to past the mid position, the MASTER to mid, and the DISTORTION to Position 2. 5
-
 1
1 -
 2
2 -
 3
3 -
 4
4 -
 5
5 -
 6
6 -
 7
7 -
 8
8
 |
 |
