Netgear A7500 User Manual - Page 5
Download the A7500 Installation Program, Set Up and Install the Adapter
 |
View all Netgear A7500 manuals
Add to My Manuals
Save this manual to your list of manuals |
Page 5 highlights
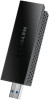
A7500 Download the A7500 Installation Program The adapter installation program is provided on the NETGEAR download site. To obtain the A7500 standalone adapter installation program: 1. Visit https://www.netgear.com/A7500-download and download the latest software file. 2. Follow the steps in Set Up and Install the Adapter on page 5 to run the installation program. Set Up and Install the Adapter Before you begin using your adapter, set up the adapter by running the installation program. To install the Windows standalone adapter: 1. Make sure your computer is running an up-to-date version of Windows 10 or Windows 11. For more information about updating Windows, see Microsoft's Update Windows support article. 2. Complete the steps described in Download the A7500 Installation Program on page 5 to download the latest software file for Windows. 3. Run the A7500 installation program: a. To start extraction of the installation files, double-click on the file that was downloaded and is named A7500 Windows Installation Program V.xxxx, where xxxx is the version number. b. Double-click on the file that was copied or downloaded and is named A7500 Windows Installation Program V.xxxx.exe where xxxx is the version number. NOTE: If a User Account Control window appears that asks if you want to allow the app to make changes to your device, select Yes. c. Follow the prompts to complete installation. When prompted, you can insert the Nighthawk® A7500 WiFi 6 USB 3.0 adapter into your computer's USB port. Get Started and Connect to a 5 WiFi Network User Manual
-
 1
1 -
 2
2 -
 3
3 -
 4
4 -
 5
5 -
 6
6 -
 7
7 -
 8
8 -
 9
9 -
 10
10 -
 11
11 -
12
-
13
-
14
-
15
-
16
 |
 |
