Netgear CSM4532 Hardware Installation Guide - Page 29
Connecting to the Management Port
 |
View all Netgear CSM4532 manuals
Add to My Manuals
Save this manual to your list of manuals |
Page 29 highlights
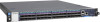
Hardware Installation To connect to the console using the RJ-45 male-to-RS-232 female cable: 1 Connect the RJ-45 connector to the console port ( ) of the switch. Model M4500-48XF8C Model M4500-32C 2 Connect the DB9 to a terminal or PC. 3 Manage the switch using the CLI commands (for more information, see the CLI manual). The switch uses the following default settings: Baud rate: 115200 Data width: 8 bits Parity: None Stop bits: 1 Flow control: None Connecting to the Management Port The management port is a dedicated port interface which is segregated from data traffic crossing other downlink or uplink ports. The port supports auto-negotiation. If the attached device also supports auto-negation, the transmission can operate in either half or full duplex, and data rate can be in 10Mbps, 100Mbps, or 1Gbps. Telnet, SNMP, and Web browser utility can all go through this port for local or remote management after the IP address, subnet mask, and default gateway are properly configured. CAUTION To avoid an IP address conflict, make sure to complete the initial configuration (see "Connecting to the Console Port") before connecting the management port to the network. For more information on how to configure the switch, see the CLI manual. To connect to the management port: 1 Connect one end of an Ethernet cable to the management port ( ) of the switch. Model M4500-48XF8C Model M4500-32C 29 NETGEAR M4500 Series Switches Hardware Installation Guide
-
 1
1 -
2
-
3
-
4
-
5
-
6
-
7
-
8
-
9
-
10
-
11
-
12
-
13
-
14
-
15
-
16
-
17
-
18
-
19
-
20
-
21
-
22
-
23
-
 24
24 -
 25
25 -
 26
26 -
 27
27 -
 28
28 -
 29
29 -
 30
30 -
 31
31 -
 32
32 -
 33
33
 |
 |
