Netgear M4100-50G Software Administration Manual - Page 364

Precon a Switch, Table 1., Switch Stack Master Scenarios

Page 364 highlights

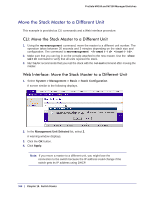
ProSafe M4100 and M7100 Managed Switches The following table provides switch stack configuration scenarios. Most of the scenarios assume at least two switches are connected through their stacking ports. Table 1. Switch Stack Master Scenarios Scenario Action Result Stack master election specifically determined by existing stack masters. Note: This is not recommended. Connect two powered-on switch stacks through the stacking ports. Only one of the stack masters becomes the new stack master. No other stack members become the stack master. Stack master election specifically determined by the stack member priority value. • Connect two switches through their stacking ports. • Use the global configuration command switch stack-member-number priority new-priority-number to set a stack member to a higher member priority value. • Restart both stack members at the same time. The stack member with the higher-priority value is elected stack master. Stack master election specifically determined by the MAC address. Assuming that both stack members have the same priority value and firmware image, restart both stack members at the same time. The stack member with the higher MAC address is elected stack master. Add a stack member. • Power off the new switch • Through their stacking ports, connect the new switch to a powered-on switch stack. • Power on the new switch. The stack master is retained. The new switch is added to the switch stack. Stack master failure. Remove (or power off) the stack master. One of the remaining stack members becomes the new stack master. All other members in the stack remain stack members and do not reboot. Preconfigure a Switch You can preconfigure (supply a configuration to) a new switch before it joins the switch stack. You can specify the stack member number, the switch type, and the interfaces associated with a switch that is not currently part of the stack. Note: If you are replacing a switch with the same model in the same position in the stack, you do not need to preconfigure it. The new switch assumes the same configuration as the previous switch. 364 | Chapter 19. Switch Stacks

  • 1
  • 2
  • 3
  • 4
  • 5
  • 6
  • 7
  • 8
  • 9
  • 10
  • 11
  • 12
  • 13
  • 14
  • 15
  • 16
  • 17
  • 18
  • 19
  • 20
  • 21
  • 22
  • 23
  • 24
  • 25
  • 26
  • 27
  • 28
  • 29
  • 30
  • 31
  • 32
  • 33
  • 34
  • 35
  • 36
  • 37
  • 38
  • 39
  • 40
  • 41
  • 42
  • 43
  • 44
  • 45
  • 46
  • 47
  • 48
  • 49
  • 50
  • 51
  • 52
  • 53
  • 54
  • 55
  • 56
  • 57
  • 58
  • 59
  • 60
  • 61
  • 62
  • 63
  • 64
  • 65
  • 66
  • 67
  • 68
  • 69
  • 70
  • 71
  • 72
  • 73
  • 74
  • 75
  • 76
  • 77
  • 78
  • 79
  • 80
  • 81
  • 82
  • 83
  • 84
  • 85
  • 86
  • 87
  • 88
  • 89
  • 90
  • 91
  • 92
  • 93
  • 94
  • 95
  • 96
  • 97
  • 98
  • 99
  • 100
  • 101
  • 102
  • 103
  • 104
  • 105
  • 106
  • 107
  • 108
  • 109
  • 110
  • 111
  • 112
  • 113
  • 114
  • 115
  • 116
  • 117
  • 118
  • 119
  • 120
  • 121
  • 122
  • 123
  • 124
  • 125
  • 126
  • 127
  • 128
  • 129
  • 130
  • 131
  • 132
  • 133
  • 134
  • 135
  • 136
  • 137
  • 138
  • 139
  • 140
  • 141
  • 142
  • 143
  • 144
  • 145
  • 146
  • 147
  • 148
  • 149
  • 150
  • 151
  • 152
  • 153
  • 154
  • 155
  • 156
  • 157
  • 158
  • 159
  • 160
  • 161
  • 162
  • 163
  • 164
  • 165
  • 166
  • 167
  • 168
  • 169
  • 170
  • 171
  • 172
  • 173
  • 174
  • 175
  • 176
  • 177
  • 178
  • 179
  • 180
  • 181
  • 182
  • 183
  • 184
  • 185
  • 186
  • 187
  • 188
  • 189
  • 190
  • 191
  • 192
  • 193
  • 194
  • 195
  • 196
  • 197
  • 198
  • 199
  • 200
  • 201
  • 202
  • 203
  • 204
  • 205
  • 206
  • 207
  • 208
  • 209
  • 210
  • 211
  • 212
  • 213
  • 214
  • 215
  • 216
  • 217
  • 218
  • 219
  • 220
  • 221
  • 222
  • 223
  • 224
  • 225
  • 226
  • 227
  • 228
  • 229
  • 230
  • 231
  • 232
  • 233
  • 234
  • 235
  • 236
  • 237
  • 238
  • 239
  • 240
  • 241
  • 242
  • 243
  • 244
  • 245
  • 246
  • 247
  • 248
  • 249
  • 250
  • 251
  • 252
  • 253
  • 254
  • 255
  • 256
  • 257
  • 258
  • 259
  • 260
  • 261
  • 262
  • 263
  • 264
  • 265
  • 266
  • 267
  • 268
  • 269
  • 270
  • 271
  • 272
  • 273
  • 274
  • 275
  • 276
  • 277
  • 278
  • 279
  • 280
  • 281
  • 282
  • 283
  • 284
  • 285
  • 286
  • 287
  • 288
  • 289
  • 290
  • 291
  • 292
  • 293
  • 294
  • 295
  • 296
  • 297
  • 298
  • 299
  • 300
  • 301
  • 302
  • 303
  • 304
  • 305
  • 306
  • 307
  • 308
  • 309
  • 310
  • 311
  • 312
  • 313
  • 314
  • 315
  • 316
  • 317
  • 318
  • 319
  • 320
  • 321
  • 322
  • 323
  • 324
  • 325
  • 326
  • 327
  • 328
  • 329
  • 330
  • 331
  • 332
  • 333
  • 334
  • 335
  • 336
  • 337
  • 338
  • 339
  • 340
  • 341
  • 342
  • 343
  • 344
  • 345
  • 346
  • 347
  • 348
  • 349
  • 350
  • 351
  • 352
  • 353
  • 354
  • 355
  • 356
  • 357
  • 358
  • 359
  • 360
  • 361
  • 362
  • 363
  • 364
  • 365
  • 366
  • 367
  • 368
  • 369
  • 370
  • 371
  • 372
  • 373
  • 374
  • 375
  • 376
  • 377
  • 378
  • 379
  • 380
  • 381
  • 382
  • 383
  • 384
  • 385
  • 386
  • 387
  • 388
  • 389
  • 390
  • 391
  • 392
  • 393
  • 394
  • 395
  • 396
  • 397
  • 398
  • 399
  • 400
  • 401
  • 402
  • 403
  • 404
  • 405
  • 406
  • 407
  • 408
  • 409
  • 410
  • 411
  • 412
  • 413
  • 414
  • 415
  • 416
  • 417
  • 418
  • 419
  • 420
  • 421
  • 422
  • 423
  • 424
  • 425
  • 426
  • 427
  • 428
  • 429
  • 430
  • 431
  • 432
  • 433
  • 434
  • 435
  • 436
  • 437
  • 438
  • 439
  • 440
  • 441
  • 442
  • 443
  • 444
  • 445
  • 446
  • 447
  • 448
  • 449
  • 450
  • 451
  • 452
  • 453
  • 454
  • 455
  • 456
  • 457
  • 458
  • 459
  • 460
  • 461
  • 462
  • 463
  • 464
  • 465
  • 466
  • 467
  • 468
  • 469
  • 470
  • 471
  • 472
  • 473
  • 474
  • 475
  • 476
  • 477
  • 478
  • 479
  • 480
  • 481
  • 482
  • 483
  • 484
  • 485
  • 486
  • 487
  • 488
  • 489
  • 490
  • 491
  • 492
  • 493
  • 494
  • 495
  • 496
  • 497
  • 498
  • 499
  • 500
  • 501
  • 502
  • 503
  • 504
  • 505
  • 506
  • 507
  • 508
  • 509
  • 510
  • 511
  • 512
  • 513
  • 514
  • 515
  • 516
  • 517
  • 518
  • 519
  • 520
  • 521
  • 522
  • 523
  • 524
  • 525
  • 526
  • 527
  • 528
  • 529
  • 530
  • 531
  • 532
  • 533
  • 534
  • 535
  • 536
  • 537
  • 538
  • 539
  • 540
  • 541
  • 542
  • 543
  • 544
  • 545
  • 546
  • 547
  • 548
  • 549
  • 550
  • 551
  • 552
  • 553
  • 554
  • 555
  • 556
  • 557
  • 558
  • 559

364
|
Chapter 19.
Switch Stacks
ProSafe M4100 and M7100 Managed Switches
The following table provides switch stack configuration scenarios. Most of the scenarios
assume at least two switches are connected through their stacking ports.
Table 1.
Switch Stack Master Scenarios
Scenario
Action
Result
Stack master election specifically
determined by existing stack
masters.
Note
: This is not recommended.
Connect two powered-on switch stacks
through the stacking ports.
Only one of the stack masters
becomes the new stack master.
No other stack members become
the stack master.
Stack master election specifically
determined by the stack member
priority value.
• Connect two switches through their
stacking ports.
• Use the global configuration
command
switch
stack-member-number priority
new-priority-number
to set a
stack member to a higher member
priority value.
• Restart both stack members at the
same time.
The stack member with the
higher-priority value is elected
stack master.
Stack master election specifically
determined by the MAC address.
Assuming that both stack members
have the same priority value and
firmware image, restart both stack
members at the same time.
The stack member with the higher
MAC address is elected stack
master.
Add a stack member.
• Power off the new switch
• Through their stacking ports, connect
the new switch to a powered-on
switch stack.
• Power on the new switch.
The stack master is retained. The
new switch is added to the switch
stack.
Stack master failure.
Remove (or power off) the stack
master.
One of the remaining stack
members becomes the new stack
master. All other members in the
stack remain stack members and
do not reboot.
Preconfigure a Switch
You can preconfigure (supply a configuration to) a new switch before it joins the switch stack.
You can specify the stack member number, the switch type, and the interfaces associated
with a switch that is not currently part of the stack.
Note:
If you are replacing a switch with the same model in the same
position in the stack, you do not need to preconfigure it. The new
switch assumes the same configuration as the previous switch.