Netgear ME102 ME102 Reference Manual - Page 10
Installing USB Configuration Utility, Configuring Access Point - software
 |
View all Netgear ME102 manuals
Add to My Manuals
Save this manual to your list of manuals |
Page 10 highlights
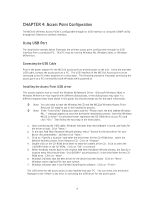
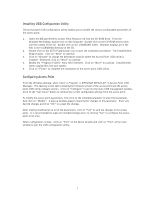
Installing USB Configuration Utility The access point USB configuration utility enables you to modify the various configurable parameters of the access point. 1. Insert the ME102 Wireless Access Point Resource CD into the CD-ROM drive. From the Windows 98 desktop, double-click on My Computer. Double-click on the CD-ROM drive to look into the content of the CD. Double-click on the USBMANG folder. Windows displays all of the files in the \USBMANG directory of the CD. 2. Double-click on the SETUP application icon to start the installation procedure. The InstallShields Wizard opens. Click on "Next" to continue. 3. Click on "Browse" to change the destination location where the Access Point USB utility is installed. Otherwise, click on "Next" to continue. 4. Modify the "Program Folders" entry field if desired. Click on "Next" to continue. InstallShields starts copying files into your system. 5. Click on "Finish" to complete the installation of the access point USB utility. Configuring Access Point From the Windows desktop, select Start ⇒ Program ⇒ NETGEAR ME102 AP ⇒ Access Point USB Manager. The opening screen opens showing the firmware version of the access point and the access point USB utility software version. Click on "Configure" to go into the main USB management window. Click on the "Get Value" button to retrieve the current configurable settings from the access point. To modify the access point parameters, first click on the intended parameter to select the parameter. And click on "Modify". A pop-up window appears inquiring for changes to the parameter. Enter any desired changes and click "OK" to accept the changes. After making modification to all of the parameters, click on "Set" to send the changes to the access point. It is recommended to make all intended changes prior to clicking "Set" to configure the access point all at once. When configuration is done. Click on "Exit" on the device window and click on "Exit" at the main window to quit the USB configuration utility. 7
-
 1
1 -
2
-
3
-
4
-
 5
5 -
 6
6 -
 7
7 -
 8
8 -
 9
9 -
 10
10 -
 11
11 -
 12
12 -
 13
13 -
 14
14 -
 15
15 -
16
-
17
 |
 |