Netgear RD5200 Installation Guide - Page 13
Power Up the System - hardware manual
 |
View all Netgear RD5200 manuals
Add to My Manuals
Save this manual to your list of manuals |
Page 13 highlights
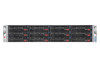
ReadyDATA 5200 Power Up the System You can power up the system with or without disks installed. You use the RAIDar utility to discover your ReadyDATA storage system on your network. RAIDar is included on the Resource CD that came with your unit. It includes versions for Windows, Mac, and Linux operating systems. To power up the system: 1. Install the appropriate version of RAIDar on a computer that is connected to the same Iocal area network (LAN) as your ReadyDATA 5200. Note: If you are using Windows XP before SP2, disable the Internet connection firewall. 2. Ensure that each power supply rocker switch on the back of the ReadyDATA 5200 is set to On and press the Power button. 3. Launch the RAIDar utility. RAIDar displays a window that lists the ReadyDATA system or systems on your network and provides details about the status of each system it discovers. The volume, disk, UPS, and fan LED icons are not operational for the ReadyDATA 5200. 4. Highlight your ReadyDATA 5200 and click the Setup button. RAIDar opens your default browser and prompts you to log in to the storage system. 5. Log in to your ReadyDATA 5200 using the default login credentials: • Default user name. admin • Default password. password Both the user name and password are case-sensitive. Dashboard, the browser-based management interface for the 5200, launches. For more information about the 5200 chassis, see the ReadyDATA 5200 Hardware Manual. For more information about configuring, managing, and maintaining your 5200, see the ReadyDATA OS Software Manual. Both documents are available on the Resource CD that came with your system. Installation Overview 13
-
 1
1 -
2
-
3
-
4
-
5
-
6
-
7
-
 8
8 -
 9
9 -
 10
10 -
 11
11 -
 12
12 -
 13
13 -
 14
14
 |
 |
