Netgear RDD516 Installation Guide - Page 2
Basic Setup
 |
View all Netgear RDD516 manuals
Add to My Manuals
Save this manual to your list of manuals |
Page 2 highlights
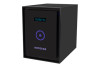
Basic Setup Follow these instructions to begin using your ReadyDATA system. These instructions assume that at least one disk is installed in the system. Note: If you have a diskless system, you must install at least one disk before following these instructions. For information about installing disks, see the hardware manual for your system. To set up your storage system: 1. Place your system in a location that provides adequate ventilation. High-capacity disks can produce considerable heat. It is important to ensure that the fan exhausts are unobstructed. For a complete list of placement considerations, see the hardware manual for your system. 2. Connect the power cord to the back of the system and plug the other end into a wall outlet or power strip. Make sure that the power switch on the back panel is in the ON position. 3. Use an Ethernet cable to connect an Ethernet port on the storage system to your network. 4. If necessary, press the Power button to turn on the system. It takes about a minute to start up. The IP address is retrieved using DHCP. 5. Install and run the RAIDar utility on a computer that is connected the same local area network (LAN) as your ReadyDATA system. RAIDar is on the resource CD that came with your system. It includes versions for Windows, Mac, and Linux operating systems. RAIDar detects and displays the ReadyDATA system or systems on your network. 6. Select your ReadyDATA system from the list of detected devices and click the Setup button. An SSL certificate security warning displays. This warning ensures an encrypted authentication and secure access to the local admin page for your storage system. 7. Accept the certificate. A login prompt displays. 8. Enter admin for the user name, enter password for the password, and click the OK button. Both the user name and password are case-sensitive. Tip: You can change these credentials when you configure your system. NETGEAR recommends that you change your password as soon as possible. The ReadyDATA local admin page displays in your browser. For information about configuring, managing, and maintaining your ReadyDATA system, see the software manual for your system.
-
 1
1 -
 2
2
 |
 |
