Netgear RND4210v2 Hardware Manual - Page 9
Boot Menu, Previously Formatted Disks
 |
View all Netgear RND4210v2 manuals
Add to My Manuals
Save this manual to your list of manuals |
Page 9 highlights
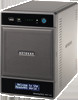
ReadyNAS Duo v2 and NV+ v2 b. Pull out the disk tray, place the new disk on the tray, and assemble the disk and tray with the screws that came with your unit. Make sure that the hard disk connectors face the interior of the disk bay. c. Slide the disk tray back into the unit and press the handle to secure the disk. 3. Turn the unit on. 4. If you are using previously formatted disks, perform a factory reboot. For more information, see Boot Menu on page 16 and Previously Formatted Disks on page 27. Note: Note: This process erases all data and formats the disk as X-RAID2TM. If you are using a previously formatted disk that contains data you want to preserve, you must move the data to an external drive before using the previously formatted disk in your ReadyNAS unit. The factory reboot process can take up to 30 minutes while your unit tests and formats the disk, installs the operating system, and creates a volume. This process can take up to 30 minutes; you can follow the progress in RAIDar. For more information about RAIDar, see the ReadyNAS RAIDiator 5.3 for Home Software Manual, which is available at http://www.readynas.com/documentation. If you are installing multiple disks at the same time, they must synchronize. This might take several hours, depending on the disk size. You can continue to use your ReadyNAS, although access is slower until the volume synchronization finishes. Getting Started 9
-
 1
1 -
2
-
3
-
 4
4 -
 5
5 -
 6
6 -
 7
7 -
 8
8 -
 9
9 -
 10
10 -
 11
11 -
 12
12 -
 13
13 -
 14
14 -
15
-
16
-
17
-
18
-
19
-
20
-
21
-
22
-
23
-
24
-
25
-
26
-
27
-
28
-
29
-
30
-
31
-
32
-
33
-
34
-
35
-
36
-
37
-
38
-
39
-
40
-
41
-
42
 |
 |
