Netgear RNDX4210 ReadyNAS NVX User Manual - Page 102
Configuring RAID, Shutdown, Setup., Expandable Volume X-RAID2, Volume RAID 0
 |
UPC - 606449060195
View all Netgear RNDX4210 manuals
Add to My Manuals
Save this manual to your list of manuals |
Page 102 highlights
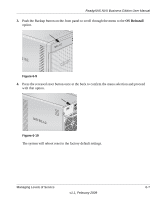
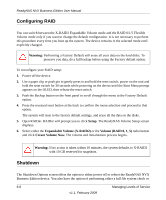
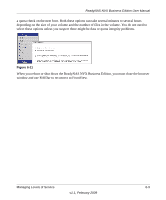
ReadyNAS NVX Business Edition User Manual Configuring RAID You can switch between the X-RAID2 Expandable Volume mode and the RAID 0/1/5 Flexible Volume mode only if you want to change the default configuration. It is not necessary to perform this procedure every time you boot up the system. The device remains in the selected mode until explicitly changed. Warning: Performing a Factory Default will erase all your data on the hard disks. To preserve you data, do a full backup before using the Factory default option. To reconfigure your RAID setup: 1. Power off the device. 2. Use a paper clip or push pin to gently press in and hold the reset switch, power on the unit and hold the reset switch for 30 seconds while powering on the device until the Boot Menu prompt appears on the OLED, then release the reset switch. 3. Push the Backup button on the front panel to scroll through the menu to the Factory Default option. 4. Press the recessed reset button at the back to confirm the menu selection and proceed to that option. The system will reset to the factory default settings, and erase all the data on the disks. 5. Open RAIDar. RAIDar will prompt you to click Setup. The ReadyNAS Volume Setup screen displays. 6. Select either the Expandable Volume (X-RAID2) or the Volume (RAID 0, 1, 5) radio button and click Create Volume Now. The volume and initialization process begins. Warning: If no action is taken within 10 minutes, the system defaults to X-RAID2 with 10 GB reserved for snapshots. Shutdown The Shutdown Options screen offers the option to either power off or reboot the ReadyNAS NVX Business Edition device. You also have the option of performing either a full file system check or 6-8 Managing Levels of Service v1.1, February 2009
-
 1
1 -
2
-
3
-
4
-
5
-
6
-
7
-
8
-
9
-
10
-
11
-
12
-
13
-
14
-
15
-
16
-
17
-
18
-
19
-
20
-
21
-
22
-
23
-
24
-
25
-
26
-
27
-
28
-
29
-
30
-
31
-
32
-
33
-
34
-
35
-
36
-
37
-
38
-
39
-
40
-
41
-
42
-
43
-
44
-
45
-
46
-
47
-
48
-
49
-
50
-
51
-
52
-
53
-
54
-
55
-
56
-
57
-
58
-
59
-
60
-
61
-
62
-
63
-
64
-
65
-
66
-
67
-
68
-
69
-
70
-
71
-
72
-
73
-
74
-
75
-
76
-
77
-
78
-
79
-
80
-
81
-
82
-
83
-
84
-
85
-
86
-
87
-
88
-
89
-
90
-
91
-
92
-
93
-
94
-
95
-
96
-
 97
97 -
 98
98 -
 99
99 -
 100
100 -
 101
101 -
 102
102 -
 103
103 -
 104
104 -
 105
105 -
 106
106 -
 107
107 -
108
-
109
-
110
-
111
-
112
-
113
-
114
-
115
-
116
-
117
-
118
-
119
-
120
-
121
-
122
 |
 |
