Netgear RNDX4410 ReadyNAS NVX User Manual - Page 57
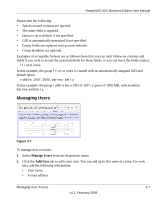
Workgroup, Apply, Enter the name you want to use in
 |
UPC - 606449060256
View all Netgear RNDX4410 manuals
Add to My Manuals
Save this manual to your list of manuals |
Page 57 highlights
ReadyNAS NVX Business Edition User Manual In User security mode, you specify a workgroup name, and create user and group accounts. You have control over how much disk space is allocated for each user or group. Each user is given a home share on the ReadyNAS NVX Business Edition device that the user can use to keep private data such as backups of the user's PC. This home share is accessible only by that user and the administrator in order to perform backups of the private shares. The option to automatically generate the private home share is controlled in the Accounts/Preferences tab, and you can disable it if you wish. Note: Private user shares are accessible only by users using CIFS (Windows) or AppleTalk file protocols. To set up the ReadyNAS NVX Business Edition for this security mode, you need the following information: • Workgroup name • Group names you wish to create (for example, Marketing, Sales, Engineering) • User names you wish to create (plus e-mail addresses if you will be setting disk quotas) • Amount of disk space you want to allocate to users and groups (optional) To change or set a workgroup name: 1. Select the User radio button. 2. Enter the name you want to use in the Workgroup field in the User section. The name can be the workgroup name that is already used on your Windows network. 3. Click Apply to save your changes. Managing User Access 3-3 v1.1, February 2009
-
 1
1 -
2
-
3
-
4
-
5
-
6
-
7
-
8
-
9
-
10
-
11
-
12
-
13
-
14
-
15
-
16
-
17
-
18
-
19
-
20
-
21
-
22
-
23
-
24
-
25
-
26
-
27
-
28
-
29
-
30
-
31
-
32
-
33
-
34
-
35
-
36
-
37
-
38
-
39
-
40
-
41
-
42
-
43
-
44
-
45
-
46
-
47
-
48
-
49
-
50
-
51
-
 52
52 -
 53
53 -
 54
54 -
 55
55 -
 56
56 -
 57
57 -
 58
58 -
 59
59 -
 60
60 -
 61
61 -
 62
62 -
63
-
64
-
65
-
66
-
67
-
68
-
69
-
70
-
71
-
72
-
73
-
74
-
75
-
76
-
77
-
78
-
79
-
80
-
81
-
82
-
83
-
84
-
85
-
86
-
87
-
88
-
89
-
90
-
91
-
92
-
93
-
94
-
95
-
96
-
97
-
98
-
99
-
100
-
101
-
102
-
103
-
104
-
105
-
106
-
107
-
108
-
109
-
110
-
111
-
112
-
113
-
114
-
115
-
116
-
117
-
118
-
119
-
120
-
121
-
122
 |
 |
