Netgear WAC104 Installation Guide - Page 2
WiFi Network Names, Join the WiFi Network, Troubleshooting Tips, Support - firmware download
 |
View all Netgear WAC104 manuals
Add to My Manuals
Save this manual to your list of manuals |
Page 2 highlights
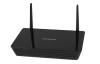
WiFi Network Names The default WiFi network name (SSID) for the 2.4 GHz radio band and the default SSID for the 5 GHz radio band are on the product label. By default, the access point's WiFi network provides open access. We recommend that you set up WiFi security. Join the WiFi Network To connect your computer or WiFi device (such as a smartphone) to your access point's WiFi network, you can use either the manual method or the Wi-Fi Protected Setup (WPS) method. Manual Method 1. Open the software utility that manages your WiFi connections on the computer or WiFi device that you want to connect to your access point. This utility scans for all WiFi networks in your area. 2. Find and select your access point's WiFi network name (SSID). The default SSID for the 2.4 GHz radio band and the default SSID for the 5 GHz radio band are on the product label. 3. Click the Connect button. By default, the WiFi network is open (that is, unsecured), so you do not need to enter a network key or password. 4. Repeat Step 1 through Step 3 to add other computers or WiFi devices. WPS Method If your computer or WiFi device supports WPS, you can use WPS to join the access point's WiFi network. For help with the WPS button on your computer or WiFi device, check the instructions or online help that came with that computer or WiFi device. Some older equipment cannot use WPS. Note: WPS does not support WEP security. If you are using WEP security, use the manual method. 1. Press the WPS button on the access point. 2. Within two minutes, on your computer or WiFi device, press its WPS NETGEAR INTL LTD Building 3, University Technology Centre Curraheen Road, Cork, Ireland button or click its onscreen WPS button. The computer or WiFi device connects to your access point's WiFi network. 3. Repeat this process to add other computers or WiFi devices to the network. Troubleshooting Tips The following table provides some tips for correcting simple problems that you might encounter. For more troubleshooting information, see the troubleshooting chapter in the user manual. Problem Cause Possible Solution Power LED is off. The access point is not receiving power. •Make sure that the power adapter is securely connected to your access point and securely connected to a working power outlet. •Check that you are using the power adapter that NETGEAR supplied for this product. Power LED remains blinking green slowly and continuously. Note: When firmware is being upgraded, the Power LED temporarily blinks green. A firmware or hardware problem exists. If the Power LED is still blinking green three minutes after you turn on power to the access point or if the Power LED is blinking green slowly and continuously at any other time, do the following: 1. Turn off the power and then turn it back on to see if the access point recovers. 2. Press and hold the Reset button to return the access point to its factory settings. If the error persists, contact NETGEAR at netgear.com/support. A LAN port LED is off. A hardware connection problem exists. •Make sure that the Ethernet cable connectors are securely plugged into the access point and LAN device. • Make sure that the LAN device is turned on. WiFi LED is off. The WiFi connection does not work. •Verify that the radios are turned on by pressing the WiFi On/ Off button. •If the radios are turned on but the WiFi LED remains off, contact NETGEAR. You cannot connect to the access point from a browser. Multiple possible causes. •If you are using an Ethernet-connected computer, check the Ethernet connection between the computer and the access point. •Quit the browser, clear the cache, delete the cookies, and launch the browser again. Support Thank you for purchasing this NETGEAR product. You can visit www.netgear.com/support to register your product, get help, access the latest downloads and user manuals, and join our community. We recommend that you use only official NETGEAR support resources. For more information about the installation options, visit www.netgear.com/support to access the user manual. For the current EU Declaration of Conformity, visit http://support.netgear.com/app/answers/detail/a_id/11621/. For regulatory compliance information, visit http://www.netgear.com/about/regulatory/. See the regulatory compliance document before connecting the power supply. NETGEAR, Inc. 350 East Plumeria Drive San Jose, CA 95134, USA © NETGEAR, Inc., NETGEAR and the NETGEAR Logo are trademarks of NETGEAR, Inc. Any non‑NETGEAR trademarks are used for reference purposes only. September 2016
-
 1
1 -
 2
2
 |
 |
