Netgear WC7520 WC7520 Installation Guide - Page 2
Troubleshooting Tips, Technical Support - configuration
 |
UPC - 606449072969
View all Netgear WC7520 manuals
Add to My Manuals
Save this manual to your list of manuals |
Page 2 highlights
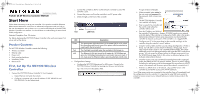
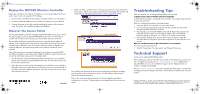
WC7520_IG_23June10.fm Page 2 Wednesday, June 23, 2010 9:27 AM Deploy the WC7520 Wireless Controller Deploy the controller in your network. If needed, you can now reconfigure the PC you used in step 1 back to its original TCP/IP settings. 1. Disconnect the controller from the computer and place it where you will deploy it. 2. Connect an Ethernet cable from your controller to a LAN port on your network. 3. Connect the power cord to the controller and plug the power cord to a power outlet. The Power, Test, and Ethernet lights should light up. Discover the Access Points The WC7520 Wireless Controller manages selected NETGEAR access points. Check the support page for a list of supported NETGEAR access points. For discovery to succeed, the controller and the access points should have network connectivity. The controller can discover supported access points using their factory default IP address. In this case the access point must be connected in the same L2 layer as the controller and not behind a router. If the access points have been configured with unique IP addresses, the access points need to have network connectivity to the controller. Note: If the access points are already deployed as stand alone, ensure that SNMP and SSH are enabled on the access points. SNMP and SSH are used to discover and convert the stand alone access points to managed mode. 1. Use the discovery wizard and make the selection based on how your controller and the access points are connected before discovery. The Discovery function will list the access points found. 2. Select the access points from the discovered list and add them to your controller's Managed access points. Enter the password for the access points and click Add. If the access points have different passwords, select the access points one at a time and enter their password. June 2010 3. Make sure there is a DHCP server in the network and that it is accessible by the access points. When access points are selected to be managed, the controller will convert them to Managed mode and they will be configured for DHCP. The controller will download all access point configuration information including security profiles to the selected access points. See the Software Administration Manual for detailed information. Refer to the access point documentation for firmware upgrade and address configuration instructions. These procedures vary depending on the access point model. Troubleshooting Tips Here are some tips for correcting simple problems you may have. I cannot access the controller with the computer. Confirm that the computer is connected to the controller. Try using the Ping command to verify the connection. There is a configuration problem. Check these items: • Verify that the PC and controller are on the same VLAN. • You may not have restarted the computer with the controller to have TCP/IP changes take effect. Restart the computer. • The computer is set to Enable NetBIOS over TCP/IP. Restart the computer and check that TCP/IP is set to use a the static IP address. The usual Network Properties setting for Windows is to "Obtain an IP address automatically." • The controller's default values may not work with your network. Check the controller default configuration against the configuration of other devices in your network. APs are not discovered or AP information is incomplete. If no access points are discovered: • Check IP Connectivity. You may need to use IP (layer 3) Discovery. Technical Support Thank you for selecting NETGEAR products. After installing your device, locate the serial number on the label of your product and use it to register your product at http://www.NETGEAR.com/register. Registration is required before you can use our telephone support service. Registration via our website is strongly recommended. Go to http://kbserver.netgear.com for product updates and Web support. For Warranty and Regional Customer Support information, see the Resource CD that came with your product. © 2010 by NETGEAR, Inc. All rights reserved. NETGEAR and the NETGEAR logo are registered trademarks of NETGEAR, Inc. in the United States and/or other countries. Other brand and product names are trademarks or registered trademarks of their respective holders. Information is subject to change without notice.
-
 1
1 -
 2
2
 |
 |
