Netgear WC9500 Installation Guide - Page 1
Netgear WC9500 Manual
 |
View all Netgear WC9500 manuals
Add to My Manuals
Save this manual to your list of manuals |
Page 1 highlights
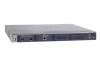
Installation Guide ProSAFE® Wireless Controller WC9500 The ProSAFE Wireless Controller WC9500 lets you manage a large wireless network from a central point, implement security features centrally, support Layer 2 and Layer 3 fast roaming, configure a guest access captive portal, and support Voice over Wi-Fi (VoWi-Fi). In this installation guide, the ProSAFE Wireless Controller WC9500 is referred to as the wireless controller. Package Contents The package contains the following items: • Wireless Controller WC9500 • AC power cable • Straight-through Category 5 Ethernet cable • Rack-mount kit • Rubber feet (4) with adhesive backing • Installation guide WARNING: DO NOT stack equipment, or place equipment in tight spaces or in drawers. Be sure that your equipment is surrounded by at least 2 inches (5 cm) of air space. The following figure shows the left side of the front panel only: USB port Digital access point counter ID Power LED Mode: Green= Link at 10G, Blink Green=10G Active, Yellow=Link at 1G, Blink Yellow=1G Active LED Mode: Left LED: Green=Link at 1G E, Yellow=Link at 10/100M Right LED:Green=Link, Green Blink=Active Status Fan Stack Master USB Reset Reset button Slots and LEDs LEDs (top to bottom): for optional Ethernet port and LEDs Power, Status, Fan, Stack Master SFP GBIC modules Set Up the Wireless Controller 1. Configure a computer with a static IP address of 192.168.0.210 and a subnet mask of 255.255.255.0. 2. Connect one end of the supplied Ethernet cable to the Ethernet port on the computer and the other end to the Ethernet port on the front panel of the wireless controller. 3. Connect the supplied power cord from the wireless controller to an AC power outlet. 4. Verify that the following LEDs on the front panel are lit: LED Description Power The green Power LED is lit. If the power light is not lit, check the connections and check to see if the power outlet is controlled by a wall switch that is turned off. Status The Status LED is lit yellow while the wireless controller is initializing. After approximately 2 minutes, when the wireless controller has completed its initialization, the Status LED turns green. Fan The green Fan LED is lit, indicating that the fans are functioning correctly. Ethernet The right Ethernet port LED is lit green for a 1000 Mbps connection or port yellow for a 100 or 10 Mbps connection. Access the Wireless Controller 1. On the computer, open a browser. In the address field, type http://192.168.0.250. The wireless controller's login window displays: 2. Enter admin for the user name and password for the password, both in lowercase letters. 3. Click Login. The wireless controller's web management interface displays. Configure the Basic Settings 1. From the main navigation menu, select Configuration > System > General. Enter a name for the wireless controller and select the country in which the wireless controller is used. Click Apply. 2. Select Configuration > System > Time. Select the time zone in which the wireless controller is used. Optionally, configure the NTP settings. Click Apply. 3. Select Configuration > System > IP/VLAN. Enter the IP settings for your network and the VLANs that you want to assign to the wireless controller. Note: A management VLAN is used for all SNMP and HTTP traffic to and from the wireless controller and managed access points. For large deployments, NETGEAR recommends that the wireless controller and access points are in separate VLANs to ensure uninterrupted connectivity between the wireless controller and the access points. Note: Clear the Untagged VLAN check box only if the hubs and switches in your network support the VLAN (802.1Q) standard. Likewise, change the untagged VLAN value only if the hubs and switches in your network support the VLAN (802.1Q) standard. Click Apply. The connection to the wireless controller is terminated because you have changed its IP address. 4. Reconfigure your computer with an IP address and subnet mask that is in the same IP subnet as the wireless controller. Use the new IP address of the wireless controller to log in again.
-
 1
1 -
 2
2
 |
 |
