Netgear WG111v3 WG111v3 Installation Guide - Page 1
Netgear WG111v3 - 54 Mbps Wireless USB 2.0 Adapter Manual
 |
View all Netgear WG111v3 manuals
Add to My Manuals
Save this manual to your list of manuals |
Page 1 highlights
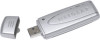
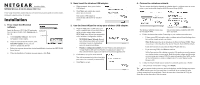
)NSTALLATION'UIDE NETGEAR Wireless-G USB 2.0 Adapter WG111v3 These setup instructions assume that you will connect to an access point or wireless router. Estimated completion time: 10 minutes. Installation 1. First, install the WG111v3 software. Insert the Resource CD. If the CD main page does not appear, double click Autorun.exe on the CD. a. Click Install the Software. The Check for Updates window opens. b. If you are connected to the Internet, click Check for Updates. If not, you can choose to install from the CD. c. Follow the onscreen instructions for the InstallShield wizard and the NETGEAR Smart Wizard. d. When the Installation Complete message appears, click Next. 2. Now, insert the wireless USB adapter. a. When prompted, insert your wireless USB adapter. b. Click Next, and confirm the country where you are located. The wireless USB adapter is automatically added with the installed driver. 3. Use the Smart Wizard to set up your wireless USB adapter. a. Windows 98SE, Me, or 2000 users go to Step b. Windows XP or Vista users can set up the wireless adapter either with the NETGEAR Smart Wizard (recommended) or the Windows Configuration Utilities. • NETGEAR Smart Wizard: Reveals more information about each network and makes it easier to troubleshoot network connection problems. • Windows configuration utilities: See the Windows documentation or "Using Windows XP and Vista Wireless Configuration Utilities" at: http://documentation.netgear.com/reference/enu/winzerocfg/index.htm b. Click Next to accept the Smart Wizard. You will be prompted to let the wizard help you connect to a network (recommended). c. Click Next to accept. 4. Connect to a wireless network. The next screen that displays depends on whether there is a wireless router or access point at your location that supports Wi-Fi Protected Setup (WPS): Hidden Network The wireless networks in your area do not support WPS. One or more wireless networks with WPS are in your area. a. Follow the instructions on the Connecting to your wireless network screen: • If there are no WPS networks, select a wireless network from the drop-down list, and the wizard records your choice. Note: Hidden networks do not broadcast the Network Name (SSID). These networks are in the drop-down list, but the Network Name (SSID) is blank. If the network uses security, then the Smart Wizard detects it. • If you are using WPS, click Next to continue. WPS allows you to click a button or create a PIN number to securely connect to a wireless router or access point. Both the wireless adapter and the router or access point must support WPS. For more information about WPS, see the NETGEAR Wireless-G USB 2.0 Adapter WG111v3 User Manual on the Resource CD. b. Follow the Smart Wizard steps to connect to a network and to save a Profile. c. After you have reviewed the settings, click Finish. The icon appears in the system tray and on the desktop; and the Settings page opens. The wizard initiates your wireless connection. It could take up to a minute for your wireless connection to be established. Check the status bar as described in Using the Status Bar on the other side of this document.
-
 1
1 -
 2
2
 |
 |