Netgear WG511 WG511v1 Reference Manual - Page 21
Install the NETGEAR 54 Mbps Wireless PC, Card WG511., Finish
 |
UPC - 606449027327
View all Netgear WG511 manuals
Add to My Manuals
Save this manual to your list of manuals |
Page 21 highlights
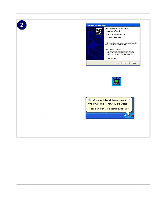
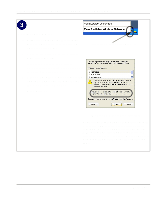
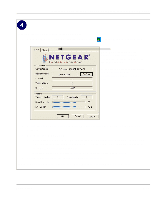
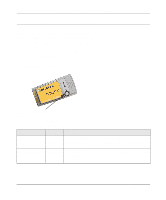
Installation Guide for the NETGEAR 54 Mbps Wireless PC Card WG511 Install the NETGEAR 54 Mbps Wireless PC Card WG511. a. Locate an available CardBus slot on the side of your notebook. Hold the PC Card with the Netgear logo facing up and insert it into the CardBus slot. The Found New Hardware Wizard is displayed. b. Click Next and follow the prompts to proceed. After the installation completes, click Finish to close the wizard. Add New Hardware Wizard Note: If Windows warns about a Digital Signature Not Found, click Yes to continue. You should see the WG511 system tray icon on the right in the lower right portion of the Windows task bar. WG511 System Tray Icon Basic Setup 2-15
-
 1
1 -
2
-
3
-
4
-
5
-
6
-
7
-
8
-
9
-
10
-
11
-
12
-
13
-
14
-
15
-
 16
16 -
 17
17 -
 18
18 -
 19
19 -
 20
20 -
 21
21 -
 22
22 -
 23
23 -
 24
24 -
 25
25 -
 26
26 -
27
-
28
-
29
-
30
-
31
-
32
-
33
-
34
-
35
-
36
-
37
-
38
-
39
-
40
-
41
-
42
-
43
-
44
-
45
-
46
-
47
-
48
-
49
-
50
-
51
-
52
-
53
-
54
-
55
-
56
-
57
-
58
-
59
-
60
-
61
-
62
-
63
 |
 |

Installation Guide for the NETGEAR 54 Mbps Wireless PC Card WG511
Basic Setup
2-15
Install the NETGEAR 54 Mbps Wireless PC
Card WG511.
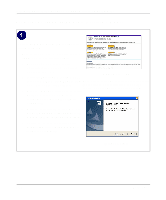
a.
Locate an available CardBus slot on the
side of your notebook. Hold the PC Card
with the Netgear logo facing up and
insert it into the CardBus slot.
The Found New Hardware Wizard is
displayed.
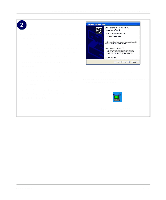
b.
Click
Next
and follow the prompts to
proceed
.
After the installation
completes, click
Finish
to close the
wizard.
You should see the WG511 system tray icon
on the right in the lower right portion of the
Windows task bar.
Add New Hardware Wizard
Note:
If Windows warns about a Digital Signature Not
Found, click
Yes
to continue.
WG511 System Tray Icon