Netgear WNR3500v2 WNR3500v2 Setup Manual - Page 7
Hardware Features, Front Panel - software
 |
View all Netgear WNR3500v2 manuals
Add to My Manuals
Save this manual to your list of manuals |
Page 7 highlights
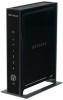
To ensure proper heat dissipation and for router stability, it is important that you connect the stand and place your router in an upright position. Hardware Features Before you install and connect your router, take a moment to become familiar with important information on the label, and with the front and back panels of the router-especially the status lights on the front panel. Front Panel The router front panel, shown in Figure 3, contains status lights. (For more information on interpreting the status lights, see "Verifying Your Connection" on page 18 and "Checking Basic Router Functions" on page 32.) Figure 3 Power On - Amber On - Green Blink - Amber Blink - Green Off Internet On - Amber On - Green Blink - Green Off Wireless On - Blue Blink - Blue Off LAN (Ports 1-4) On - Green Blink - Green On - Amber Blink - Amber Off WPS button/light Blink - Green On - Green The router is performing the power-on self-test diagnostic. The power is on and the router is ready. A software update is in progress. The firmware is corrupt. See "Checking Basic Router Functions" on page 32 to restore your firmware. Power is not being supplied to the router. No IP address acquired. The wireless router has acquired an Internet address. Data is being communicated with the Internet. No Ethernet cable is connected to the modem. The wireless interface is enabled. Data is being communicated over the wireless network. The wireless interface is turned off. The local port is connected to a 1000 Mbps device. Data is being transmitted at 1000 Mbps. The local port is connected to a 10/100 Mbps device. Data is being transmitted at 10/100 Mbps. No link is detected on this port. Indicates WPS activity; the device is in the 2 minute interval to synchronize security or there is a WPS error. Security set to WEP, WPA-PSK or WPA2-PSK. Getting to Know Your Wireless Router 3
-
 1
1 -
 2
2 -
 3
3 -
 4
4 -
 5
5 -
 6
6 -
 7
7 -
 8
8 -
 9
9 -
 10
10 -
 11
11 -
 12
12 -
13
-
14
-
15
-
16
-
17
-
18
-
19
-
20
-
21
-
22
-
23
-
24
-
25
-
26
-
27
-
28
-
29
-
30
-
31
-
32
-
33
-
34
-
35
-
36
-
37
-
38
-
39
-
40
-
41
-
42
-
43
-
44
-
45
-
46
-
47
-
48
-
49
-
50
-
51
-
52
 |
 |
