Nikon 2170749 Instruction Manual - Page 5
ApvANcEr
 |
UPC - 111820880199
View all Nikon 2170749 manuals
Add to My Manuals
Save this manual to your list of manuals |
Page 5 highlights
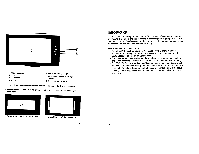
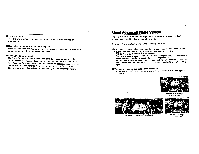
21 Date/time and provided short messages can be imprinted • Messages (as many as 30 in up to 12 languages), as well as the date and time, can be imprinted on the picture. For processing and printing IX240 films We recommend bringing your IX240 film cartridge to a photofinisher displaying the "Certified Photofinisher Mark" sign for processing and printing. ApvANcEr-) PHOTO SYSTEM -..- TV Certified Photofinisher Mark Certified photofinishers offer the following services • Three different print types Classic (C), wide-vision (H) and panorama (P) types are available. • Data printing See page 53. • Index Prints Positive images of all exposed frames are printed on one sheet. • Negative Return in Cartridge (NRIC) Your negatives are returned inside the cartridge for easy storage. For further details, ask your certified photofinisher. Contents The "BASIC OPERATION" section introduces battery, lens, film, focusing, exposure and shooting in basic steps for easy picture-taking--even for SLR camera beginners. "DETAILED OPERATION" explains each function from lens to exposure in detail, in approximately the same order as the steps in the "BASIC OPERATION" section. After becoming familiar with basic shooting, refer to the detailed explanation of each operation/function to step up to advanced shooting that requires more advanced techniques. "Flash Photography" introduces flash photography using the PRONEA S's built-in Speedlight in the dark, as well as other flash-shooting situations in bright conditions. Please read this manual thoroughly and carefully to get the most out of your Nikon PRONEA S. PREPARATION Nomenclature LCD PanelNiewfinder Display Introduction About Advanced Photo System About This Manual BASIC OPERATION 1. Install Batteries and Check Battery Power 2. Mount Lens 3. Load Film 4. Set Focus Mode Selector to AF a 5. Set Exposure Mode Dial to 6. Select Print Type, Hold Camera and Focus 7. Confirm Indications in Viewfinder and Release Shutter 8. Using Built-In Speedlight About Focus and Exposure 10 2-13 2-3 4-5 6-7 8-9 12-13 15-32 16-17 18-19 20-21 22-23 24-25 26-27 28-29 30-31 32
-
 1
1 -
 2
2 -
 3
3 -
 4
4 -
 5
5 -
 6
6 -
 7
7 -
 8
8 -
 9
9 -
 10
10 -
 11
11 -
12
-
13
-
14
-
15
-
16
-
17
-
18
-
19
-
20
-
21
-
22
-
23
-
24
-
25
-
26
-
27
-
28
-
29
-
30
-
31
-
32
-
33
-
34
-
35
-
36
-
37
-
38
-
39
-
40
-
41
-
42
 |
 |
