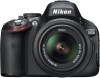
Nikon 25478 User Manual
Nikon 25478 Manual
 |
View all Nikon 25478 manuals
Add to My Manuals
Save this manual to your list of manuals |
Nikon 25478 manual content summary:
- Nikon 25478 | User Manual - Page 1
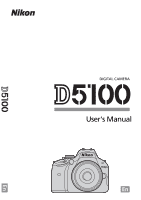
DIGITAL CAMERA User's Manual En En - Nikon 25478 | User Manual - Page 2
Thank you for your purchase of a Nikon single-lens reflex (SLR) digital camera. The documentation for this product consists of a User's Manual (this booklet) and a Reference Manual (pdf ). To get the most from your camera, please be sure to read all instructions thoroughly and keep them where they - Nikon 25478 | User Manual - Page 3
For Your Safety ...ii Notices ...iii X Introduction Package Contents ...1 Getting to Know the Camera ...2 Camera Menus ...8 First Steps...12 s Basic Photography and Playback Battery Level and Card Capacity...17 Taking Photographs ...18 Creative Photography (Scene Modes 21 Basic Playback ...26 z - Nikon 25478 | User Manual - Page 4
the product's internal parts could result in injury Nikon-authorized service center for inspection. A Do not place the strap around the neck of an infant or child Placing the camera Nikon for the purpose to maintain compliance with product regulations. A CD-ROMs CD-ROMs containing software or manuals - Nikon 25478 | User Manual - Page 5
been tested and found to comply with the limits for a Class B digital device, pursuant to Part 15 of the FCC rules. These limits are designed to provide reasonable protection against harmful interference in a D5100 residential installation. This equipment generates, uses, and can radiate radio - Nikon 25478 | User Manual - Page 6
CAUTION This Class B digital apparatus complies with Canadian AN INCORRECT TYPE. DISPOSE OF USED BATTERIES ACCORDING TO THE INSTRUCTIONS. This symbol indicates that this product is to be sure to also replace any pictures selected for preset manual white balance. Care should be taken to avoid injury - Nikon 25478 | User Manual - Page 7
brand electronic accessories (including chargers, batteries, AC adapters, and flash accessories) certified by Nikon specifically for use with this Nikon digital camera are engineered and proven to operate within the operational and safety requirements of this electronic circuitry. The use of non - Nikon 25478 | User Manual - Page 8
profits that may result from product malfunction. A Camera Settings The explanations in this manual assume that default settings are used. A Life-Long Learning As part of Nikon's "Life-Long Learning" commitment to ongoing product support and education, continually-updated information is available on - Nikon 25478 | User Manual - Page 9
the following items: BS-1 accessory shoe cover DK-20 rubber eyecup D5100 digital camera BF-1B body cap X DK-5 eyepiece cap AN-DC3 strap EG-CP14 audio/video (A/V) cable ViewNX 2 CD User's Manual (this booklet) Quick Start Guide Reference CD Warranty Purchasers of the lens kit option should - Nikon 25478 | User Manual - Page 10
to bookmark this section and refer to it as you read through the X rest of the manual. The Camera Body 1 2 3 4 5 6 7 8 9 10 11 24 12 25 13 14 (flash compensation) button 14 Speaker 15 Focal plane mark (E) 16 Eyelet for camera strap .......... 1 17 Microphone 51, 53 18 Connector cover 19 E (self - Nikon 25478 | User Manual - Page 11
The Camera Body (Continued) 2 1 7 8 9 10 11 X 12 3 4 13 14 5 15 16 17 18 19 20 6 21 22 1 Viewfinder eyepiece 31 2 ) button 8 22 Battery latch 12, 15 A The Power Switch Rotate the power switch as shown to turn the camera on. Rotate the power switch as shown to turn the - Nikon 25478 | User Manual - Page 12
• j Auto (flash off) P, S, A, and M Modes (0 43) Select these modes for full control over camera settings. • P-Programmed auto • S-Shutter-priority auto • A-Aperture-priority auto • M-Manual Special Effects Modes Use special effects during shooting. • % Night vision (0 56) • 3 Selective color - Nikon 25478 | User Manual - Page 13
out. This position is recommended for normal photography. Low-angle shots Frame live view shots with the camera close to the ground. High-angle shots Frame live view shots while holding the camera over your head. Self-portraits Use for self-portraits in live view. The monitor shows a mirror image - Nikon 25478 | User Manual - Page 14
The Information Display Camera settings can be viewed and adjusted in the information display. Press the 6 Auto-area AF indicator ........ 34 3D-tracking indicator........... 34 Focus point 7 Manual flash indicator Flash compensation indicator for optional flash units 8 Print date indicator 9 Auto - Nikon 25478 | User Manual - Page 15
The Viewfinder X 1 23 45 67 89 10 11 12 14 15 16 13 1 Focus points 2 Focus indicator 19 3 Autoexposure (AE) lock indicator 4 Shutter speed 43 5 Aperture (f-number 43 6 Battery indicator 17 7 Bracketing indicator 8 "K" (appears when memory remains for over 1,000 exposures 17 9 Flash- - Nikon 25478 | User Manual - Page 16
. Press 1 or 3 to scroll through the display. Press Q (W) again to return to the menus. Q (W) button Using Camera Menus The multi selector and J button are used to navigate the camera menus. Move cursor up J button: select highlighted item Cancel and return to previous menu Select highlighted - Nikon 25478 | User Manual - Page 17
Follow the steps below to navigate the menus. 1 Display the menus. Press the G button to display the menus. 2 Highlight the icon for the current menu. Press 4 to highlight the icon for the current menu. 3 Select a menu. Press 1 or 3 to select the desired menu. X G button 4 Position the cursor in - Nikon 25478 | User Manual - Page 18
6 Display options. Press 2 to display options for the selected menu item. X 7 Highlight an option. Press 1 or 3 to highlight an option. 8 Select the highlighted item. Press J to select the highlighted item. To exit without making a selection, press the G button. Note the following: • Menu items - Nikon 25478 | User Manual - Page 19
Defaults to m Recent Settings) A For More Information Information on individual menu options is available using the camera's on-board help (0 8) and in the Reference Manual on the supplied reference CD (for information on viewing the Reference Manual, see the inside front cover of this booklet). 11 - Nikon 25478 | User Manual - Page 20
turn the camera off before the warnings and cautions on pages ii-iii and 69-71 of this manual. Charge the battery indoors at ambient temperatures of 5-35 °C (41 If the problem persists, cease use immediately and take battery and charger to your retailer or a Nikon-authorized service representative. - Nikon 25478 | User Manual - Page 21
If this is the first time the memory card will be used in the camera or if the card has been formatted in another device, select Format memory card in the setup menu and follow the on-screen instructions to format the card (0 11). Note that this permanently deletes any data the - Nikon 25478 | User Manual - Page 22
and date/time can be changed at any time using the Language and Time zone and date options in the setup menu (0 11). A The Camera Clock The camera clock is less accurate than most watches and household clocks. Check the clock regularly against more accurate time pieces and reset as necessary. 14 - Nikon 25478 | User Manual - Page 23
data are being recorded, deleted, or copied to a computer. Failure to observe these precautions could result in loss of data or in damage to the camera or card. • Do not touch the card terminals with your fingers or metal objects. • Do not bend, drop, or subject to strong physical shocks. • Do - Nikon 25478 | User Manual - Page 24
if you attempt to release the shutter). To unlock the memory card, slide the switch to the "write" position. A Detaching the Lens Be sure the camera is off when removing or exchanging lenses. To remove the lens, press and hold the lens release button (q) while turning the lens clockwise (w). After - Nikon 25478 | User Manual - Page 25
sBasic Photography and Playback Battery Level and Card Capacity Before shooting, turn the camera on and check the battery level and number of exposures remaining in the information display or viewfinder (if the monitor is off, press the P button - Nikon 25478 | User Manual - Page 26
. When framing photographs in the viewfinder, hold the handgrip in your right hand and cradle the camera body or lens with your left. Keep your elbows propped lightly against your torso for support and place one foot half a pace ahead of the other to keep your upper body stable. In j mode, shutter - Nikon 25478 | User Manual - Page 27
subject is moving), and the in-focus indicator (I) will appear in the viewfinder. In-focus indicator Description I Subject in focus. I (blinks) Camera unable to focus using autofocus. See page 33. In-focus indicator Buffer capacity s While the shutter-release button is pressed halfway, the - Nikon 25478 | User Manual - Page 28
on the lens focal length scale to zoom in, shorter focal lengths to zoom out). Zoom in Zoom ring Zoom out A Image Sensor Cleaning The camera vibrates the low-pass filter covering the image sensor to remove dust when the - Nikon 25478 | User Manual - Page 29
Creative Photography (Scene Modes) The camera offers a choice of "scene" modes. Choosing a scene mode automatically optimizes settings to suit the selected scene, making creative photography as simple as selecting a mode, framing a - Nikon 25478 | User Manual - Page 30
p Child s m Sports n Close up Use for snapshots of children. Clothing and background details are vividly rendered, while skin tones remain soft and natural. Fast shutter speeds freeze motion for dynamic sports shots in which the main subject stands out clearly. The built-in flash and AF-assist - Nikon 25478 | User Manual - Page 31
Other Scenes The following scenes can be selected by rotating the mode dial to h and rotating the command dial until the desired scene appears in the monitor. o Night Portrait Mode dial Command dial Monitor s Use for a natural balance between the main subject and the background in portraits - Nikon 25478 | User Manual - Page 32
t Beach/Snow s u Sunset v Dusk/Dawn w Pet Portrait 24 Capture the brightness of sunlit expanses of water, snow, or sand. The built-in flash and AF-assist illuminator turn off. Preserves the deep hues seen in sunsets and sunrises. The built-in flash and AFassist illuminator turn off; use of a tripod - Nikon 25478 | User Manual - Page 33
x Candlelight y Blossom z Autumn Colors 0 Food For photographs taken by candlelight. The built-in flash turns off; use of a tripod is recommended to prevent blur when lighting is poor. s Use for fields of flowers, orchards in bloom, and other landscapes featuring expanses of blossoms. The built-in - Nikon 25478 | User Manual - Page 34
. To view additional information on the current photograph, press 1 and 3. To end playback and return to shooting mode, press the shutter-release button halfway. 1/ 12 NIKON D5100 1/ 250 F11 100 -1. 3 +1. 0 AUTO A6, M1 100D5100 DSC_0001. JPG 15/04/2011 10 : 02 : 27 35mm NORMAL 4928x3264 26 - Nikon 25478 | User Manual - Page 35
in pdf format on the supplied reference CD) for complete information on P, S, A, and M modes, playback, printing pictures, viewing pictures on TV, camera menus, troubleshooting, and optional flash units. For information on viewing the Reference Manual, see the inside front cover of this booklet. 27 - Nikon 25478 | User Manual - Page 36
user to control timing of click made by mirror, which is also quieter than in single frame mode. Also, beep does not sound when camera focuses, keeping noise to a minimum in quiet surroundings. 1 Place the cursor in the information display. If shooting information is not displayed in the monitor - Nikon 25478 | User Manual - Page 37
mode, press the shutter-release button halfway. A The Memory Buffer The camera is equipped with a memory buffer for temporary storage, allowing shooting to disconnect the power source until the access lamp has gone out. If the camera is z switched off while data remain in the buffer, the power will - Nikon 25478 | User Manual - Page 38
. Remote control mode: From a distance of 5 m (16 ft.) or less, aim the transmitter on the ML-L3 at either of the infrared receivers on the camera (0 2, 3) and press the ML-L3 shutter-release button. In delayed remote mode, the selftimer lamp will light for about two seconds before the shutter is - Nikon 25478 | User Manual - Page 39
after the self- timer has started. If the flash is required, the camera will only respond to the ML-L3 shutterrelease button once the flash has exposures selected for Custom Setting c3 (Self-timer). In flash modes that support red-eye reduction, the red-eye reduction lamp will light for about one - Nikon 25478 | User Manual - Page 40
focus tracking to predict final distance to subject and adjust focus as necessary. At default settings, shutter can only be released if camera is able to focus. MF Manual focus Focus using the lens focus ring (if the lens is equipped with an M/A-M or A-M mode switch, slide the switch to M before - Nikon 25478 | User Manual - Page 41
and the camera may sound a beep, allowing the shutter to be released even when the subject is not in focus. In these cases, focus manually or use focus background. The focus point contains objects at different distances from the camera. Example: Subject is inside a cage. The subject is dominated - Nikon 25478 | User Manual - Page 42
. Use with erratically moving subjects. In AF-A and AF-C focus modes, user selects focus point using multi selector. If subject moves after camera has focused, camera uses 3D-tracking zf 3D-tracking (11 points) to select new focus point and keep focus locked on original subject while shutter - Nikon 25478 | User Manual - Page 43
Image Quality and Size Together, image quality and size determine how much space each photograph occupies on the memory card. Larger, higher quality images can be printed at larger sizes but also require more memory, meaning that fewer such images can be stored on the memory card. Image Quality - Nikon 25478 | User Manual - Page 44
Names Photographs are stored as image files with names of the form "DSC_nnnn.xxx," where nnnn is a four-digit number between 0001 and 9999 assigned automatically in ascending order by the camera, and xxx is one of the following three letter extensions: "NEF" for NEF images, "JPG" for JPEG images - Nikon 25478 | User Manual - Page 45
Using the Built-in Flash The camera supports a variety of flash modes for photographing poorly lit or backlit subjects. ❚❚ Using the Built-in Flash: i, k, p, n, o, s, w, and g Modes 1 Choose a flash mode (0 38). 2 Take pictures. The - Nikon 25478 | User Manual - Page 46
Flash Mode The flash modes available vary with shooting mode: i, k, p, n, s, w, g No Auto Njo Auto+red-eye reduction j Off o Njr Auto + slow sync + red-eye reduction Nr Auto+slow sync j Off 0 N Fill flash P, A S, M N Fill flash N Fill flash Nj Red-eye reduction Nj Red-eye reduction - Nikon 25478 | User Manual - Page 47
+ Command dial Information display A The Built-in Flash For information on the lenses that can be used with the built-in flash, see the Reference Manual (on CD). Remove lens hoods to prevent shadows. The flash has a minimum range of 0.6 m (2 ft.) and can not be used in the macro range of - Nikon 25478 | User Manual - Page 48
ISO Sensitivity "ISO sensitivity" is the digital equivalent of film speed. The higher the ISO , or lines; noise is particularly likely at settings of Hi 0.3-Hi 2). Choosing Auto allows the camera to set ISO sensitivity automatically in response to lighting conditions. Mode i, j, % P, S, A, - Nikon 25478 | User Manual - Page 49
and view the results in the monitor. To ensure that shooting starts at the desired time, check that the camera clock is set correctly (0 14). Use of a tripod is recommended. Mount the camera on a tripod before shooting begins. To ensure that shooting is not interrupted, be sure the battery is fully - Nikon 25478 | User Manual - Page 50
, multiple exposure, and high dynamic range can not be used. A Interrupting Interval Timer Photography To interrupt interval timer shooting, turn the camera off or rotate the mode dial to a new setting. Returning the monitor to the storage position does not interrupt interval timer shooting - Nikon 25478 | User Manual - Page 51
M Modes P, S, A, and M modes offer different degrees of control over shutter speed and aperture. See the Reference Manual (on CD) for more information on each mode. Mode Description Camera sets shutter speed and aperture for optimal exposure (user can rotate command dial to choose from different - Nikon 25478 | User Manual - Page 52
photographs in live view. 1 Rotate the live view switch. The mirror will be raised and the view through the lens will be displayed in the camera monitor. The subject will no longer be visible in the viewfinder. Live view switch 2 Position the focus point. Position the focus point over your - Nikon 25478 | User Manual - Page 53
button is pressed halfway. AF-F Full-timeservo AF For moving subjects. Camera focuses continuously during live view and movie recording. MF Manual focus Focus manually. For information on manual focus, see the Reference Manual (on CD). 1 Place the cursor in the information display. Press the - Nikon 25478 | User Manual - Page 54
i and j, the following AF-area modes can be selected in live view: Option Description 6 Face-priority AF The camera automatically detects and focuses on portrait subjects facing the camera. Use for portraits. 7 Wide-area AF Use for hand-held shots of landscapes and other non-portrait subjects - Nikon 25478 | User Manual - Page 55
track the selected subject as it moves through the frame. To end focus tracking, press J a second time. Focus point x Focus point D Subject Tracking The camera may be unable to track subjects if they move quickly, leave the frame or are obscured by other objects, change visibly in size, color, or - Nikon 25478 | User Manual - Page 56
A The Live View Display ty q w u e i r o Item Description 0 q Shooting mode The mode currently selected with the mode dial. Select i or j for automatic scene selection (autofocus only; 0 49). 4 w "No movie" icon Indicates that movies can not be recorded. 51 e Audio recording - Nikon 25478 | User Manual - Page 57
in the monitor. D Using Autofocus in Live View x Autofocus is slower in live view and the monitor may brighten or darken while the camera focuses. The camera may be unable to focus in the following situations: • The subject contains lines parallel to the long edge of the frame • The subject - Nikon 25478 | User Manual - Page 58
under fluorescent, mercury vapor, or sodium lamps or if the camera is panned horizontally or an object moves at high speed through frame. Bright light Failure to observe this precaution could result in damage to the camera's internal circuitry. Live view ends automatically if the lens is removed - Nikon 25478 | User Manual - Page 59
during movie recording. 3 Start recording. Press the movie-record button to start recording (the camera can record both video and sound; do not cover the x microphone on the front of the camera during recording). A recording indicator and the time available are displayed in the monitor. Except - Nikon 25478 | User Manual - Page 60
, banding, or distortion may be visible in the monitor and in the final movie under fluorescent, mercury vapor, or sodium lamps or if the camera is panned horizontally or an object moves at high speed through frame (flicker and banding can be reduced by choosing a Flicker reduction option that - Nikon 25478 | User Manual - Page 61
❚❚ Movie Settings Choose movie quality and sound options. • Movie quality: Choose from the following options. The frame rate depends on the option currently selected for Video mode in the setup menu (0 11): Movie quality Frame size (pixels) Frame rate r 30 fps 1, 2 s 1920 × 1080 25 fps 2, 3 - Nikon 25478 | User Manual - Page 62
). Press J to start playback. 1 icon Length Current position/total length The following operations can be performed: To Use Volume Guide Description Pause Pause playback. Play Advance/ x rewind Adjust volume Edit movie Return to fullframe playback J X/W A Resume playback when movie - Nikon 25478 | User Manual - Page 63
%Special Effects Special effects can be used when recording images. Shooting with Special Effects The following effects can be selected by rotating the mode dial to q and rotating the command dial until the desired option appears in the monitor. Mode dial Command dial Monitor A NEF (RAW) If NEF - Nikon 25478 | User Manual - Page 64
sensitivities (with some noise in the form of randomly-spaced bright pixels, fog, or lines). Autofocus is available in live view only; manual focus can be used if the camera is unable to focus. The built-in flash and AF-assist illuminator turn off; use of a tripod is recommended to reduce blur - Nikon 25478 | User Manual - Page 65
3 Selective Color 1 Silhouette 2 High Key 3 Low Key All colors other than the selected colors are recorded in black and white. The effect can be chosen during live view (0 44). The built-in flash turns off; use of a tripod is recommended when lighting is poor. Silhouette subjects against bright - Nikon 25478 | User Manual - Page 66
Options Available in Live View ❚❚ g Color Sketch 1 Select live view. Rotate the live view switch to raise the mirror and display the view through the lens in the monitor. Live view switch 2 Adjust options. Press J to display the options shown at right (note that the options temporarily clear from - Nikon 25478 | User Manual - Page 67
in the center of the display and press 1 to choose the color of the object as one that will remain in the final image (the camera may have difficulty detecting unsaturated colors; choose a saturated color). To zoom in on the center of the display for more precise color selection, press X. Press - Nikon 25478 | User Manual - Page 68
4 Choose the color range. Press 1 or 3 to increase or decrease the range of similar hues that will be included in the final image. Choose from values between 1 and 7; note that higher values may include hues from other colors. Color range 5 Select additional colors. To select additional colors, - Nikon 25478 | User Manual - Page 69
QViewNX 2 Installing ViewNX 2 Install the supplied software to display and edit photographs and movies that have been copied to your computer. Before installing ViewNX 2, confirm that your computer meets the system requirements on page 62. ViewNX 2TM Your Imaging Toolbox 1 Start the computer and - Nikon 25478 | User Manual - Page 70
and follow the on-screen instructions. A Installation Guide For help installing ViewNX 2, click Installation Guide in Step 3. 4 Exit Premium/Professional/Enterprise/Ultimate (Service Pack 1), Windows Vista Home Basic/ OS Home Premium/Business/Enterprise/Ultimate (Service Pack 2), or Windows XP - Nikon 25478 | User Manual - Page 71
click Change program. A program selection dialog will be displayed; select Import File using Nikon Transfer 2 and click OK. 2 Double-click Import File. Q 2 Confirm that the correct source is selected. Confirm that the camera or removable disk appears as a device button in the "Source" panel of the - Nikon 25478 | User Manual - Page 72
Start Transfer 4 Terminate the connection. If the camera is connected to the computer, turn the camera off and disconnect the USB cable. If you are are displayed in ViewNX 2 when transfer is complete. A Starting ViewNX 2 Manually • Windows: Double-click the ViewNX 2 shortcut on the desktop. • Mac - Nikon 25478 | User Manual - Page 73
get the most from your 5 AF-S or AF-I lens required. camera. Vibration Reduction (VR) supported 6 With maximum effective aperture of f/5.6 or faster. with VR lenses. not in focus. Focus aperture other than the maximum aperture is manually until image in viewfinder is in focus. used. 8 With maximum - Nikon 25478 | User Manual - Page 74
batteries are Power sources available from local retailers and Nikon-authorized service representatives. • Battery Charger MH-24 (0 12): Recharge EN-EL14 batteries. • Power Connector EP-5A, AC Adapter EH-5b: These accessories can be used to power the camera for extended periods (EH-5a and EH-5 AC - Nikon 25478 | User Manual - Page 75
SD memory cards have been tested and approved for use in the D5100. Cards with class 6 or faster write speeds are recommended for movie . The camera supports UHS-1. 3 Check that any card readers or other devices with which the card will be used are SDXC-compliant. The camera supports UHS-1. - Nikon 25478 | User Manual - Page 76
not use alcohol, thinner, or other volatile chemicals. D Servicing the Camera and Accessories The camera is a precision device and requires regular servicing. Nikon recommends that the camera be inspected by the original retailer or Nikon-authorized service representative once every one to two years - Nikon 25478 | User Manual - Page 77
any sand or salt using a cloth lightly dampened in pure water and then dry the camera thoroughly. The lens and mirror are easily damaged. Dust and lint should be gently removed cloth and wipe the lens carefully. See the Reference Manual (on CD) for information on cleaning the low-pass filter. n 69 - Nikon 25478 | User Manual - Page 78
created by the interaction of an image containing a regular, repeating grid, such as the pattern of weave in cloth or windows in a building, with the camera image sensor grid. If you notice moiré in your photographs, try changing the distance to the subject, zooming in and out, or changing the angle - Nikon 25478 | User Manual - Page 79
the product off before replacing the battery. • Remove the battery from the camera or charger when not in use and replace the terminal cover. These devices If the battery will not be used for some time, insert it in the camera and run it flat before removing it and storing it in a location with - Nikon 25478 | User Manual - Page 80
camera off and recharge or replace battery. d (blinks) Use Nikon-approved battery. for use in this camera. Initialization error. Turn camera off and then on again. d/k Turn camera Format card. If problem persists, card may be damaged. Contact Nikon-authorized service representative. This memory - Nikon 25478 | User Manual - Page 81
) card. Card is full j/A/s (blinks) • • • Reduce quality or size. Delete photographs. Insert new memory card. - ● Camera can not focus using autofocus. Change (blinks) composition or focus manually. • Use a lower ISO sensitivity. • Use commercial ND filter. Subject is too bright • In mode - Nikon 25478 | User Manual - Page 82
Nikon-authorized service representative. Start-up error. Contact a O Nikon-authorized service representative. (blinks) Consult Nikon-authorized service representative. Autoexposure error Unable to start live view. Please wait for camera . * See printer manual for more information. n 74 - Nikon 25478 | User Manual - Page 83
Specifications ❚❚ Nikon D5100 Digital Camera Type Type Single-lens reflex digital camera Lens mount Nikon F mount (with AF contacts) Effective angle of view Approx. 1.5 × lens focal length (Nikon DX format) Effective pixels Effective pixels 16.2 million Image sensor Image sensor 23.6 × - Nikon 25478 | User Manual - Page 84
lenses for the F3AF are not supported), and AI-P lenses. Non-CPU lenses can be used in mode M, but the camera exposure meter will not function. remote), # (quick-response remote), J (quiet shutter release) Up to 4 fps (manual focus, mode M or S, shutter speed 1/250 s or faster, and other settings at - Nikon 25478 | User Manual - Page 85
Manual pop-up with button release Guide Number Approx. 12/39, 13/43 with manual flash (m/ft, ISO 100, 20 °C/68 °F) Flash control • TTL: i-TTL balanced fill-flash and standard i-TTL flash for digital SLR and safety lock Nikon Creative Lighting Advanced Wireless Lighting supported with SB-900, - Nikon 25478 | User Manual - Page 86
scene selection • Autofocus (AF): Single-servo AF (AF-S); full-time-servo AF (AF-F) • Manual focus (MF) Face-priority AF, wide-area AF, normal-area AF, subject-tracking AF Contrast-detect AF anywhere in frame (camera selects focus point automatically when face-priority AF or subject-tracking AF is - Nikon 25478 | User Manual - Page 87
diameter) Supported languages Supported languages camera with a fully-charged battery operating at an ambient temperature of 20 °C (68 °F). • Nikon reserves the right to change the specifications of the hardware and software described in this manual at any time and without prior notice. Nikon - Nikon 25478 | User Manual - Page 88
V, 50/60 Hz, 0.2A maximum Rated output DC 8.4 V/0.9 A Supported batteries Nikon rechargeable Li-ion battery EN-EL14 Charging time Approx. 1 hour and built-in CPU and F mount for use exclusively with Nikon DX-format digital SLR cameras Focal length 18-55 mm Maximum aperture f/3.5-5.6 Lens - Nikon 25478 | User Manual - Page 89
batteries varies with the condition of the battery, temperature, and how the camera is used. Sample figures for EN-EL14 (1030 mAh) batteries are given other trade names mentioned in this manual or the other documentation provided with your Nikon product are trademarks or registered trademarks - Nikon 25478 | User Manual - Page 90
82 - Nikon 25478 | User Manual - Page 91
- Nikon 25478 | User Manual - Page 92
No reproduction in any form of this manual, in whole or in part (except for brief quotation in critical articles or reviews), may be made without written authorization from NIKON CORPORATION. Printed in Thailand 6MB11511-03
-
 1
1 -
 2
2 -
 3
3 -
 4
4 -
 5
5 -
 6
6 -
 7
7 -
8
-
9
-
10
-
11
-
12
-
13
-
14
-
15
-
16
-
17
-
18
-
19
-
20
-
21
-
22
-
23
-
24
-
25
-
26
-
27
-
28
-
29
-
30
-
31
-
32
-
33
-
34
-
35
-
36
-
37
-
38
-
39
-
40
-
41
-
42
-
43
-
44
-
45
-
46
-
47
-
48
-
49
-
50
-
51
-
52
-
53
-
54
-
55
-
56
-
57
-
58
-
59
-
60
-
61
-
62
-
63
-
64
-
65
-
66
-
67
-
68
-
69
-
70
-
71
-
72
-
73
-
74
-
75
-
76
-
77
-
78
-
79
-
80
-
81
-
82
-
83
-
84
-
85
-
86
-
87
-
88
-
89
-
90
-
91
-
92
 |
 |
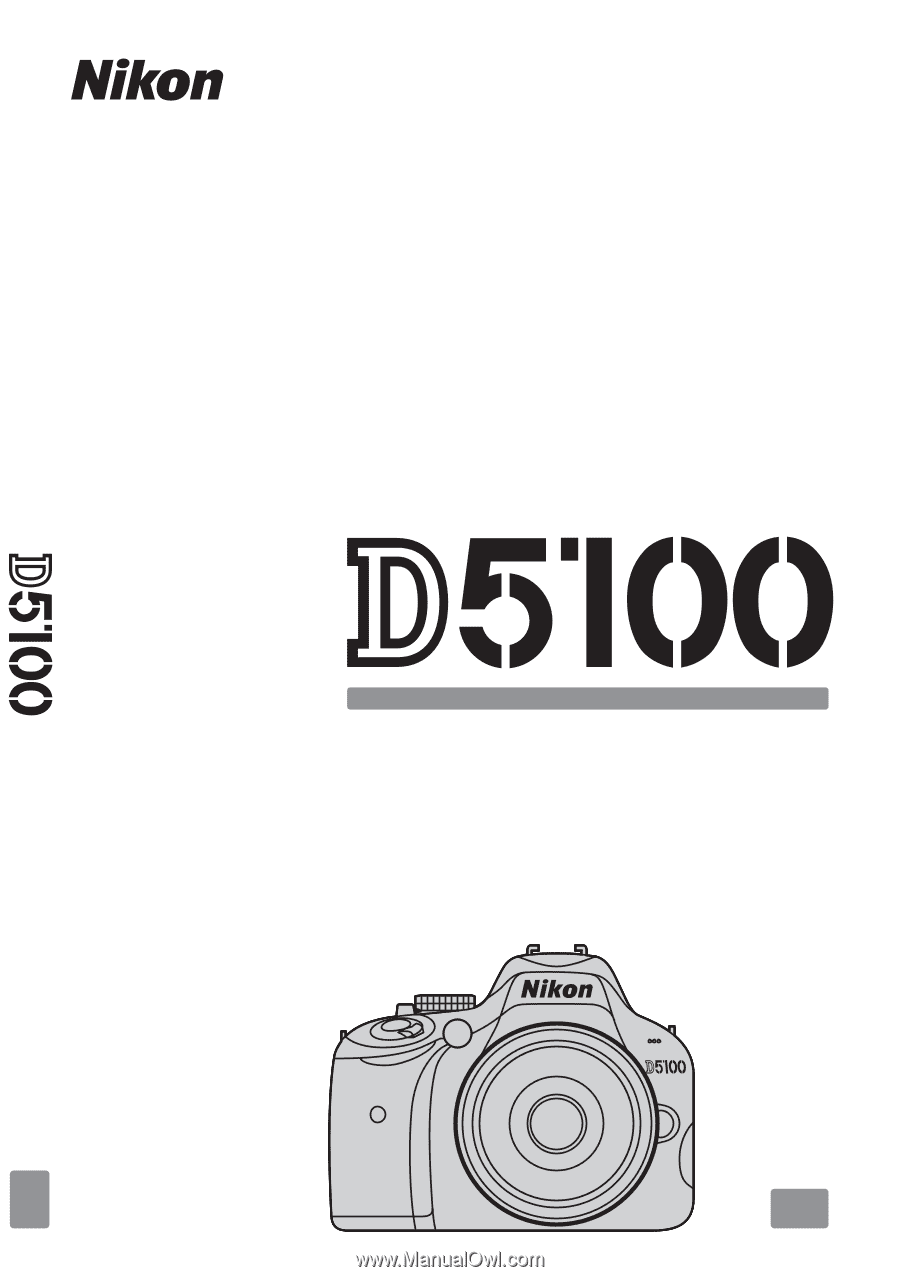
DIGITAL CAMERA
En
User's Manual
En