Nikon 25539 User Manual
Nikon 25539 - Coolpix P3 Digital Camera Manual
 |
UPC - 018208255399
View all Nikon 25539 manuals
Add to My Manuals
Save this manual to your list of manuals |
Nikon 25539 manual content summary:
- Nikon 25539 | User Manual - Page 1
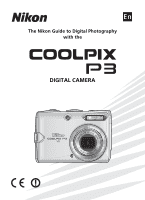
En The Nikon Guide to Digital Photography with the DIGITAL CAMERA - Nikon 25539 | User Manual - Page 2
registered trademarks of Microsoft Corporation. Internet is a trademark of Digital Equipment Corporation. Adobe and Acrobat are registered trademarks of Adobe other trade names mentioned in this manual or the other documentation provided with your Nikon product are trademarks or registered - Nikon 25539 | User Manual - Page 3
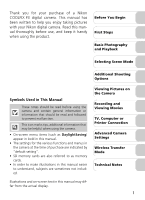
Thank you for your purchase of a Nikon COOLPIX P3 digital camera. This manual has been written to help you enjoy taking pictures with your Nikon digital camera. Read this manual thoroughly before use, and keep it handy when using the product. Before You Begin First Steps Basic Photography and - Nikon 25539 | User Manual - Page 4
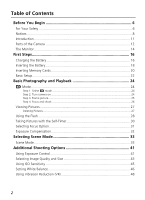
Photography and Playback 24 X Mode ...24 Step 1. Select X mode...24 Step 2. Turn camera on...24 Step 3. Frame picture...25 Step 4. Focus and shoot...26 Viewing Pictures 27 Deleting Image Quality and Size 43 Using ISO Sensitivity 45 Setting White Balance 46 Using Vibration Reduction (VR 48 2 - Nikon 25539 | User Manual - Page 5
Movie 59 Movie Playback 60 TV, Computer or Printer Connection 61 Connecting to a TV 61 Connecting to a Computer 62 Connecting to a Printer 67 Connecting the Camera to a Printer 68 Printing Pictures One at a Time 69 Printing Multiple Pictures ...70 Creating a DPOF Print Order: Print Set 72 3 - Nikon 25539 | User Manual - Page 6
Advanced Camera Settings 76 Using the Menus 76 Displaying the Menus...76 Navigating the Menus ...77 The Shooting Menu 78 Metering...79 Continuous...80 BSS ...82 Auto - Nikon 25539 | User Manual - Page 7
Transfer Mode 110 Confirming Profiles 120 Transferring Images to a Computer 121 Transferring Images to a Printer 130 Technical Notes 132 Optional Accessories 132 Caring for Your Camera 133 Error Messages 136 Troubleshooting 140 Appendix...143 Specifications 151 Index ...155 5 - Nikon 25539 | User Manual - Page 8
your Nikon product or injury to yourself or to others, read the following safety precautions in their entirety before using this equipment. Keep this manual where the camera or battery charger break open as the result of a fall or other accident, take the product to a Nikon-authorized service - Nikon 25539 | User Manual - Page 9
sure it is unplugged. • Use only rechargeable Nikon EN-EL5 lithium-ion batteries (supplied). • Before removing the battery, turn the camera off and allow the battery to cool ROMs on which the software and manuals are distributed should not be shock. Follow the instructions of hospital and airline - Nikon 25539 | User Manual - Page 10
in these manuals at any time and without prior notice. • Nikon will limits for a Class B digital device, pursuant to Part 15 accordance with the instructions, may cause harmful that any health problems are associated with maximum SAR levels tested for the NIKON COOLPIX P3 has been shown to be 0.131 - Nikon 25539 | User Manual - Page 11
for the general population; consult Safety Code 6, obtainable from Health Canada's website www.hc-sc.gc.ca/rpb Notice for customers in Europe Hereby, Nikon, declares that this digital camera is in compliance with the essential requirements and other relevant provisions of Directive 1999/ 5/EC. 9 - Nikon 25539 | User Manual - Page 12
. Notice Concerning Prohibition of Copying or Reproduction Note that simply being in possession of material that has been digitally copied or reproduced by means of a scanner, digital camera or other device may be punishable by law. • Items prohibited by law from being copied or reproduced Do - Nikon 25539 | User Manual - Page 13
Accessories Nikon COOLPIX cameras are designed to the highest standards and include complex electronic circuitry. Only Nikon brand electronic accessories (including battery chargers, batteries, AC adapters, and flashes) certified by Nikon specifically for use with this Nikon digital camera are - Nikon 25539 | User Manual - Page 14
Before You Begin Parts of the Camera Mode dial To select a mode, align the mode icon with q next to the mode dial. X Auto shooting mode (P.24) Z Image mode (P.43) e ISO Sensitivity mode (P.45) M/E Exposure mode (P.41) b Scene mode (P.33) c White balance mode (P.46) T Movie mode (P.56) a - Nikon 25539 | User Manual - Page 15
Before You Begin Zoom (j/kl) buttons (P.25, 15) m button (P.76) Monitor (P.14) Flash (J) lamp (P.29) Multi selector Delete T button (P.27, 51) Wireless transfer LED (P.123) Speaker Tripod socket (P.30, 35 - 37, 48) Play i button (P.49) Battery chamber/ Memory card slot cover (P.18) Multi - Nikon 25539 | User Manual - Page 16
15 1/60 F2.7 9999 22 21 20 19 18 17 16 Icons displayed vary with camera settings. 1 Shooting mode 24, 33, 41, 58 2 AE-L indicator1 40 3 Focus Internal memory/Memory card indicator 26 9 Battery level indicator4 24 10 ISO Sensitivity 45 11 Vibration reduction (VR 48 12 Self-timer indicator - Nikon 25539 | User Manual - Page 17
24 5 Volume indicator 60 6 Voice memo recording guide 55 7 Voice memo playback guide 55 8 Current frame number/Total number of frames 1) Appears when the battery is running low. Displaying Help Dialogs This camera displays explanations about the various modes and menus on the monitor. Pressing - Nikon 25539 | User Manual - Page 18
The camera uses and follow the warnings and notices on pages 6 and 7 of this manual. • The supplied power cable is intended solely for use with the cable for use abroad; consult with a local Nikonauthorized retailer or service representative. Note on the Battery Before using the EN-EL5 battery, - Nikon 25539 | User Manual - Page 19
40°C (32 to 104°F). • A charging error has occurred. Immediately unplug the wall plug from the power outlet. Contact your local retailer or Nikon representative for details. 3 When charging is complete, remove battery from charger and unplug wall plug from power outlet. • Unplug the wall plug from - Nikon 25539 | User Manual - Page 20
the entrance of the battery chamber, and insert the battery. Inserting the Battery Inserting the battery upside down or backwards could damage the camera. Confirm that the battery is oriented correctly. • The orange battery latch is pushed aside when the battery is inserted. The latch will close - Nikon 25539 | User Manual - Page 21
be removed by hand. • Note that the battery may become hot during use. Observe due caution when removing it. Alternative Power Sources To power the camera continuously for extended periods, use the optional EH-62A AC adapter kit. Do not use other AC adapter kits. It may cause overheating or damage - Nikon 25539 | User Manual - Page 22
First Steps Inserting Memory Cards Pictures can be stored in the camera's internal memory (approximately 23 MB) or on an optional Secure Digital (SD) memory card. If a memory card is inserted in the camera, pictures will automatically be stored on the card and only the pictures stored on it are - Nikon 25539 | User Manual - Page 23
selector up to highlight Format and then press d. • Do not turn the camera off or remove the battery or memory card until formatting is complete. • copies of any pictures you wish to keep. Removing Memory Cards Turn the camera off and confirm that the power-on lamp has gone out before removing - Nikon 25539 | User Manual - Page 24
Basic Setup A language-selection dialog is displayed the first time the camera is turned on. Select a language and set the time and date as described below. The multi selector is used in the following steps. The buttons - Nikon 25539 | User Manual - Page 25
, hour, and minute. MY 05 2006 30 OK DATE M D Y 05 15 2006 15 30 OK Select date display order. 1/60 F2.7 120 Exit DATE menu. Camera is now ready for use. Note on Daylight Saving Time To turn daylight saving time on or off, press the multi selector down to highlight - Nikon 25539 | User Manual - Page 26
) mode, an automatic, "point and shoot" mode recommended for first-time users of digital cameras. Step 1. Select X mode. 1 Rotate mode dial to X. Basic Photography and Playback Step 2. Turn camera on. 2 .1 Turn camera on. The power-on lamp will light and the monitor will turn on. 2 .2 Check - Nikon 25539 | User Manual - Page 27
zoom is in effect. • To cancel digital zoom, press j (t) until the zoom indicator turns white. Auto Off If no operations are performed for approximately one minute (default setting), the camera enters Standby mode to save power. In Standby mode, the monitor turns off and the power-on lamp blinks - Nikon 25539 | User Manual - Page 28
halfway, stopping when you feel resistance. Focus and exposure are set and locked while the shutterrelease button is held in this position. • In X mode, the camera focuses on the subject at the center of the frame (P.86). When the subject is in focus, the focus indicator p and focus area [ ] will be - Nikon 25539 | User Manual - Page 29
the picture. • Pressing T in Shooting mode deletes the last picture taken. No OK Yes Turning Camera On with i When the camera is off, pressing i for approximately one second will turn the camera on in Fullscreen playback mode (P.49). Press i again to return to the mode previously selected with - Nikon 25539 | User Manual - Page 30
of the flash and look- eye". If "red-eye" is detected ing at the pre-flashes). after a picture is taken, the • Not recommended when camera will correct "red-eye" quick shutter response is when storing the picture. required. B Flash (off) Cancel Flash will not fire even when light levels are - Nikon 25539 | User Manual - Page 31
Selecting the Flash Option Flash OK Flash OK Display Flash menu. Highlight option. Selected flash option is indicated by icon on monitor. • To exit without changing the flash mode, wait five seconds without pressing d. 1/60 F2.7 120 Basic Photography and Playback Note on Using the Flash When - Nikon 25539 | User Manual - Page 32
Taking Pictures with the Self-Timer The self-timer allows you to appear in your own pictures. When using the self-timer, mount the camera on a tripod (recommended) or rest it on a flat, level surface. Self-timer OK Self-timer OK Display Self-timer menu. Highlight option. Basic Photography and - Nikon 25539 | User Manual - Page 33
at a wide- tance to the subject. angle zoom position. w Infinity The camera focuses on subjects from 5 m (16 ft. 5 in.) to infinity. Use the shoot- ing display turns green and the zoom position is set to wideangle, the camera can focus on Use for close-ups. objects as close as 4 cm (1.7 in.) - Nikon 25539 | User Manual - Page 34
water, sand, or snow) or the background is much brighter than the main subject. Select positive values if the main subject looks too dark. • The camera tends to give more exposure when the large areas of the frame are very dark (for example, when photographing a forest of dark green leaves) or - Nikon 25539 | User Manual - Page 35
Selecting Scene Mode Selecting Scene Mode Scene Mode You can select from a menu of 16 "scenes", each corresponding to a particular situation. Camera settings are automatically adjusted to suit the selected scene, sparing you the necessity of adjusting each setting separately. Selecting the Advanced - Nikon 25539 | User Manual - Page 36
PORTRAIT Normal Effect 1 Effect 2 Exit OK Help Highlight option. 1/60 F2.7 120 Set option and return to Shooting mode. • If Advanced option is set to Effect 1 or Effect 2, the selected effect (1 or 2) appears next to the scene mode icon. Selecting Scene Mode Advanced Options Effects You may not - Nikon 25539 | User Manual - Page 37
reduction turns on automatically at slow shutter speeds and it will take longer than usual to store the picture. • Digital zoom is not available. • To prevent blurring, mount the camera on a tripod or rest it on a flat, level surface. Note on Using a Tripod Turn Vibration reduction (P.48) off when - Nikon 25539 | User Manual - Page 38
reduction turns on automatically at slow shutter speeds and it will take longer than usual to store the picture. • To prevent blurring, mount the camera on a tripod or rest it on a flat, level surface. H BEACH/SNOW Captures the brightness of such subjects as snowfields, beaches, or sunlit expanses - Nikon 25539 | User Manual - Page 39
• Noise reduction turns on automatically at slow shutter speeds and it will take longer than usual to store the picture. • To prevent blurring, mount the camera on a tripod or rest it on a flat, level surface. K FIREWORKS SHOW Slow shutter speeds are used to capture the expanding burst of light from - Nikon 25539 | User Manual - Page 40
to wide-angle and the F icon on the monitor turns green. • The camera can focus on objects as close as 4 cm (1.7 in.) from the lens position. • Minimum focus distance will vary with the zoom position. • The camera focuses continuously until the focus is locked by pressing the shutter-release button - Nikon 25539 | User Manual - Page 41
as a guide. • When the subject's face becomes the same size as K, the camera recognizes it and frames with a double yellow border. • If the camera detects multiple pressed halfway, the camera will focus on the center of the frame. • Digital zoom (P.25) is not available. • The camera's ability to - Nikon 25539 | User Manual - Page 42
Using F PANORAMA ASSIST Mode PANORAMA ASSIST Exit OK Help 1/60 F2.7 120 Highlight F (PANORAMA ASSIST) in Compose first shot. Scene menu. 1/60 F2.7 119 1/60 F2.7 119 Take first shot. • The G icon is displayed and approxi- mately 1/3 of the picture is shown superimposed. • Settings for white - Nikon 25539 | User Manual - Page 43
Aperture-priority auto) are available. M and E modes also allow you to control ISO Sensitivity (P.45), white balance (P.46), and the options in the Shooting menu (P.78 You select the aperture and the Use to vividly capture the main camera sets the shutter speed subject and background or to for the - Nikon 25539 | User Manual - Page 44
. The smallest number in a lens' aperture range is the maximum aperture and the largest number is the minimum aperture. The aperture for this camera's lens (focal length: 7.5 to 26.3 mm; aperture range: f/2.7 to f/5.3) changes depending on the zoom setting. The aperture increases when zooming in and - Nikon 25539 | User Manual - Page 45
the internal memory or on the memory card. Image Quality The process of reducing the image file size when storing is called compression. In this camera, pictures are compressed and recorded as JPEG files. The more a picture is compressed, the smaller the image file size becomes. As a result, more - Nikon 25539 | User Manual - Page 46
Selecting Image Quality or Size IMAGE MODE Image quality Image size IMAGE MODE Image quality Image size OK Help Rotate mode dial to Z. IMAGE MODE menu is displayed. OK Help Highlight Image quality or Image size and press d. IMAGE SIZE 3264×2448 2592×1944 2048×1536 1024×768 640×480 OK Highlight - Nikon 25539 | User Manual - Page 47
Sensitivity is a measure of how the camera's sensor reacts to light. Setting a high ISO will let you take pictures with smaller apertures under low lighting conditions or make it easier to freeze action with faster shutter speeds. However, the higher the ISO, the more likely "noise" in the form of - Nikon 25539 | User Manual - Page 48
Setting White Balance Adjust the white balance based on the light source to give the image the most realistic colors possible. Auto (default setting) will cover most situations, but the white balance may be changed to compensate for unusual lighting conditions that may produce images with unnatural - Nikon 25539 | User Manual - Page 49
- candescent light look as though they had been taken under white light). When White bal. preset is selected in the WHITE BALANCE menu, the camera will zoom in and the menu shown Cancel Measure OK at right will be displayed on the monitor. White balance measuring window Cancel (default setting - Nikon 25539 | User Manual - Page 50
less likely to occur in situations where it is difficult to hold the camera steady, such as when shooting at slow shutter speeds in dimly lit Reduction • Vibration reduction may take a few seconds to activate after the camera recovers from Standby mode or the power is turned on. Wait until - Nikon 25539 | User Manual - Page 51
51 Play movie (for movies) d P.60 Exit to Shooting mode i - Viewing Pictures on the Camera Viewing Pictures • When the camera is off, pressing i for approximately one second will turn the camera on in Full-screen playback mode. • To view the pictures in the internal memory, remove the memory - Nikon 25539 | User Manual - Page 52
Exit to Full-screen playback mode View Playback menu Exit to Shooting mode - j (t) /k (v) - T P.27 d P.49 m P.76 i - Viewing Pictures on the Camera Thumbnail Playback • Press j (t) or k (v) in Thumbnail playback mode to switch between the 4, 9 and 16 thumbnail display. • To exit to Full - Nikon 25539 | User Manual - Page 53
right side of the display: • Shooting mode (M/E) • Shutter speed • Aperture • Exposure compensation • ISO Sensitivity View histogram of next picture 100NIKON 0001.JPG 1/60 F2.7 0 - Viewing Pictures on the Camera View histogram of previous picture Delete picture View thumbnails Exit to Full-screen - Nikon 25539 | User Manual - Page 54
Playback menu Exit to Full-screen playback mode Crop picture Exit to Shooting mode T P.27 m P.76 d P.49 Shutter-release button P.54 i - Viewing Pictures on the Camera 52 - Nikon 25539 | User Manual - Page 55
to Full-screen playback mode Crop picture Exit to Shooting mode T P.27 m P.76 d P.49 Shutter-release button P.54 i - Viewing Pictures on the Camera Playback Zoom Playback zoom is not available with movies (P.58), copies created using the Small pic. option (P.96), or cropped copies of 320 - Nikon 25539 | User Manual - Page 56
Yes OK Confirmation dialog is displayed. Highlight Yes. 2006.05.15 15:30 100NIKON Cropped copy is created. 0002.JPG 2/ 2 Viewing Pictures on the Camera Cropping pictures Depending on the size of the original picture and the zoom ratio at the time the copy was created, copies will be c 3,264 - Nikon 25539 | User Manual - Page 57
and appended to any picture marked with the N:O (voice memo recording guide) icon in Full-screen playback mode (P.49). Recording Voice Memos Press 0001.JPG 1/ 1 Erase 1 image (s)? No OK Yes Viewing Pictures on the Camera Notes on Voice Memos • Voice memo file names are the same as those of - Nikon 25539 | User Manual - Page 58
Recording and Viewing Movies Selecting Movie Options Selecting Movie Options Select the type of movie according to your shooting intent. Mode Q TV movie 640 (default setting) Size (pixels) 640 × 480 S Small size 320 320 × 240 U Smaller size 160 160 × 120 V Time-lapse movie 640 × 480 Frame/ - Nikon 25539 | User Manual - Page 59
Select Auto-focus mode in the Movie menu, and select one of the following two modes. Z Single AF (default setting) a Full-time AF The camera focuses on the center of the frame when the shutterrelease button is pressed halfway. Focus locks (AF Lock) when the focus operation is complete (P.87). - Nikon 25539 | User Manual - Page 60
S. The monitor shows the available recording time. Start recording. • The camera focuses on the subject in the center of the frame (P.57). • (P.46) is Auto. - Metering (P.79) is Matrix. • While recording a movie, only digital zoom (up to 2×) can be used (time-lapse movie: up to 4×). Adjust the zoom - Nikon 25539 | User Manual - Page 61
Recording a Time-Lapse Movie The camera takes pictures at a specified intervals to create a silent movie with a frame rate of 30 frames per second and a frame turns off and the power lamp blinks between frames to save power and turns on immediately before the camera takes the next shot. 59 - Nikon 25539 | User Manual - Page 62
Movie Playback Movies are marked with the S icon in Full-screen playback mode (P.49). Press d to play back a movie. Playback controls are displayed at the top of the monitor. Press the multi selector left or right to highlight a control, then press d to perform the selected operation. During pause - Nikon 25539 | User Manual - Page 63
Computer or Printer Connection EG-CP14 A / V cable 3 Set TV to video input. • For more information, see the manual for the TV. 4 Press i for approximately one second to turn camera on. The camera monitor will remain off and the TV will show the pictures or movies on the monitor. Video Output - Nikon 25539 | User Manual - Page 64
installing and using PictureProject, see the Quick Start Guide or the PictureProject Reference Manual (on CD). You can wirelessly transfer pictures storage depending on your computer's operating system (P.64). OK 3 Turn camera off and connect supplied UC-E6 USB cable as illustrated. UC-E6 USB cable - Nikon 25539 | User Manual - Page 65
to the computer. Messages on the monitor are shown below. PREPARING TO TRANSFER TRANSFERRING IMAGES TO COMPUTER TRANSFER COMPLETED 6 Disconnect camera after transfer is complete (P.66). TV, Computer or Printer Connection Marking Pictures for Transfer Pictures set for transfer are marked with - Nikon 25539 | User Manual - Page 66
hardware information database is being updated, the computer will start the Add New Hardware Wizard. Click Cancel to exit the wizard, and then disconnect the camera. Windows 98 Second Edition (SE) The Add New Hardware Wizard will be displayed. Click Cancel to exit the wizard, and then disconnect the - Nikon 25539 | User Manual - Page 67
to the computer. Transferring Images Stored on the Memory Card • To transfer images stored on the memory card, insert the memory card into the camera before connecting to a computer. • When the SD memory card's write protect switch is in the "lock" position, data transfer using d (Transfer g) is not - Nikon 25539 | User Manual - Page 68
off and disconnect the USB cable once transfer is complete. When Mass storage is selected in USB Option: Turn the camera off after performing the following operations, and disconnect the USB cable. Windows XP Home Edition/Professional: Click the "Safely Remove Hardware" icon in the notification - Nikon 25539 | User Manual - Page 69
UC-E6 USB cable, selected pictures can be printed directly from the camera. • You can use Wireless transfer mode (P.109) to print pictures directly supports Digital Print Order Format (DPOF) (P.154), selected pictures can be printed using Print set (P.72). For more information, see the manual - Nikon 25539 | User Manual - Page 70
option to PTP in INTERFACE menu of Set-up menu (P.107). OK 2 Turn camera off. 3 Turn printer on. 4 Connect supplied UC-E6 USB cable as illustrated. • Operation via a USB hub has not been tested by Nikon. 5 Turn camera on. After the PictBridge welcome screen, the picture recorded most recently - Nikon 25539 | User Manual - Page 71
PictBridge menu. PictBridge PictBridge is an industry standard for direct printing from digital cameras to printers that ensures compatibility regardless of the make of devices. Note on Paper Size The camera supports the following paper sizes: Default, 3.5" × 5" (89 mm × 127 mm), 5" × 7" (127 mm - Nikon 25539 | User Manual - Page 72
or Printer Connection Printing Multiple Pictures Connect the camera and printer (P.68), and then follow the all the pictures in the internal memory or on the Print all images memory card. The camera returns to the PRINT MENU when print- ing is complete. DPOF printing Print pictures according - Nikon 25539 | User Manual - Page 73
1 2 3 4 5 Back Start print Printing 002/006 Selected pictures are displayed. • To return to the PRINT SELECTION screen, press m. Start printing. • The camera returns to the PRINT MENU when printing is complete. • To cancel printing, press d. Cancel TV, Computer or Printer Connection 71 - Nikon 25539 | User Manual - Page 74
to be included with each print. The pictures can be printed using Print set settings with a DPOF-compatible device or at a digital photo lab which supports DPOF (P.154). P Print selected L Choose date w Delete print set Select pictures to create a print order. Set a print order to print all - Nikon 25539 | User Manual - Page 75
TV, Computer or Printer Connection PRINT SELECTION Back OK Set number of copies and press d. Press the multi selector up (+) or down (-) to set the number of copies (up to 9). • To deselect a picture, press the multi selector down (-) when the number of copies is 1. • Repeat steps 3 to 5 to select - Nikon 25539 | User Manual - Page 76
TV, Computer or Printer Connection CHOOSE DATE CHOOSE DATE Highlight date. copies Back OK copies Back OK Set number of copies and press d. Press the multi selector right (+) to display 1 (the number of copies) on a thumbnail image of the selected date. • Press the multi selector left (-) and - Nikon 25539 | User Manual - Page 77
is changed after shooting pictures. If a picture is taken without setting the camera clock, the date will not be printed even if Date is selected in that supports DPOF. If an Error Occurs If an error message is displayed, check the printer and resolve the problem as directed in the printer manual. - Nikon 25539 | User Manual - Page 78
menu (P.78): White balance Rotate mode dial to M or E. Press m. To display the Playback menu (P.89): Exit OK Help List by date Advanced Camera Settings Press i. Press m. To display the Movie menu (P.56): Exit OK Help Movie options Rotate mode dial to S. Press m. Exit OK Help • Press - Nikon 25539 | User Manual - Page 79
area Exit OK Highlight option. METERING Matrix Center-weighted Spot Spot AF area Exit OK Display options. Metering Exit OK Help Select highlighted option. Advanced Camera Settings 77 - Nikon 25539 | User Manual - Page 80
P.84 M Image sharpening Control how much outlines in your pictures are sharpened in the camera. P.84 P Saturation control Adjust vividness of the color of a picture. P.85 W Sensitivity Select ISO Sensitivity. P.45 X Image quality Select image quality. P.43 b Image size Select an image - Nikon 25539 | User Manual - Page 81
spot metering to the active focus area when AF area mode is set to Auto or Manual (P.86). Advanced Camera Settings - The Shooting Menu Note on Metering When digital zoom is used, the camera automatically switches to a setting similar to Centerweighted. However, the metering target does not appear - Nikon 25539 | User Manual - Page 82
(30 seconds, 1, 5, 10, 30, 60 minutes) first and then press the shutter-release button. SET INTERVAL TIME 1/2 30s 1m 5m 10m 30m • The camera will take pictures at Exit OK z Intvl timer shooting the specified interval until the shutter-release button is pressed again, the internal memory or - Nikon 25539 | User Manual - Page 83
first shot in each series. The flash is automatically set to B (Flash Cancel). • Digital zoom (P.25) cannot be used at settings of Multi-shot 16 or Ultra HS. • When display turns on automatically immediately before the camera takes the next shot. • Do not rotate the mode dial during the interval - Nikon 25539 | User Manual - Page 84
shutter-release button is pressed. The sharpest picture in the series is saved and the others are discarded. BSS is recommended when: • The camera is zoomed in. • The camera is in Macro close-up mode. • Shooting with the flash off when lighting is poor. B Off (default setting) A On Turns BSS off - Nikon 25539 | User Manual - Page 85
one picture with normal white balance, one picture with a bluish cast, and one picture with a reddish cast. Recording time roughly triples. Advanced Camera Settings - The Shooting Menu Notes on Auto Bracketing • When AUTO BRACKETING is set to Auto bracketing, the flash is automatically set to - Nikon 25539 | User Manual - Page 86
Advanced Camera Settings - The Shooting Menu Image Adjustment F This setting adjusts contrast for optimal results before storing pictures in the internal memory or on the memory card. G - Nikon 25539 | User Manual - Page 87
Gives vivid color effects. Select when printing pictures "as is," without further modification. Best choice for most situations. Select if retouching pictures on a computer. Advanced Camera Settings - The Shooting Menu 85 - Nikon 25539 | User Manual - Page 88
point from 11 focus areas containing the subject closest to the camera. The selected focus area is displayed when the shutter-release button a relatively motionless subject that is not at the center of the frame. When Manual is selected, the focus area and selectable area are displayed. Use the multi - Nikon 25539 | User Manual - Page 89
used to take pictures of off-center subjects or in situations in which the camera is unable to focus using Autofocus (P.147). Procedures for AF lock are described button pressed halfway, recompose your picture. The distance between the camera and your subject should not change while the focus is - Nikon 25539 | User Manual - Page 90
setting) I On Aperture changes with the zoom position. Aperture is kept as close as possible to the f/-number selected by you or the camera. To prevent the selected f/-number from exceeding the exposure range at the new zoom position, select an aperture from f/5 to f/7.3. Noise Reduction o At - Nikon 25539 | User Manual - Page 91
Advanced Camera Settings - The Playback Menu The Playback Menu The Playback menu includes the items in the following table. See "Using the Menus" (P.76) for more information - Nikon 25539 | User Manual - Page 92
Advanced Camera Settings - The Playback Menu Navigating the Picture Selection Screen When selecting a picture in Print set (P.72), Delete (P.94), Protect (P.94), Transfer marking (P.95) or Copy (P. - Nikon 25539 | User Manual - Page 93
Advanced Camera Settings - The Playback Menu Navigating the Choose Date Screen When Choose date is selected in Print set (P.72), Delete (P.94) or Transfer marking (P.95), a CHOOSE - Nikon 25539 | User Manual - Page 94
be performed on all pictures on the same date: D-Lighting, Print set, Delete, Transfer marking, and Small pic. LIST BY DATE SELECTED IMAGES Advanced Camera Settings - The Playback Menu Exit OK Delete Back OK Zoom in Highlight date. • A thumbnail image of the first shot, the recording date, and - Nikon 25539 | User Manual - Page 95
30 minutes after the slide show starts, the monitor will turn off due to the Auto off function. The camera will turn off automatically if no operations are performed for another three minutes. (The camera will also turn off when Loop is set.) • Movies are displayed as still images showing the first - Nikon 25539 | User Manual - Page 96
stored in the internal memory or on the memory card. • When a memory card is in the camera, only the pictures stored on it are deleted. • When there is no memory card in the camera, pictures stored in the internal memory are deleted. B Erase selected images Deletes pictures selected IMAGES screen - Nikon 25539 | User Manual - Page 97
PictureProject. For more information, see the PictureProject Reference Manual (on CD). • If a memory card in which pictures selected by another model of camera to transfer is inserted, this camera cannot recognize the transfer settings. Use this camera to select the pictures to transfer again. • In - Nikon 25539 | User Manual - Page 98
× 480 J 320 × 240 K 160 × 120 Suitable for displaying on a TV. Suitable for displaying on web pages. Suitable as an attachment to e-mail. Advanced Camera Settings - The Playback Menu Notes on Small Picture • Copies are stored as JPEG files with Image quality set to BASIC (compression ratio 1:16 - Nikon 25539 | User Manual - Page 99
from the internal memory to the memory card, or vice versa. Exit OK CAMERA TO CARD Selected images All images Exit OK MNO Copies pictures stored in the formats. • You cannot copy the pictures taken with another make of camera or retouched on a computer. File Name • When copying using Selected - Nikon 25539 | User Manual - Page 100
P.104 h Sound settings Set the button sound, the volume of shutter and start-up sounds. P.105 i Auto off Set the time before the camera enters Standby mode automatically to save power. P.105 M/O Format memory/card Format the internal memory or memory card. P.106 j Language Select a language - Nikon 25539 | User Manual - Page 101
is turned on. Disable welcome A welcome screen is not displayed when the camera is turned on. Nikon Displays a welcome screen when the camera is turned on. Animation (default setting) Displays a short animation when the camera is turned on. Select an image Select a picture in the internal - Nikon 25539 | User Manual - Page 102
When traveling, you can use the Time zone option to automatically display the date and time at your destination (the camera calculates the time zone differences). Date Set the camera clock to the current date and time. For more information, see "Basic Setup" (P.22). Select a time zone for Y (new - Nikon 25539 | User Manual - Page 103
Advanced Camera Settings - The Set-up Menu Monitor Settings Z You can set the monitor indicators on/off, and adjust the brightness of the monitor. Photo Info Show info (default setting) Displays the current settings or operation guide on the monitor when taking or viewing pictures. Auto info - Nikon 25539 | User Manual - Page 104
shooting. The imprinted date will be printed even if a printer does not support DPOF. You cannot use this option to imprint a date stamp on Ultra HS mode or when shooting movies. • Date imprint cannot be selected if the camera clock has not been set (P.22,100). • An imprinted date may be difficult - Nikon 25539 | User Manual - Page 105
Advanced Camera Settings - The Set-up Menu Date Counter Use this option to imprint the number of days remaining until a specified date or the number of elapsed - Nikon 25539 | User Manual - Page 106
light when the shutter-release button is pressed halfway, allowing the camera to focus even when the subject is poorly lit. f Off the Shooting menu. • The center focus area is selected when AF area mode is set to Manual. • When shooting in A PORTRAIT (FACE AF), B PORTRAIT, C PARTY/INDOOR, D NIGHT - Nikon 25539 | User Manual - Page 107
the shutter sound to Loud, Normal or Off. Set the volume of the sound played when the camera is turned on to Loud, Normal or Off. Auto Off i The monitor turns off automatically and the camera enters Standby mode to save power if no operations are performed for a specified length of time - Nikon 25539 | User Manual - Page 108
recorded data. All pictures will be erased. Format takes longer than Quick format. Notes on Formatting Memory/Card • During formatting, do not turn the camera off or remove the battery or memory card. • Format new memory cards with the Format option before recording pictures on them. • Shooting and - Nikon 25539 | User Manual - Page 109
after shooting. E On (default setting) Marks all pictures with the E icon and sets them for transferring. Advanced Camera Settings - The Set-up Menu The E Transfer Marking Icon When the camera is connected to a computer via the UC-E6 USB cable (P.62), the pictures marked with the E icon will - Nikon 25539 | User Manual - Page 110
). For more information, see "Default Settings" (P.143). Firmware Version B Use this option to check the firmware version for the camera. The 12-digit number displayed below the firmware version is the camera's MAC address. COOLPIX P3 Ver.1.0 MAC address XX-XX-XX-XX-XX-XX Back MAC address 108 - Nikon 25539 | User Manual - Page 111
the optional PD-10 wireless printer adapter, you can wirelessly transfer pic- BUSY tures directly from the camera to a PictBridge-compatible printer and print. Supported Operating Systems The following operating systems have been tested and approved for use with Wireless transfer mode: • Windows - Nikon 25539 | User Manual - Page 112
Select when establishing a peer-to-peer connection era to Computer) net- between the camera and computer. This type is recom- work profile mended for first-time users of wireless networks.* Create Profile manually Select if your computer has a fixed IP address, does not have a wireless network - Nikon 25539 | User Manual - Page 113
. • Macintosh: Applications folder J open the Wireless Camera Setup Utility folder in the Nikon Software folder and check whether the Setup Utility is installed in some areas) Installation See the Quick Start Guide or PictureProject Reference Manual (on CD) for more information on installing the - Nikon 25539 | User Manual - Page 114
options for steps 5 and 6 when selecting Create Pro- file manually, see "Information about Profile Configuration" (P.118). • Click Help Confirm that your camera's battery is inserted and fully charged. 2 Confirm that your computer supports wireless networking. 3 Confirm that camera is connected to - Nikon 25539 | User Manual - Page 115
to Computer) network profile. After the ad-hoc network is set up, wireless printing is configured. Wireless Transfer Mode When "Create an Ad-hoc (Camera to Computer) network profile" is Selected After you follow the steps on page 112 to set up an ad-hoc network and configure a profile device - Nikon 25539 | User Manual - Page 116
computer supports wireless networking. If a wireless LAN adapter is installed in your computer, click Next. • If selecting Create an Infrastructure (Access Point) network profile, Create Infrastructure (Access Point) and Ad-hoc (Camera to Computer) network profile or Create Profile manually, confirm - Nikon 25539 | User Manual - Page 117
network set up using Windows XP's built-in wireless network features, runs Windows XP SP1, or is a Macintosh, complete the settings for Create Profile manually. Neither screen below is displayed. If an infrastructure network is set up in the computer If no wireless networks are set up in the - Nikon 25539 | User Manual - Page 118
point for other items. • When selecting Create an Ad-hoc (Camera to Computer) network profile, this step is unnecessary. • When selecting Create Profile manually, enter the same values set in the access point for all items manually except those that are automatically provided. 7 Configure TCP/IP - Nikon 25539 | User Manual - Page 119
wireless printing (P.130), enter a printer profile name and select a printer icon. • When selecting Create Infrastructure (Access Point) and Ad-hoc (Camera to Computer) network profile, the Setup Utility automatically returns to the screen in step 5 without configuring a printer, and a new ad-hoc - Nikon 25539 | User Manual - Page 120
printers connected to a computer, the optional PD-10 wireless printer adapter) in the camera. If nine have already been configured and you want to add a new one, delete is 1. Configure Select Auto or Manual for the method of setting the camera IP address. IP Address When Configure is set to - Nikon 25539 | User Manual - Page 121
level. MAC Address Filtering When MAC address filtering is enabled, only devices with an authorized MAC address can access the wireless LAN. Check the camera's MAC address (P.108) and add it to the authorized list. Port Number For wireless communication, the UDP port number is 5353 and the TCP - Nikon 25539 | User Manual - Page 122
Confirming Profiles A profile is information about a profile device and is stored in the camera. You can use the Setup Utility to view or delete profiles saved in the camera, or edit a profile name. 1 Start Setup Utility. 2 Select Profiles tab. Select the desired profile name from the list. To check - Nikon 25539 | User Manual - Page 123
dial disconnects the connection and stops image transfer. Note on Standby Mode If no operations are performed for approximately three minutes, the camera will enter Standby mode and the monitor will turn off automatically. During Standby mode, image transfer will still continue. Memory Card Write - Nikon 25539 | User Manual - Page 124
Displaying the WIRELESS MENU: CHOOSE PROFILE 1/3 Profile-A CHOOSE PROFILE 1/3 Profile-A Profile-B Profile-B Profile-C OK Info Rotate mode dial to Y and turn camera on. • The CHOOSE PROFILE screen is displayed and the most recently used profiles are shown first. (The screens in steps 1 and - Nikon 25539 | User Manual - Page 125
displayed in red. If the signal strength is weak, remove any obstacles between the camera and computer. If an Error Occurs When the connection to a profile device or the selected as a profile device. See the manual for the wireless printer adapter for more information. Wireless Transfer Mode 123 - Nikon 25539 | User Manual - Page 126
computers without PictureProject installed, Explorer (for Windows) or Finder (for Macintosh) starts and displays the save location. The save location cannot be changed. • If the camera is connected to a computer in PC Mode (P.129) without PictureProject installed, drag and drop images from the - Nikon 25539 | User Manual - Page 127
Transferring Images by Specific Recording Date: Shooting Date WIRELESS MENU Easy Transfer Shooting Date Marked Images Selected Images Shoot & Transfer OK 1/2 Help SHOOTING DATE 2006.06.10 5 2006.05.30 3 2006.05.15 2 images 0 Exit OK OFF ON Highlight Shooting Date in WIRE- Display SHOOTING - Nikon 25539 | User Manual - Page 128
Transferring Images with Transfer Mark: Marked Images WIRELESS MENU Easy Transfer Shooting Date Marked Images Selected Images Shoot & Transfer OK 1/2 Help Transferring images to computer 0002/0006 Cancel Highlight Marked Images in WIRELESS MENU. Transfer images. Press d to transfer images with - Nikon 25539 | User Manual - Page 129
Selecting and Transferring Images: Selected Images WIRELESS MENU Easy Transfer Shooting Date Marked Images Selected Images Shoot & Transfer OK 1/2 Help SELECTED IMAGES 2006.05.15 15:30 55 Exit OK Highlight Selected Images in WIRE- Display SELECTED IMAGES screen. LESS MENU. This screen - Nikon 25539 | User Manual - Page 130
If the transfer confirmation dialog is dis- played, select Yes. Select No to cancel image transfer. Changing the Settings Press m while the camera is in Shooting mode to display the SHOOT & TRANSFER screen and make the following changes. Confirm Transfer Off Immediately transfers recorded image - Nikon 25539 | User Manual - Page 131
Transfer Mode When Multiple Computers Share the Same SSID If the camera has stored the profiles of multiple devices with the same network name (SSID ) and those devices are started, the camera connects only to the profile device specified in the CHOOSE PROFILE screen - Nikon 25539 | User Manual - Page 132
Printing CHOOSE PROFILE 1/3 Profile-A CHOOSE PROFILE 1/3 Profile-A Profile-B Profile-B Profile-C OK Info Profile-C OK Info Rotate mode dial to Y and turn camera on. • The CHOOSE PROFILE screen is displayed and the most recently used profiles are shown first. • Press l (Info) on the CHOOSE - Nikon 25539 | User Manual - Page 133
Directly to a Printer: PD-10 Wireless Printer Adapter Using the optional PD-10 wireless printer adapter, you can wirelessly transfer pictures directly from the camera to a PictBridge-compatible printer and print them. For more information, see the manual for the adapter. 131 Wireless Transfer Mode - Nikon 25539 | User Manual - Page 134
Technical Notes Optional Accessories The following optional accessories are available for your Nikon digital camera. Contact your local retailer or Nikon representative for details. Rechargeable battery Additional EN-EL5 Li-ion batteries Battery charger MH-61 battery charger AC adapter EH-62A - Nikon 25539 | User Manual - Page 135
Caring for Your Camera To ensure continued enjoyment of your Nikon product, observe the following precautions when parts are especially susceptible to damage. Applying force to the lens cover could result in camera malfunction or damage to the lens. Do not point the lens at strong light sources for - Nikon 25539 | User Manual - Page 136
, wipe off any sand or salt with a dry cloth lightly dampened with fresh water, then dry thoroughly. The camera may be damaged if foreign matter gets inside the camera body. Nikon cannot accept liability for damage caused by dirt or sand. Do not use alcohol, thinner, or other volatile chemicals - Nikon 25539 | User Manual - Page 137
desiccant when it loses its capacity to absorb moisture. Do not store your camera with naphtha or camphor moth balls or in locations that: • are could be drained to the point that it no longer functions. Turning the camera on or off while the battery is exhausted can result in reduced battery life - Nikon 25539 | User Manual - Page 138
that appear on the monitor and how to deal with them. Display S (Flashes) Problem Clock not set. Set clock. Solution WARNING!! BATTERY EXHAUSTED w t p (flashes red) Battery exhausted. Camera cannot focus. Turn camera off and replace battery. Use AF lock to focus on another subject at same - Nikon 25539 | User Manual - Page 139
DIAL IS NOT IN THE PROPER POSITION. u Problem Solution Destination is out of memory for copying Nikon representative. card. • Press i to return to shooting mode. • To show pictures in the internal memory, remove memory card from camera. File created by computer or different make of camera - Nikon 25539 | User Manual - Page 140
(if using), remove and reinsert battery, and turn camera on. If error persists, contact local retailer or Nikon representative. PRINTER ERROR u CHECK PRINTER STATUS Printer error occurred See the manual for the printer and solve on your printer. the problem. Page - P.24 P.20, P.62 - P.62, P.64 - Nikon 25539 | User Manual - Page 141
Error Messages During Wireless Transfer Mode Display Problem Solution Page Transfer error u Error occurred when images were transferred to computer. Check signal. Move the camera closer to the printer. Remove any obstacles between camera antenna and profile device. - Profile not registered. - Nikon 25539 | User Manual - Page 142
Troubleshooting If your camera fails to function as expected, check the list of common problems below before consulting your local retailer or Nikon representative. Refer to the page numbers listed in the right-most column for more information. Electronically-Controlled Cameras In extremely rare - Nikon 25539 | User Manual - Page 143
Problem Possible cause • Camera is in Playback mode. • Battery is exhausted. No picture is taken when shutter- release button is pressed • • • Flash lamp blinks: flash is charging. Message "CARD IS NOT FORMATTED" appears in monitor: memory card is not formatted for use in camera. Message " - Nikon 25539 | User Manual - Page 144
Problem Possible cause Copy cannot be cre- • Picture is a retouched copy. ated using in card • USB in the INTERFACE menu set to PTP when camera connected to reader or card slot computer (Windows only). See PictureProject reference manual (on CD) for further information. Signal is weak • Set - Nikon 25539 | User Manual - Page 145
Appendix Default Settings (P.108) For Reset All (P.108) restores the following default settings: Scene menu b Advanced option Default PORTRAIT (FACE AF) Normal Shooting menu White balance Metering Continuous Intvl timer shooting BSS Auto bracketing Image adjustment Image sharpening Saturation - Nikon 25539 | User Manual - Page 146
• Reset all also clears the current file number (P.147) from memory. Numbering will continue from the lowest number available. To reset file numbering to 0001, perform Reset all after deleting all pictures (P.94) or formatting the internal memory or memory card (P.106). • All other settings are - Nikon 25539 | User Manual - Page 147
265 • If number of exposures remaining is 10,000 or more, camera exposure count display will show 9999. Technical Notes Movie Options and Maximum Total maximum total recording time for the memory card is indicated as a guide. Actual total recording time varies depending on the make of memory - Nikon 25539 | User Manual - Page 148
AF/F Off 0.0 [Off] O COPY B AF/F Off 0.0 [Auto] P SPORTS [B] [AF] [Off] 0.0 [Auto] • Digital zoom is not available with A PORTRAIT (FACE AF), B PORTRAIT, and D NIGHT PORTRAIT mode. • In Scene mode, the camera automatically selects optimal focus area for the selected mode. • AF-assist - Nikon 25539 | User Manual - Page 149
.JPG P.92 Voice memo DSCN, RSCN, SSCN, FSCN .WAV P.55 • Pictures are stored in a folder created automatically by the camera. The folder name includes a three-digit folder number (e.g., 100NIKON). Folders can hold up to 200 pictures; if a picture is taken when the current folder contains 200 - Nikon 25539 | User Manual - Page 150
• In Movie mode, camera automatically focuses on the subject using the center focus area. AF area mode cannot be used. • While digital zoom (P.25) is in in Manual Flash (P.28), self-timer (P.30), focus (P.31), and exposure compensation (P.32) cannot be set while the focus area selection guide and - Nikon 25539 | User Manual - Page 151
. When lighting is poor, however, camera automatically compensates by raising sensitivity to maximum of ISO 200 equivalent. Approximately equivalent to ISO 50. Approximately equivalent to ISO 100. Approximately equivalent to ISO 200. Approximately equivalent to ISO 400. Options for White Balance - Nikon 25539 | User Manual - Page 152
shooting cannot be edited. Notes on Editing Images: • Editing images from another model of camera is not supported. • Images edited with this camera may not properly play back on another model of camera or transfer to a computer. • Edited images are separate images from the original. Deleting one - Nikon 25539 | User Manual - Page 153
Specifications Nikon COOLPIX P3 Digital Camera Type Compact digital camera Effective pixels 8.1 million Image sensor 1/1.8 in. high-density CCD selection AF-assist illuminator Auto (11-area automatic selection), Manual (99-area manual selection), Center (center focus area selection) CLASS 1 - Nikon 25539 | User Manual - Page 154
EV) ISO Sensitivity Approx. equivalent to ISO 50, 100, 200, 400; Auto (auto gain setting from ISO 50 terminals DC in; Digital I/O (audio-video out and USB) Supported language Czech, Danish, Based on Camera and Imaging Products Association (CIPA) standard for measuring life of camera batteries. - Nikon 25539 | User Manual - Page 155
. Actual rates may differ. • Industry standard for measuring life of camera batteries. Measured at 25°C (77°F); zoom adjust- ed with each Weight AC 100 - 240 V, 50/60 Hz, 0.12 - 0.08 A DC 4.2 V, 950 mA Nikon Li-ion Rechargeable Battery EN-EL5 Approx. 2 hrs. when no charge remains 0 - 40°C (32 - - Nikon 25539 | User Manual - Page 156
card. To print pictures using Print set, check that printers or your local photo labs supports DPOF. Exif Version 2.2 This camera supports Exif (Exchangeable Image File Format for Digital Still Cameras) version 2.2, a standard that allows information stored with pictures to be used for optimal color - Nikon 25539 | User Manual - Page 157
mode, 13, 31 l Help button, 13, 15, 122 Z Image mode, 12, 44 e ISO Sensitivity mode, 12, 45 m Menu button, 13, 76 T Movie mode, 12, 56, 58 Blur, 35, 37, 48 see also Vibration reduction BSS, 82 C Camera shake, see Vibration reduction Choose date, 72, 91, 94, 95 Digital zoom, 25 155 Technical Notes - Nikon 25539 | User Manual - Page 158
size, 14, 43-44 Image sharpening, 14, 84 Incandescent, 149 Interface, 107 connector cover, 13 USB, 64, 107 Video mode, 107 Internal memory icon, 26 ISO Sensitivity, 14, 45, 88, 149 J JPEG, 43, 144 L Lamp, Flash, 29 LANDSCAPE E, 36, 146 Language, 22, 106 Lens, 12, 134 Lens cover, 12 List by - Nikon 25539 | User Manual - Page 159
Zoom, 52 QuickTime, see Movies R Reset all, 108, 143 Resizing pictures, 96, 150 RSCN, 147 S Saturation, 85 Saturation control, 85 Scene mode, 33-40 Secure Digital (SD), see Memory card Self-portraits, 30 Self-timer, 30 Self-timer lamp, 12, 30 Sensitivity, 45, 88, 149 Setup menu, 76, 98-108 Shade - Nikon 25539 | User Manual - Page 160
13 SPORTS P, 38, 146 SSCN, 147 Standby mode, 25, 105, 121 Strap, camera, 12 SUNSET I, 37, 146 Support information, 11 T Telephoto button, see k v button Thumbnail playback, 50 Time zone, LED, 13, 123 Wireless Transfer Mode, 109-131 Z Zoom, 25 digital, 25 optical, 25 playback, 53 Quick playback, 52 - Nikon 25539 | User Manual - Page 161
No reproduction in any form of this manual, in whole or in part (except for brief quotation in critical articles or reviews), may be made without written authorization from NIKON CORPORATION. Fuji Bldg., 2-3 Marunouchi 3-chome, Chiyoda-ku, Tokyo 100-8331, Japan Printed in Belgium TR6A01(11)
-
 1
1 -
 2
2 -
 3
3 -
 4
4 -
 5
5 -
 6
6 -
 7
7 -
8
-
9
-
10
-
11
-
12
-
13
-
14
-
15
-
16
-
17
-
18
-
19
-
20
-
21
-
22
-
23
-
24
-
25
-
26
-
27
-
28
-
29
-
30
-
31
-
32
-
33
-
34
-
35
-
36
-
37
-
38
-
39
-
40
-
41
-
42
-
43
-
44
-
45
-
46
-
47
-
48
-
49
-
50
-
51
-
52
-
53
-
54
-
55
-
56
-
57
-
58
-
59
-
60
-
61
-
62
-
63
-
64
-
65
-
66
-
67
-
68
-
69
-
70
-
71
-
72
-
73
-
74
-
75
-
76
-
77
-
78
-
79
-
80
-
81
-
82
-
83
-
84
-
85
-
86
-
87
-
88
-
89
-
90
-
91
-
92
-
93
-
94
-
95
-
96
-
97
-
98
-
99
-
100
-
101
-
102
-
103
-
104
-
105
-
106
-
107
-
108
-
109
-
110
-
111
-
112
-
113
-
114
-
115
-
116
-
117
-
118
-
119
-
120
-
121
-
122
-
123
-
124
-
125
-
126
-
127
-
128
-
129
-
130
-
131
-
132
-
133
-
134
-
135
-
136
-
137
-
138
-
139
-
140
-
141
-
142
-
143
-
144
-
145
-
146
-
147
-
148
-
149
-
150
-
151
-
152
-
153
-
154
-
155
-
156
-
157
-
158
-
159
-
160
-
161
 |
 |
The Nikon Guide to Digital Photography
with the
En
DIGITAL CAMERA